Fineous Fizzlecrank’s Fabulous Alchemy Lab

I have always had a soft spot for green slime. After receiving the Holmes Basic Edition of Dungeons & Dragons for my birthday in 1979, I would spend hours reading through the monster descriptions. I was already familiar with many of these, from different myths or old movies. However, the green slime always stood out and sparked my imagination.

The green slime has gone through a bit of an evolution over the various versions D&D. While this green substance features heavily in this week’s post, I will leave it to you to tune things in such a way that would best fit your game. As always, I have tried to tried to keep this as system agnostic as possible.

Alchemy Lab w/ Grid & Labels. Created with Campaign Cartographer SS4

What the Party Knows

To kick things off, arrange for your party to get hired to recover an exotic object. In my game, I went with something called the Burundi Apparatus, a device created by a Gowandian scholar. What you use for your game is entirely up to you.

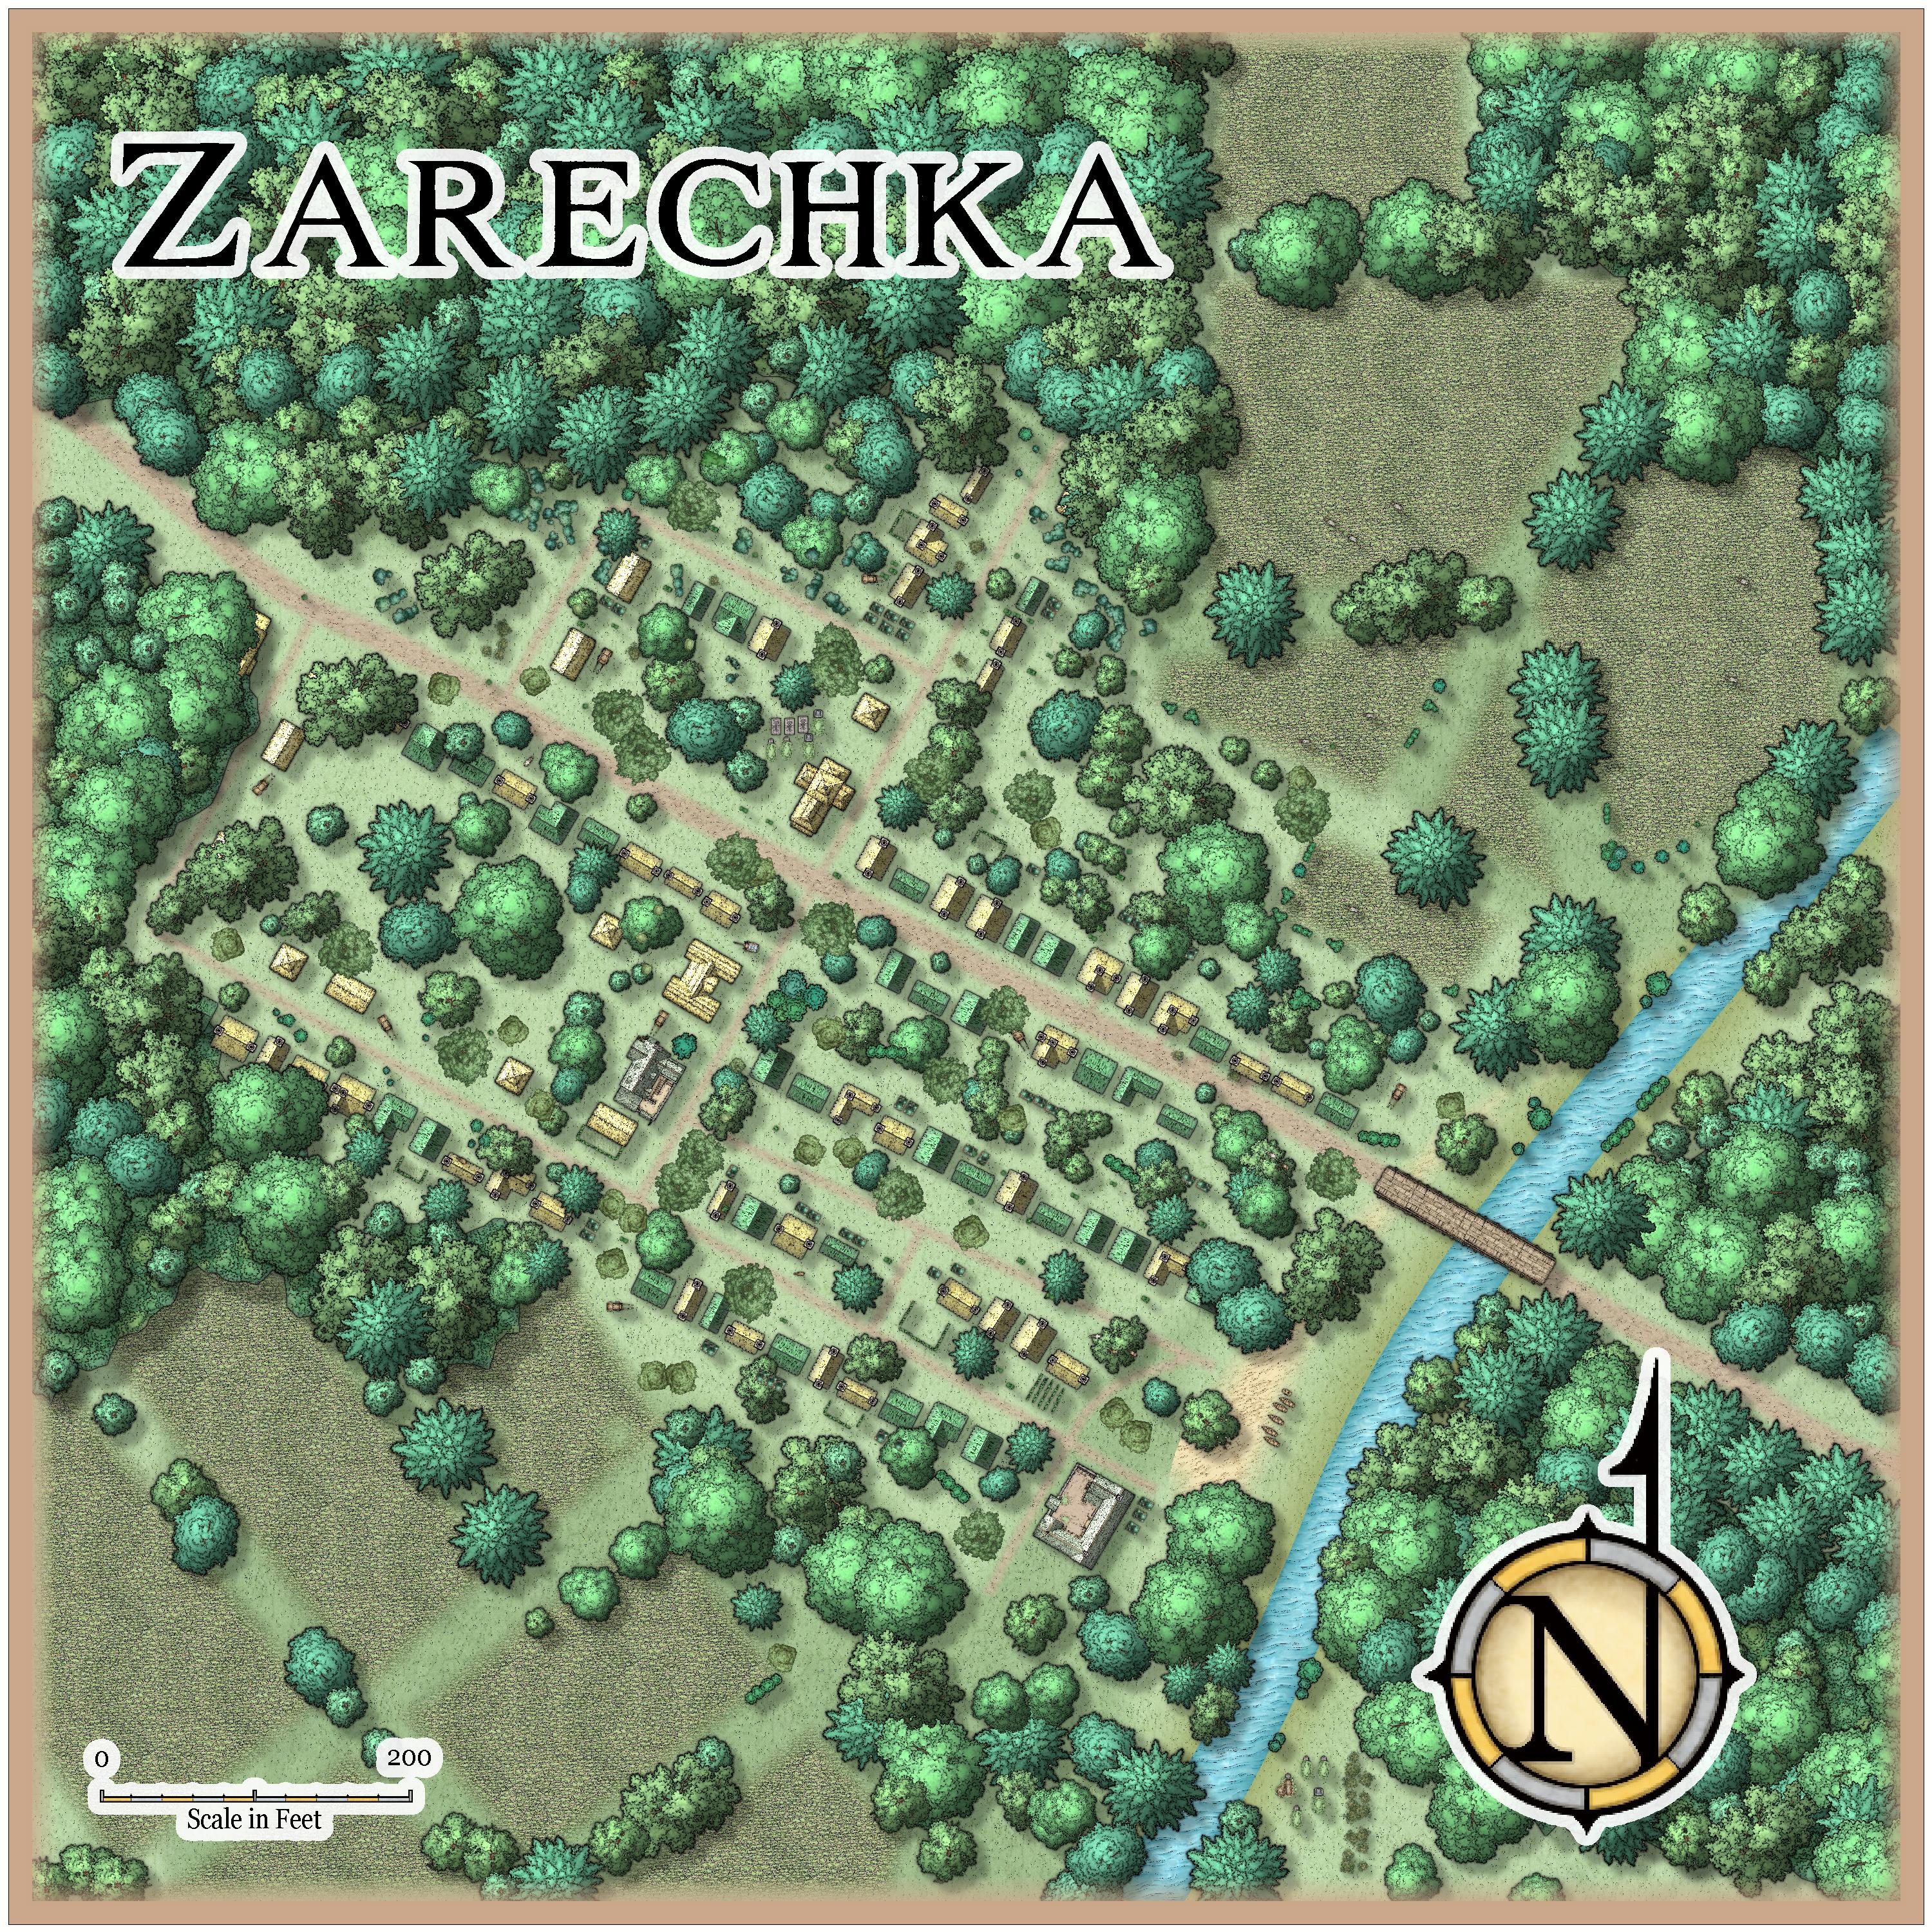
The individual hiring the party recently loaned the apparatus to a gnome alchemist named Fineous Fizzlecrank. The gnome was supposed to have returned the item weeks ago. However, as Fizzlecrank is known to be a bit eccentric and get caught up in his work, the party has been sent out to fetch the overdue device directly. The gnome lives on the outskirts of a small village, about 2 days’ travel from the party’s current location.

Should the party happen to ask around, they may learn the following bits of information about Fizzlecrank:

  • The gnome is filthy rich, having made his money selling potions and elixirs to the wealthy.
  • He lives in a large estate on the outskirts of the village.
  • He has a staff of human servants who wait on him hand and foot.
  • People call him eccentric but he is really quite mad.
  • Some say that he can turn lead into gold.
  • He is absolutely obsessed with green slime.
  • He has not been seen for weeks.

What the Party Doesn’t Know

Fineous Fizzlecrank, the eccentric gnome alchemist, was always known for his unconventional methods and insatiable curiosity. His reputation for pushing boundaries made him both revered and ridiculed among his peers.

Fizzlecrank’s fascination with green slime began innocently enough. He had read ancient texts that hinted at the slime’s potential applications in alchemical concoctions. His early experiments involved extracting and distilling the slime’s essence to create powerful acids for his potions. But as time went on, Fizzlecrank’s obsession grew, and he delved deeper into the mysteries of the substance.

He spent countless nights pouring over his notes, scribbling equations, and muttering to himself. His once-pristine laboratory was soon a mess of vials, flasks, and slime samples. The more he experimented, the wilder his ideas became. He believed that the slime held the key to unlocking extraordinary abilities—immunity to disease, increased longevity, and even the power to transmute materials.

When his staff became fearful for his health, the alchemist dismissed them all, assuring them that he was fine. However, Fizzlecrank’s experiments became increasingly reckless. He began exposing himself to small doses of the slime, believing it would grant him the insights he sought. His skin developed strange patterns and a sickly green hue, while his mind started to unravel. Yet, he pressed on, his obsession blinding him to the dangers he was courting.

One fateful day, driven to a fevered state of delirium, Fizzlecrank ingested a substantial amount of the slime. His transformation was swift and horrifying. His body convulsed, his bones shifted, and his limbs contorted into a gelatinous form. As his consciousness melded with the slime, he gained a rudimentary form of sentience, albeit one warped by his madness.

The Manor House

Fizzlecrank’s alchemy lab is located in the basement under his opulent manor house. Should you desire, you could certainly map out the full structure and create other encounters. For the purposes of this post, I will limit myself to the alchemy lab itself.

Whether you decide to spend time detailing the manor house or not, you will want to leave some clues to make sure the party suspects something is amiss. My party waited politely at the door. Once they were fairly certain no one would answer, the rogue took care of the lock and the let themselves in.

It was clear from the state of disarray that something was not right. However, seeing a number of valuable objects lying around left the party feeling fairly certain that the manor had not been robbed. Ultimately, the party discovered a diary Fizzlecrank had left in the study. This document clearly documented the alchemist’s descent into madness and made numerous mentions of green slime.

Concerned for the well-being of the gnome and not yet having found the Burundi Apparatus, the party made their way downstairs.
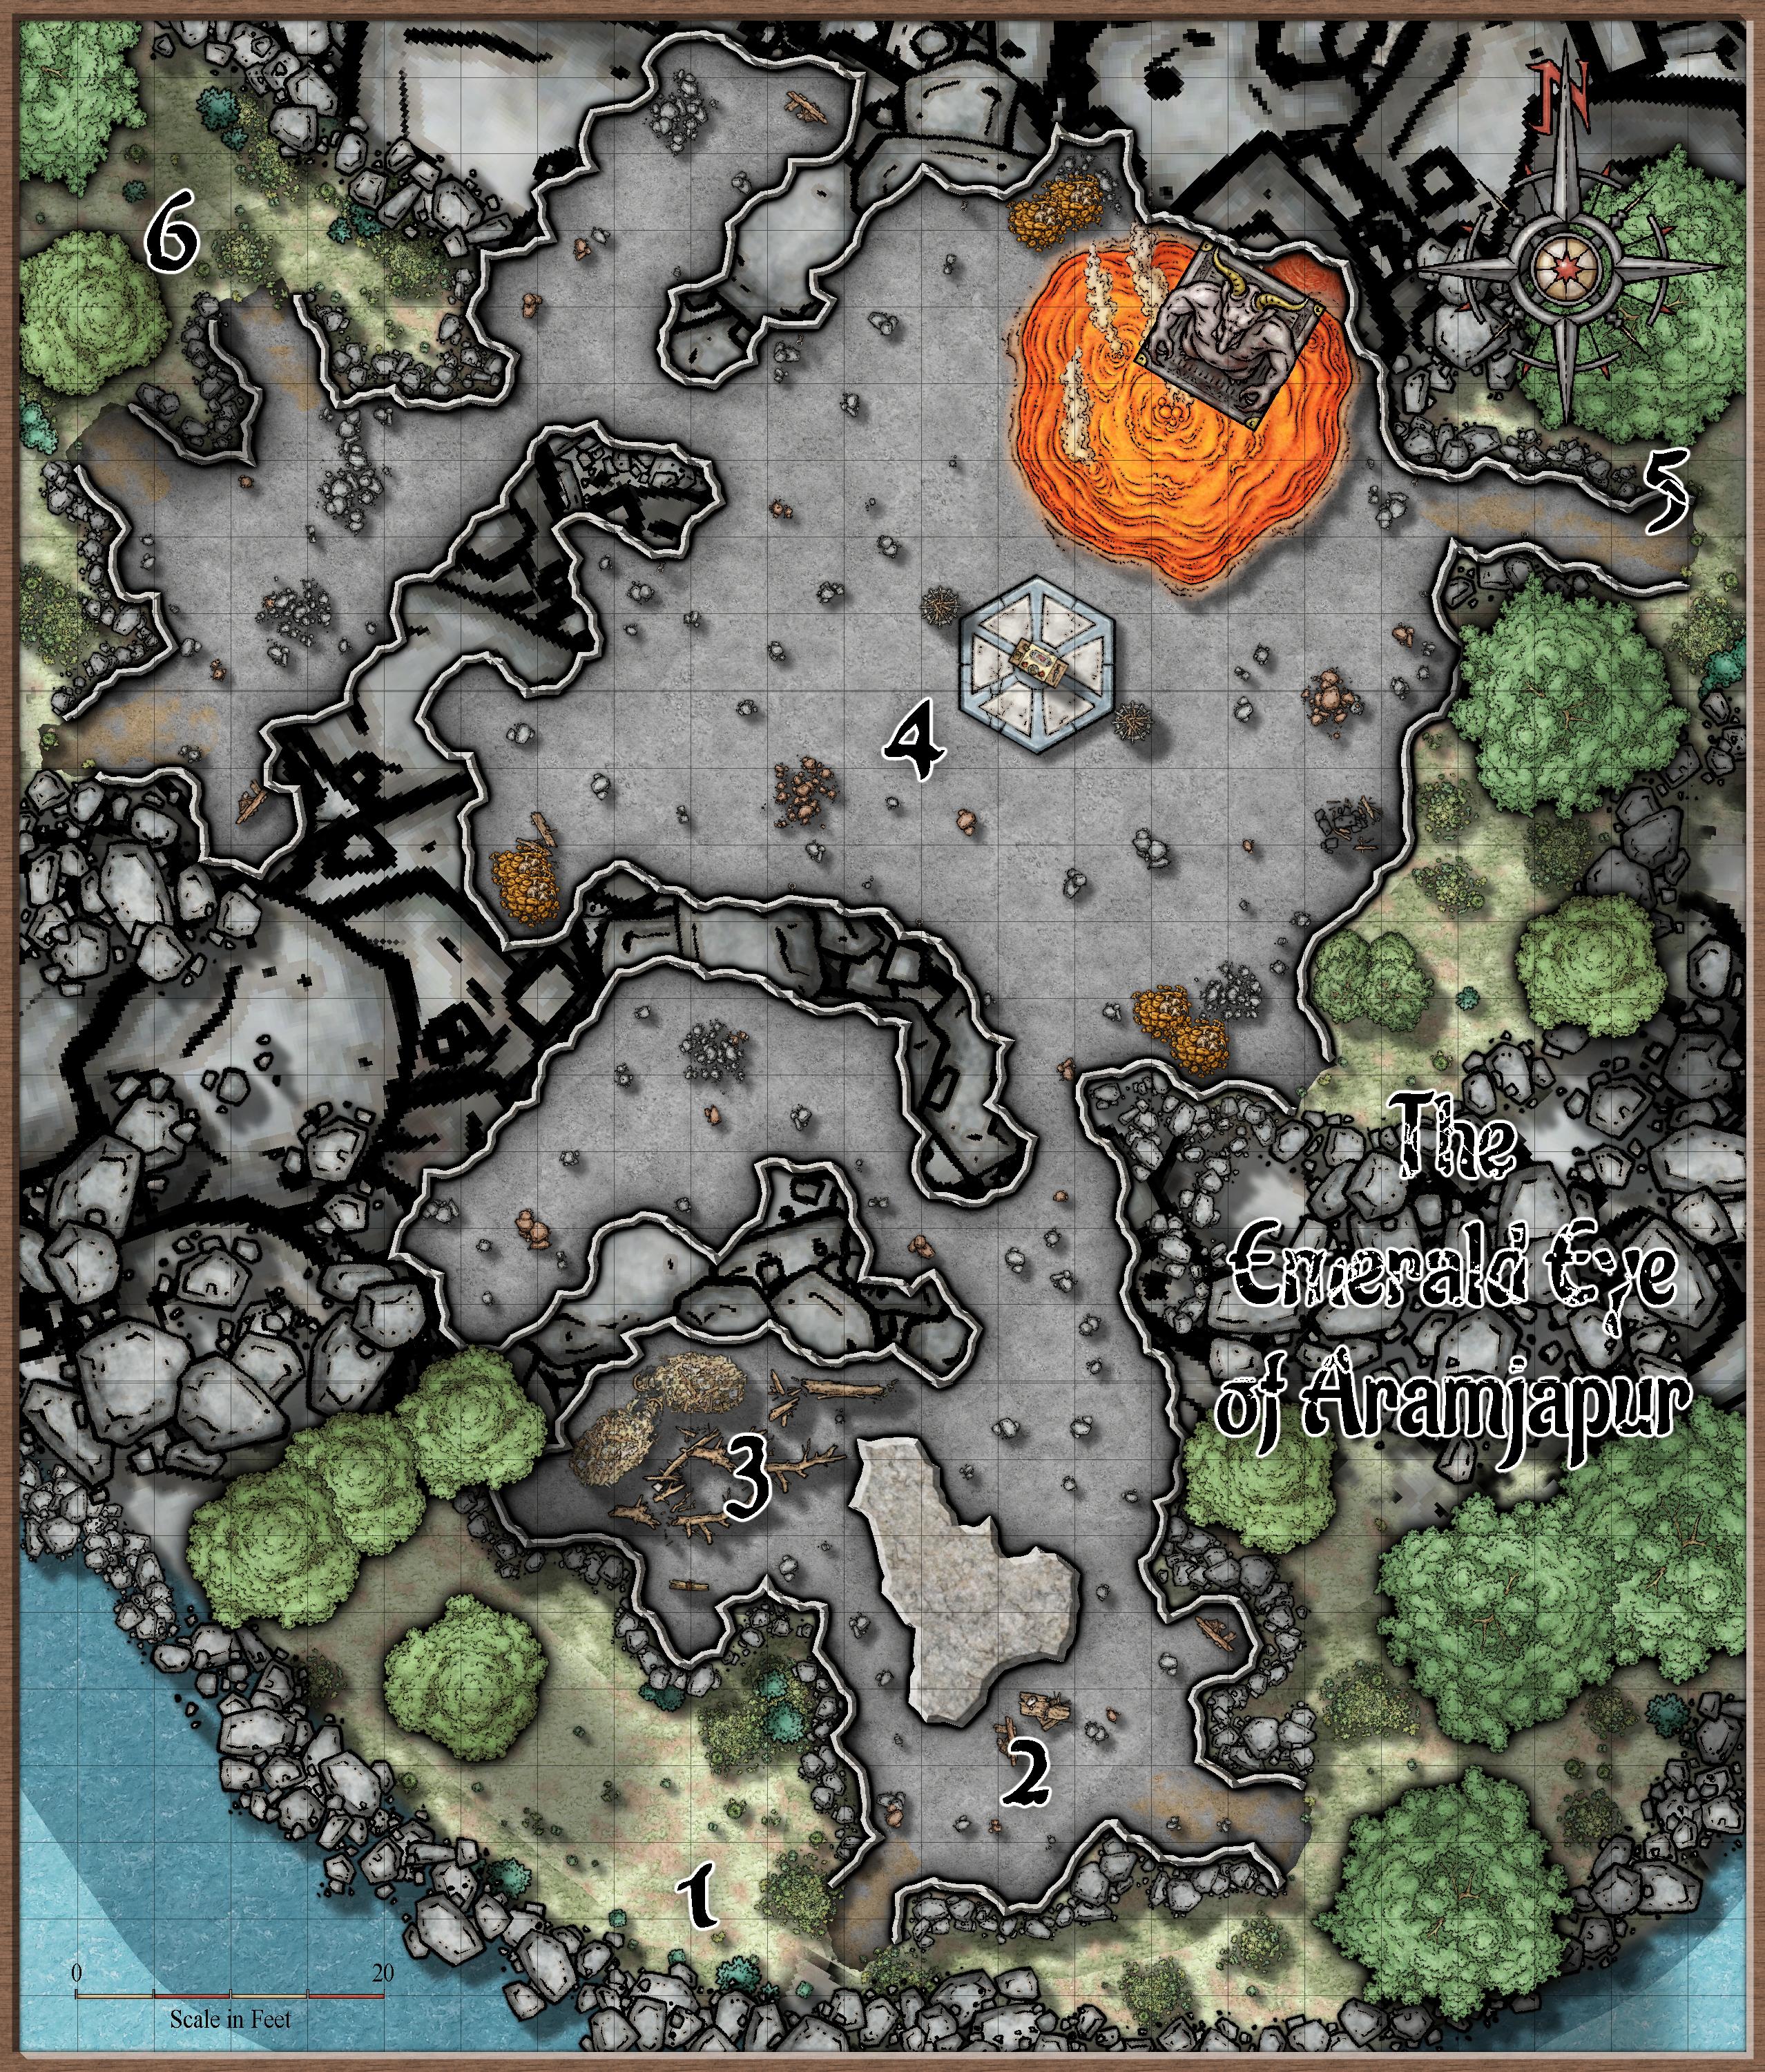
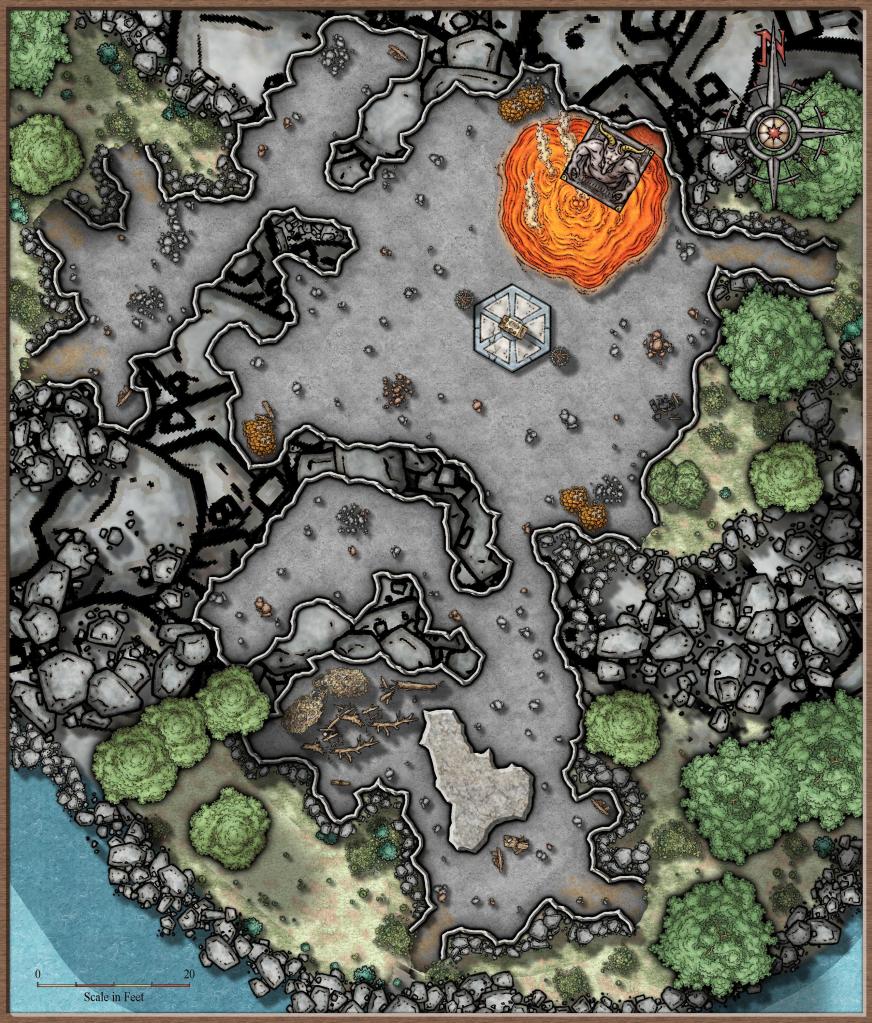
The Alchemist Lab

Entering this massive room, the party will immediately know that they have found the alchemist lab. 11 pillars support the ceiling and the room is lit with a sickly green phosphorescent light that emanates from the top of each.

The room is in a great deal of disarray and the air is filled with a strange, pungent odor. There are 4 cluttered tables on each side of the room, with crates, barrels, bookshelves, and all manner of odd storage beyond.

1-4 Loose Slimes

Areas marked 1-4 show loose minor green slimes that have been roaming the lab since Fizzlecrank’s transformation. When the party first opens the door, slime #1 will begin moving toward area #5, at a pace of 5’ per round. On the second round after the party opens the door, slime #2 will similarly start moving, and so on.

These minor slimes will pay no attention to the party unless attacked or blocked. If so, they will hold their ground and fight back. You will need to adjust accordingly for your game but in my Rules Compendium game I gave these minor slimes a pseudopod melee attack with a reach of 5’, dealing 1-2 hit points of damage. They were unharmed by all attacks, except cold or fire (again adjust as necessary) but only had 1 hp each.

Upon dispatching one of these minor slimes, the pile of ooze starts to quiver in an unstable fashion. At the top of the following round, the minor slime corpse will burst like a bubble, dealing 1 hit point of damage to all adjacent targets. If the bursting slime happens to be adjacent to any of the 8 tables in the room, roll a d4 and the result will be the number of beakers containing other minor slimes that are shattered, releasing more minor slimes into the room.

These extra slimes will only be released once per table and any new slimes will start heading toward area #5 unless hindered by the party.

5 Greater Slime / Fineous Fizzlecrank

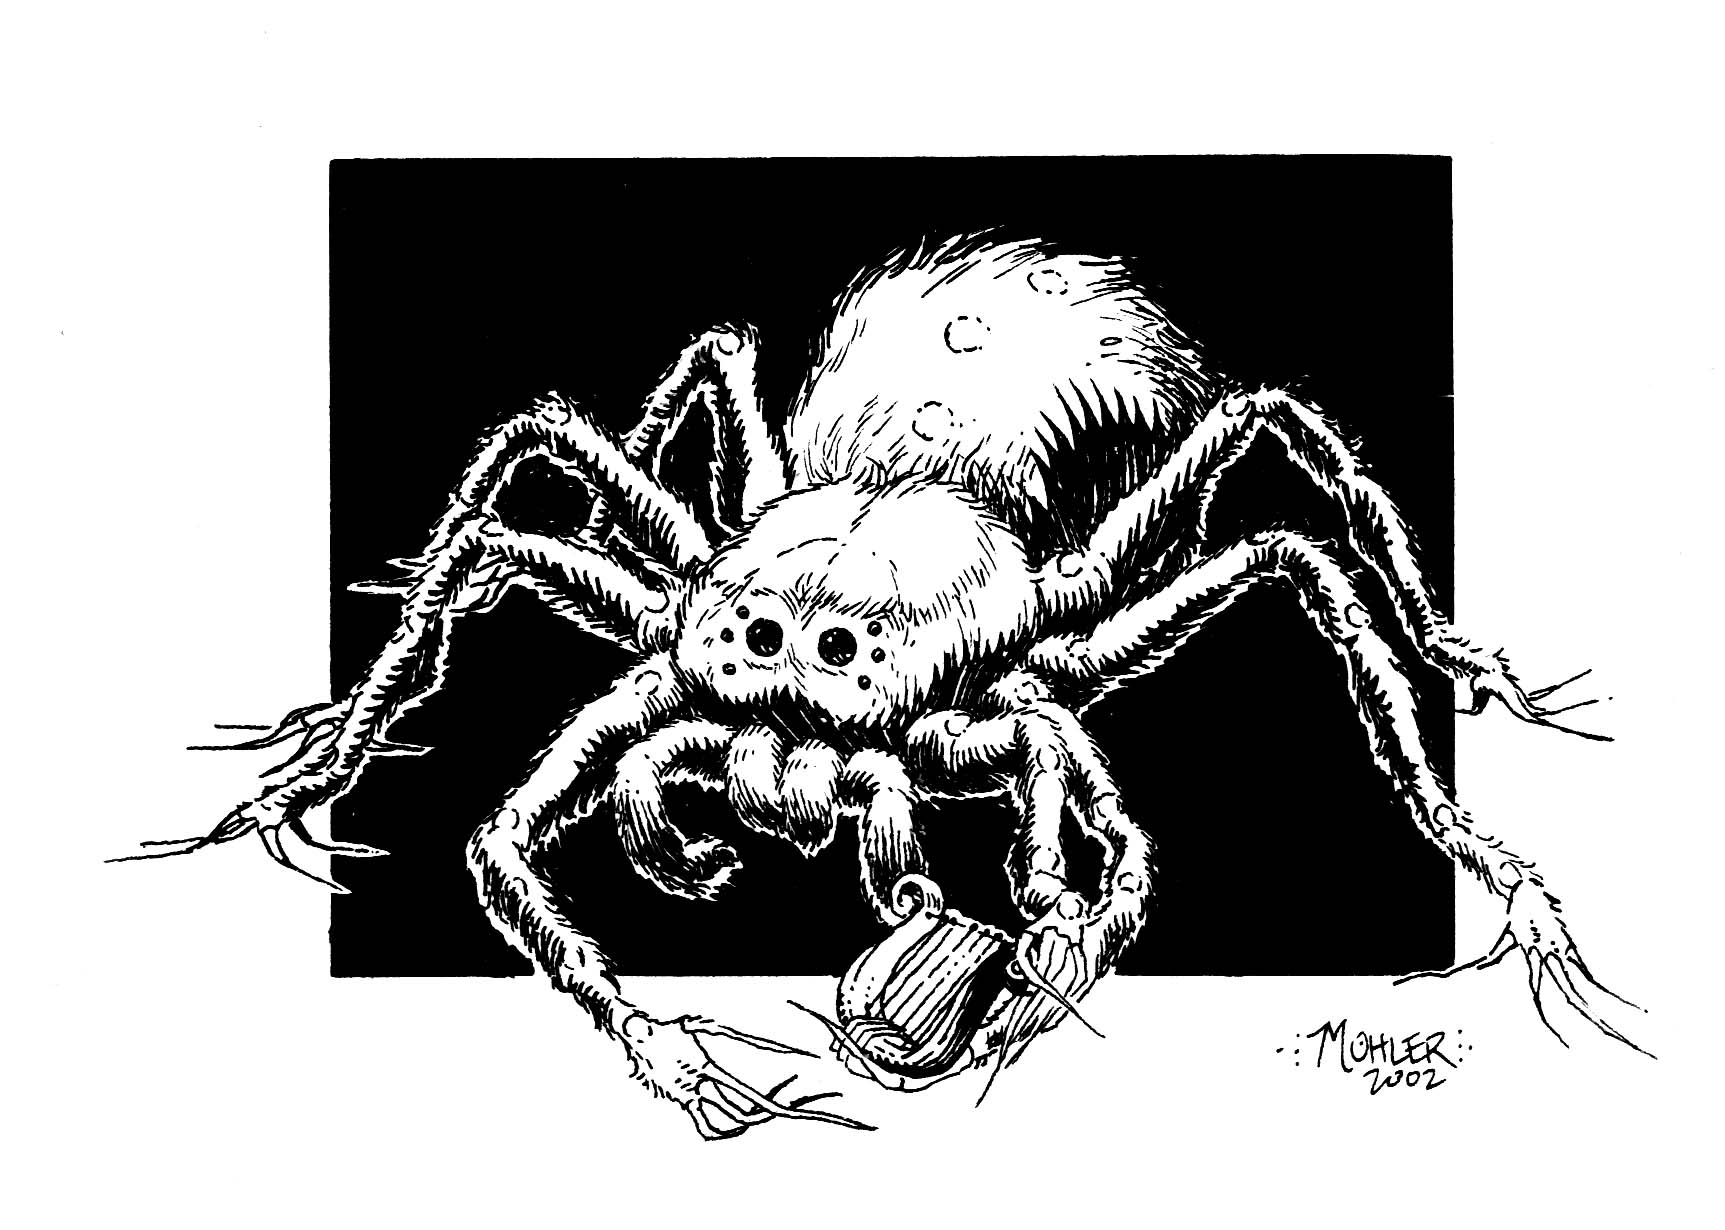
A wooden basin 12’ in diameter is inset within the floor here. Inside lies the slumbering form of what remains of Fineous Fizzlecrank. Now a giant amorphous green slime with a vaguely humanoid face, the creature is resting when the party initially enters the room.

If any of the minor slimes reach it or if the party disturbs the basin in any way, it will wake and attack. In addition, any subsequent minor slimes that reach it will have a healing effect on the abomination.

6 Burundi Apparatus

The Burundi Apparatus may be found inside a small crate here.

Wrap-Up

This week was a touch more silly than my usual fare but my group had a lot of fun with this fight. You’ll have a bit of tinkering to do, in deciding on what stats you want to use for the minor and greater slimes. That said, I suspect that most folks reading gaming blogs know the drill and wouldn’t have much trouble putting something together. I’m just trying to toss stuff out there to inspire people.

Do you have any favorite old-standby monsters that you’d enjoy seeing in an encounter? Drop me a line and let me know. Thanks for taking the time to stop by and have a great week!

For more maps & plot hooks, go here.

For some random tables, go here.

Finally, for a bit about me and some general stuff, this is the spot.

Morgan Ravenswing – The Imperial Highwayman

I am excited to share this week’s post. Since starting this endeavor, it has been my goal to share things that would help spark ideas with GMs and ultimately make the process of running their games easier.

This week’s plot hook is one that I stole from my dear friend Mike Capron’s Fantasy Hero campaign, all the way back in 1988. I have used this thread, or some version of it, in pretty much every campaign I have run as an adult. As always, this is system agnostic and could easily be dropped into the TTRPG of your choosing.

Act I

At some point early in my adventuring party’s career, I will have them meet a stranger. This generally occurs as a means to break up a period of overland travel. For instance, the group may literally be headed from their starting town to their first adventure when they cross paths with a lone traveler.

Sometimes this fellow is broken down by the side of the road and requests aid, sometimes he asks to camp with the party for the night, and sometimes he’s simply passing by. It does not matter how the traveler meets the party or how long he spends with them.

He will introduce himself as “Cedric Farnum”. The stranger should seem completely non-threatening and polite. He should appear a bit foppish but have a couple of telltale hints that there is something more to him. Perhaps he has striking eyes, his sword is of fine quality, or his boots are not quite as worn as one would expect for long-distance travel. If asked about any of these things, be sure to have a logical answer prepared for him.

Whatever the means of introduction, and whatever transpires while he is with the party, Cedric will not linger long. Even if he spends a night camping with the group, he will be up early, thank everyone for their hospitality, and head on his merry way.

Act II

The second part of this plot hook will involve waiting for a bit to let things breathe. 2-3 game sessions are generally sufficient. For instance, if your party had been on their way to an adventure when they met Cedric, perhaps wait until the party returns to civilization with their spoils.

Making their way through the bustling city, the party will spy a wanted poster. The poster reads:

WANTED

Dead or Alive

Morgan Ravenswing

The Imperial Highwayman

There is a hefty reward being offered for this individual. However, that is not what catches their eyes. There on the poster is the spitting image of the stranger they knew as “Cedric Farnum”. If you happen to have a player who is religious at taking notes, this reveal is a great way to reward them. In that case, I might just describe the person and let the player take the credit for the recognition.

If the party inquires with any locals about this Morgan Ravenswing fellow, they will receive all sorts of information. The most common tale will be that he and his band of cutthroats are notorious for ambushing travelers on their way to and from the city. Some of the townsfolk see him as a villain while others seem to view him as something of a local folk hero. Build what you want from there and don’t be afraid to ham it up.

Should the party mention to any local authorities that they believe they have met this fellow before, they will be very interested in the details. They will pester the adventurers with all sorts of questions regarding where this took place, as well as how large of a band Ravenswing had with him. Hearing that he was by himself and did nothing to accost the party will leave the officials somewhat uncertain regarding the validity of the claims.

Once again it’s best to sort of let this whole thread go cold. I’ve never had a party want to immediately pack up and search for this highwayman, though I suppose it could happen. Most often the party will move on to their next adventure and largely forget that this ever happened.

Over the course of the next adventure or two, it can be fun to drop in little reminders. Perhaps they see more wanted posters or perhaps they stumble upon a band of nobles in their skivvies, who claim to have been robbed by Ravenswing. However you go about it, I find that it’s a fun exercise. It reminds players that other events are happening in your world, outside of whatever they have been up to.

ACT III

Finally, we have arrived at the payoff. There are really only 2 keys to pulling this off. You want to make sure that since the initial meeting, you have brought up Morgan Ravenswing enough that everyone will immediately know who you are talking about. You will also need to have let things go cold enough that the party isn’t expecting to meet a highwayman around every corner. If you manage to nail both of these, you’ll have a memorable encounter on your hands.

As the party is returning from or heading to their next adventure, they cross a small bridge heading to a crossroads. Up ahead, a wagon blocks the road, surrounded by odd planks and debris. A figure stands atop the wagon, waiving frantically to the party.

“Hello. Hello, my friends.” the figure calls, once the party is within earshot.

By the time that they can hear the greeting, you may describe the figure as a tall, slender fellow, dressed in flamboyant, colorful attire. His clothing is a mixture of fine silks, velvets, and lace, adorned with intricate embroidery and shimmering jewels that catch the light with every move he makes.

His hat, adorned with an ostentatious plume of feathers, sits at a jaunty angle atop his head, giving him an air of casual elegance. He is, as surely your party will have guessed, Morgan Ravenswing, the Imperial Highwayman.

Perceptive characters will immediately be aware that they are surrounded. While the exact numbers are hidden within the woods, there are clearly quite a few other people out there. From those that can be seen, it’s clear that they are armed with bows. While they are not directly aiming at the party, they have arrows knocked.

By this stage in their careers, most parties will likely be itching for a fight. Ravenswing will attempt to reassure them that he merely wants to talk. At the same time, sufficiently describing the number of archers in the woods is likely to give even the most trigger-happy party members a moment of pause.

Where you take it from here is up to you but allow me to point out a few different options:

The Highway Robbery

My least favorite option. If the party is too big for their britches or it works best for your story, this could devolve into a fight. Ravenswing & his band will fight the characters if need be. A victorious party will be allowed to head back to town and collect a bounty. Should Morgan Ravenswing and his band win, they’ll not kill the party unless absolutely necessary. Instead, party members will be stripped down to only what is required to maintain their modesty. The highwayman will express his disappointment in the party and leave them, bound, and gagged, for someone else to find.

The Philanthropist

If the party can keep their cool long enough to hear Ravenswing out, things will get interesting. The party will be led deep into the forest, to the band’s secret hideaway.

The highwayman will apologize for the surprise but claim that it was necessary due to not knowing how the party would react. Once everyone is calm, he will explain that he has been following the party’s actions for some time and is reaching out to them for help.

In this scenario, Morgan Ravenswing is essentially a Robin Hood type character. He’s a philanthropist who has wrongly been labeled a criminal. Yes, he may occasionally bend or break some laws. However, he always does it with the best of intentions.

Having some knowledge of the “big bad evil guy” of the campaign, the highwayman and his gang have waylaid the party specifically to provide them with vital information and to lend their support in the future.

This is a very cinematic twist, that often leaves players squirming with excitement. Build on it from there.

The Dread Pirate Roberts

In a shameless riff on The Princess Bride, the highwayman reveals that he is not the only “Morgan Ravenswing” but rather that a number of different people have taken up the mantle over the years. As with the last option, he’s a bit of a philanthropist but for some reason must step down from the role.

Having watched the party for a while now, he believes that one of the party members would be the perfect candidate to take on the persona and continue carrying out good deeds across the empire.

Final Thoughts

I hope that you find something here that inspires you in some way for your game. If so, please drop me a note down below and let me know what you would do. I appreciate you taking the time to stop by.

If you would like to see more of my maps with plot hooks, you may find them here.

That’s all for now. Have a great week and don’t forget to daydream a bit if the week gets you down. We all share an amazing hobby, and those fantastic places can be a great escape! Good gaming.

When the Cat’s Away…

This week I’m sharing this simple battlemap from a short game session for my group. It could serve in a number of possible scenarios but I will briefly explain how I used it for my game.

Battlemap with grid & labels.

The Story

In the bustling city of Summerville, a wealthy merchant sought the aid of a capable party to retrieve a jeweled dagger he had recently agreed to purchase. The dagger belonged to a retired adventurer; a renowned rogue known as Alphonse “the Cat” Richter. With a bag of gold in hand for the purchase, the party embarked on a day’s journey to Richter’s modest cottage, eager to secure the prized treasure.

Unbeknownst to the party, a pack of four wererats had recently killed Richter. Led by a particularly cunning fellow named Gravik, they sought to recover the dagger for themselves. Having dispatched the rogue, they set about trying to locate the treasure with no luck.  

With two of the band keeping watch, the wererats were aware of the party’s approach. Gravik remained in the cottage (location #1) in his human form, pretending to be Richter. The others each waited for signs of trouble (at locations #2, #3, & #4 respectively) and observed from a distance.

Gravik. Art used by permission.
© Thomas Denmark. All Rights Reserved.
thomasdenmark.com

Expecting to meet a dashing and experienced rogue, the party was taken aback when “Richter” appeared unremarkable and disinterested. Claiming to no longer desire the merchant’s payment for the dagger, Gravik nervously sent the party away without even inviting them in.

Making their way back to the bridge, doubts began to arise within the party. Two of the adventures mentioned that “Richter” seemed a bit off. Another had noticed odd tracks leading around behind the cabin.

In the meantime, Gravik decided that if he couldn’t find the dagger, he might as well end up with the bag of gold from the merchant. Before the party could act on their suspicions, Gravik transformed into his hybrid form and ran out to attack. Seeing their leader spring into action, the rest of his band joined the fray. A ferocious battle ensued, and the party fought for their lives against the lycanthropes.

Battlemap without grid.

The party emerged victorious from the encounter, though one of the characters suffered a concerning bite. Richter’s lifeless body was discovered beside a freshly dug burrow in the garden (location #5). A search of the flower beds to the south of the cabin (location #6) yielded the jeweled dagger, wrapped-up burlap bag.

With the mystery unraveled, the party headed back to Summerville to claim their fee from the merchant.

That is the tale that this simple map was for used for in my game. As is always the case, a number of other questions were raised. What would have happened if the party had decided to keep the dagger for themselves? Aside from being jeweled, what was so special about the dagger in the first place? Were Gravik and his band acting on their own or is there a larger pack lurking around the Summerville area? If so, will the party have a target on their back?

Closing

That’s all for this week. Still tinkering to try to find the right mix of sharing maps with just enough of a plot hook to spark ideas. Thanks for stopping by. If you would like to see some more of my maps with plot hooks you may find them here. Good gaming!

Battlemap with grid.

The Haunted Shrine of Gaiporo

Hun Khi. Created using Campaign Cartographer’s Empire of the Sun style.

In the ancient land of Hun Khi, somewhere to the southeast of Mt. Saga, lies the small lakeside village of Gaiporo. Serene and picturesque, this village thrives on the bounties of the nearby lake and the lush surrounding forests. However, a chilling presence lingers beyond the village’s borders, concealed within the depths of the misty forest.

Hidden away in the foothills, stands the Haunted Shrine of Gaiporo. For nearly seven decades, this sacred place has remained untouched, haunted by the spirits of the Toyagaru family. These ill-fated siblings met their untimely demise when a rival warlord’s agents infiltrated their home, slaying them in their sleep.

Tethered to this world by an unquenchable thirst for revenge, the ghostly apparitions of the brothers now haunt the shrine. These vengeful entities manifest themselves when any approach. In death their faces have taken on a bestial look and their eyes glow a crimson red.

Whispers of their spectral presence have long circulated among the villagers, filling their hearts with trepidation. Legends speak of the fabled Twin Blades of Toyagaru, two exquisite swords of immense power and mystical enchantment. It is said that any who can defeat the vengeful spirits or bring peace to their souls by exacting revenge upon the rival warlord’s family may claim these legendary weapons as their own.

Vengeful spirit of Hideo Toyagaru. Art by © 2015 Dean Spencer, used with permission. All rights reserved.

Brave adventurers seeking glory and riches may find themselves drawn to the Haunted Shrine of Gaiporo, enticed by the lure of the twin blades. But beware, for the path to redemption is fraught with danger and the spirits of the Toyagaru brothers are not easily vanquished. To claim the fabled swords, heroes must navigate the misty forest, face spectral adversaries, and uncover the truth that lies hidden within the shadowed depths of the shrine.

Conclusion

The Twin Blades of Toyagaru. Art by © 2015 Dean Spencer, used with permission. All rights reserved.

Thanks for stopping by. I am trying to find the sweet spot with these, where I provide an interesting idea to build an adventure around without going too deep. If you have a preference either way, please drop me a note in the comments.

In the meantime, you may find all of my maps with plot hooks here. Random lists may be found here.

That’s all for now. Have a great week!

The Beast of Zarechka – Part 1

Darkness looms over the quiet village of Zarechka and rumors of a fearsome beast spread through the countryside. For weeks now, the villagers have lived in terror as a malevolent creature strikes without warning, leaving behind only death and destruction in its wake.

The mayor has put out a call for brave adventurers to come forth and hunt down the beast. But as the party begins their investigation, they soon discover that there may be more to this mystery than meets the eye. Will they uncover the truth behind the terror, or fall prey to the same fate as those who came before them?

This week I’m back with another plot-hook to get your creative juice flowing. As always, I’ll try to keep this as system agnostic as possible. Rather than provide a complete adventure, I’ll set the stage and let you fill in the blanks in the manner that would best suit your table. This week’s will be a three-parter. I’ll set the stage today and then follow up with the rest.

Zarechka

Zarechka is a small village nestled at the foot of a range of forested hills, in a remote corner of Borea. The village is situated near a small river, which provides water for the villagers’ crops and animals.

Houses in the village are made of wood and stone, with thatched roofs and small gardens. The villagers are mostly farmers and craftsmen, and they lead simple lives, working hard to make a living in the rugged wilderness that surrounds them.

Despite its peaceful and welcoming appearance, Zarechka has been terrorized by a series of brutal assaults over the past month. The attacks have been gruesome and concentrated on those outside of the village, including farmers, travelers, and livestock. The villagers have heard haunting howls and strange noises emanating from the nearby forest at night and are certain that a savage beast is responsible.

The village’s mayor, Jacob Russoff, has grown desperate for a solution and has turned to the party for help. Upon arriving in Zarechka, they will feel the palpable tension and fear that grips the village. Folk look at them with a mixture of hope and desperation, praying that they are the ones who will put an end to the reign of terror that has befallen their town.

I’ve included a basic map for the village of Zarechka. Feel free to use it or simply swap in a village from your existing campaign. In terms of the availability of good and services, keep in mind that Zarechka is located in a remote area, so characters will not have access to everything that they might expect to find in a large city.

The Attacks

The attacks started nearly a month ago with the brutal killing of a farmer named Dimitri Kozlov, who lived in a remote cabin near the edge of the forest. Since then, there have been similar attacks with livestock being taken and people being killed. Villagers have also heard haunting howls and strange noises emanating from the forest at night. Despite their efforts to defend themselves, the attacks have become more frequent in recent weeks, and the villagers are now living in constant fear.

Mayor Russoff may be able to provide valuable information. © J Lonnee, 2011. Licensed by Nevermet Press, LLC. Used by permission.

The party will surely want to ask the mayor for any information that he can provide regarding the attacks. It is also likely that they will spend some time gathering information from the villagers. Anyone within the village or outlying area will be able to also tell the party will be able to tell the party about the other two victims.

The second victim was a shepherd named Lawrence Talbot, who was found dead in the early morning hours by his fellow shepherds. A young woman named Anya Ivanova was the third. She was a local seamstress who was found dead in the woods, after venturing out to forage for herbs and mushrooms.

Below are a number additional rumors that the party is likely to uncover. (A “T” will indicate that there is at least some truth to the rumor while an “F” will indicate that it is entirely false.)

  • (T) The mayor’s daughter claims to have seen the creature in the forest while she was out picking berries. Valentyna Russoff actually did catch a glimpse of the creature in broad daylight and should be able to provide a basic description. She would also be able to direct the party to the location of the berry patch.
  • (F) Old man Igor believes the attacks are the result of a curse brought upon the village by a witch who was banished many years ago.
  • (T) A group of outsiders passing through town claim to have killed the beast and are looking for a reward for their services. This group arrived in the village last week, with the carcass of a large wolf. They demanded a reward for slaying “the beast”. However, the mayor did not believe that their claim was true and refused to pay. The group left the village, clearly upset and vowing their revenge for having been wronged.
  • (T) A farmer named Alexei saw the beast dragging off one of his cows in the middle of the night. Alexi’s farm is not far from where Valentyna Russoff saw the beast. Unfortunately, he saw it at night and from the back, so while he can describe it, his description would be similar to that of a great bear.
  • (F) A visiting scholar from the city believes the attacks are the result of a rogue experiment conducted by a mad scientist who lives in the area.
  • (T) A blacksmith named Mikhail claims to have found large, clawed footprints near the scene of one of the attacks. Mikhail made a bronze cast of the tracks, and they seem to resemble those of an incredibly large wolf.
  • (F) A young woman named Katerina believes the attacks are the result of a vengeful spirit seeking revenge for an old injustice.
  • (F) A hunter named Sergei claims to have seen the beast with his own eyes while he was out tracking a bear. If asked, he will provide the description of an owlbear.
  • (F) A traveling merchant believes the attacks are the result of a group of bandits who are using the cover of the beast to mask their activities.
  • (T) A farmer named Vlad claims to have heard the beast howling in the woods at night, and the howls were unlike anything he had ever heard before. Vlad is well-acquainted with the sound of wolves, and he can assure the party that this was no wolf.

These rumors are a little homage to B2 The Keep on the Borderlands and something that I come back to in many of my adventures. Use them at your discretion and according to what need from the adventure. If you’re tight on time and just using this as a one-shot, you might eliminate the false rumors altogether. On the other hand, if you’re needing to kill time while you work on other parts of your campaign, some red herrings might keep your party tied up for a while.

I’m going to be fleshing out some of the areas that the party is likely to want to explore. I will not be adding information for any of the false leads that they may receive from the villagers. That bit I’ll leave up to you. For instance, there was a witch who was banished years ago, and a mad scientist does reside in the area. However, since neither of them has anything to do with the beast of Zarechka, I will not be discussing them here.

The Investigation

After having had a chance to speak with mayor Russoff and other villagers, there are 4 main locations that the party is likely to want to investigate. I’ve marked these as #1- #4 on the local area map and will describe them.

Location #1 Dimitri Kozlov’s Farm

Dimitri’s farm lies just over a mile north of Zarechka. Arriving on the scene, the party will find that the fields have not been tended to in quite some time and the animals have already been removed by other villagers.

The farmer was taken from inside his cabin, which sits at the edge of the forest. The door has been shattered and the splintered wood around the latch suggests that whatever broke in was large and powerful. The door is slightly ajar, creaking back and forth in the breeze.

The cabin is in a state of disarray, with furniture overturned and personal belongings strewn about. Blood stains the walls and floor, and scattered furniture indicates that something grisly occurred here. There is no body or any form of substantial remains, aside from the splatters of blood. Villagers will be able to confirm that the scene remains exactly as it was originally found.

A keen eye will notice reddish mud or clay tracks on the floor. Rangers or characters with appropriate nature skills will recognize these as resembling those of a great wolf, but only for the hind feet. They will also note that they have not seen this reddish mud anywhere else in the area. As they inspect the scene further, they will also spot large human handprints alongside the wolf tracks. Something terrible has happened here.

As this was the first attack and occurred nearly a month ago, tracking the beast outside of the cabin will be fruitless. The key clues here will be the types of tracks, as well as the reddish mud. Once they are back in Zarechka, the villagers may be able to provide some insight into the mud. I will cover that in part 2.

Location # 2 Lawrence Talbot’s Shepherd Post

This field, situated at the foot of a gentle slope, can be found about two miles north of the village. The grass here is lush and green, and the occasional wildflower can be seen swaying in the breeze. The air is filled with the gentle sound of bleating sheep and the rustling of leaves in the wind.

It is in this idyllic setting that Lawrence Talbot tended his flock before his grisly demise. Though his remains have long since been removed, the rocks at the foot of the hills still bear stains of his blood. A sense of unease lingers in the air, as if some dark force still haunts this peaceful field.

Other shepherds in the area will be able to point the party to where Lawrence’s remains were found. Aside from the blood on the rocks, nothing else is immediately evident. However, a thorough search of the area will turn up a broken leather thong on which rests a pendant engraved with a strange rune. Villagers back in Zarechka may be able to shed some light on the nature of the rune but I will cover that in part 2 next week.

To be continued!

I truly appreciate you taking the time to stop by. If you are enjoying yourself, I encourage you to please say hello in the comments below. Part 2 has already been posted and you may find it here. Part 3 has also now been posted and you may find it here.

I’ve dropped a few Easter eggs into this one and I took inspiration for this adventure from the story of the Beast of Gévaudan. If you’d rather listen to something than read, I’d suggest checking out the Stuff You Missed In History Class episode.

Finally, if you’d just like to see more of my maps with plot hooks, you may find them here. That’s all for now. Have a great week and good gaming!

The Mine at Mt. Morris

The hills making up the Archian border with Caledos are pocked with dozens of abandoned mines. These leave a lasting reminder of the rush for silver in the years prior to the rise of the Graun Empire.

Without drawing much attention from local officials, a nebulous consortium of investors has been purchasing old dig sights along the coastal region. The mine at Mt. Morris was one such purchase. About 12 months ago, a group of ten men re-opened the dig, in what locals were sure was folly.

After spending a couple weeks repairing the base camp, the team resumed the dig. None but the foreman had any previous mining experience. Most of the “miners” consisted of farm hands or former members of the stevedores’ guild. None were strangers to hard work, but they were a motley group to be certain. However, the strangers who came and offered them the job assured that they would be paid handsomely.

The past year had been difficult. The team had failed to find any substantial amount of ore and they often assumed that their work would soon come to an end. Despite this, the paymaster and his retinue of guards would appear every month and the dig continued.

Recent Events

Seven days ago, a strange thing happened, breaking the monotony for the miners. While digging in the eastern tunnel that morning, the team struck what appeared to be a rock wall. Further investigation confirmed that they had indeed stumbled upon a bit of masonry crafted by human (or demi-human) hands.

Foreman Fugue seemed particularly interested in this development and ordered that there always be three men digging until such a time as the wall was breached. Unfortunately, Fugue himself explained that he was feeling ill and retired to his office in the storehouse.

Later that evening, just before dusk, the wall gave way and opened into a chamber beyond. The crew initially thought to go fetch the foreman. However, they knew he was not feeling well. There was no telling what might lie beyond the wall, and they reasoned that they might find something of value. Gathering up torches, the trio decided to enter the chamber alone. None of the miners were heard from ever again.

Foreman Fugue

Bartholomew Fugue is a wiry little weasel of a fellow. Just shy of 50 years old he appears to be more of a bookworm than a miner. That said, in his younger days he did indeed work during the great silver rush.  

Two years ago, Fugue was approached by a group who held certain interests in the region. They were seeking the diary of Elthane Vanator, a necromancer and occultist of some renown. Apparently something about this diary made it incredibly valuable and they wanted it found.

The belief was that the book was hidden away in Vanator’s old lair, which lay buried under the Archian hills, somewhere nearby.

Thus is was that Fugue was assigned a crew of nine and set about digging in the old silver mine. He had been sworn to secrecy and warned that his life would be forfeit if his true purpose were ever discovered.

Fugue was no fool. Prior to being stationed at the mine, he did his research. He took with him a number of books on the occult, as well as what bits of information he could gather regarding Elthane Vanator. From these readings he gathered that the necromancer, having been hanged some 100 years earlier, was known to employ the living dead as guardians over his dwellings.

What Happened?

Foreman Fugue had almost forgotten his original job of finding the diary. His employers had been paying him well and he had been skimming off the meager bits of silver that his miners had been finding.

Ghouls made for the perfect undead guardian. Art by Bartek Blaszczec.

When word came out of the mine that the diggers had found a wall, his blood ran cold. Knowing that Vanator’s lair may hold undead guardians, the foreman feigned illness and excused himself from the proceedings. He briefly considered warning the others but thought better of it. He had been warned not to disclose the true purpose of the mine, and this was not the time to start taking chances. Stopping briefly at the stables, he left extra water for his horse and placed a padlock on the stall. Then he proceeded to his office and locked himself away.  

Sure enough, later that evening the sound of blood curdling screams could be heard throughout the camp. From he vantage point in the office, he spied a pack of cadaverous looking creatures burst forth from the mine entrance. With bestial swiftness the animated corpses fanned out and swarmed the camp. A terrible stench of carrion filled the air, as Fugue steadied the barricade in front of his door.

More screams were heard in the hours to follow. The foreman sat watching in terror, too scared to make so much as a sound. At one point there had been pawing and scratching at his door, but his defenses held. Not long after that he viewed the shapes of the undead retreating back into the cave.

Too craven to risk leaving his sanctuary, he has been holed up in the storehouse for the past week. The days have been quiet, though at night he has heard sniffing and panting outside his walls. The paymaster is due today, along with his armed guards. Once they arrive he plans to let the guards deal with the guardians and then hopes to take some credit for finding the diary that surely must be within the discovered vault.

The Mine at Mt. Morris

How you get your party to the camp is entirely up to you. One easy method would be to have a relative or friend from a nearby town hire them to deliver something to one of the miners. I happened to know that my group was filled with inquisitive types, so I allowed them to stumble onto the camp randomly, as they were traveling across the countryside.

1 Bunkhouse

This L-shaped building is the bunkhouse that served as the living quarters for the miners. Characters will recognize the stench of rotting flesh as they get near. The back doors are slightly ajar, and the front doors are unlocked.

The remains of two of the miners may be found here. It is a grisly sight and will be clear that something has been eating the corpses and that they have been dead for the better part of a week.

There is nothing of great value in the room, though the party might turn up a decent bag of copper and silver coins if the absolutely turn the place upside down and go through all of the miners’ belongings.

The most curious thing in the whole room is to be found in a footlocker under the northernmost bed (Foreman Fugue’s). Tucked away under some handkerchiefs and small clothes will be found a book and some hastily scribbled notes. The book is titled A Treatise on Reanimated Beings and seems to be a bit of a bestiary imparting knowledge on minor undead creatures. Reading through the notes will indicate that someone was expecting to encounter undead guardians.

2 Mess Hall

This is where the miners prepared their meals and relaxed when they were not working. As with the other structures, this was built back when the mine was first created and it’s clear that it has been serving considerably fewer people.

As with the bunkhouse there are two sets of remains here as well. Both seem to have met the same fate as their fellows.

There is not much of value to be found here, though the party could stock up on the equivalent of iron rations, wine, and ale as they wish.

3 Stables

The stables area makes for another unsettling scene. The remains of one miner can be found in the stable yard. Two horses appear to have met a similar fate in their stalls.

Oddly, one living horse remains. Scratches and claw marks mar the door to the stall. A locked padlock seems to have saved the poor creature, but it is quite dehydrated and appears to be starving. Close inspection will show that someone left extra water in the stall for the beast, but the containers are bone dry.

To the west of this building is a great deal of debris, earth, and rocks that have been removed from the mine.

4 Storehouse

The front and rear doors to this building are closed and locked. There are windows on each facing of the building, though all appear to be barricaded with an assortment of boxes and crates.

On a roll of a 1 or 2 on a d6, characters will hear movement from within the building as they approach.

Entering via any of the doors may be obtained through a regular open doors check. Entering via any of the windows will simply be a matter of breaking the glass and pushing the haphazard barricade aside.

Characters will be able to tell that this building is used to store all of the equipment for the mine. All manner of digging equipment and supplies may be found here.

Foreman Bartholomew Fugue. Artwork © 2015 Dean Spencer, used with permission. All rights reserved.

The smaller room in the northeastern corner of the building is where Foreman Fugue has locked himself away, cowering in fear. He will not call out to the party if he hears them enter the building. Upon entering the office area, characters will find Fugue in the fetal position and he will immediately “surrender” to the party and beg them not to hurt him.

While he is terrified, this is partly an act. The foreman does not want to reveal what is going on and has no explanation for why he has stayed locked up in the office for days. If questioned, he will lie and claim that some creatures came out of the woods two days ago and he barely managed to escape with his life. If asked about the horse in the stables or the book and notes in the footlocker, he will lie poorly and show signs of great discomfort.

If threatened with physical harm, Fugue will break down crying and attempt to save himself. Bit by bit he will start to reveal what actually happened. However, he will only reveal what he judges to be enough to save his wretched hide. If the party does press him to the point of revealing anything about his employer, he will strive to make it seem that he was an unwilling participant, at the risk of death. He will not mention that the paymaster is due to arrive today unless his life is absolutely on the line.

5 Mine Entrance

The corpse of one of the unfortunate miners lays here.

6 Cave Intersection

Here the tunnel branches off in 4 directions. The northern path only goes a short distance and yet another dead miner can be found here.

7 Western Tunnel

3 nights ago, a green slime made its way into the mine complex and has taken up residence along the roof of this tunnel. If party members are not paying attention and come to the end of this tunnel it will drop on them.

8 Altar Room

Diary of Elthane Vanator. Used with permission Tales of Collaborative Storytelling.

This is the room where the mine intersected with the previous underground complex. As the party moves in this direction the will be assailed by the smell of carrion.  Four pillars support the ceiling. A pool of 2’ deep murky water dominates the center of the room. On the northern wall is a stone altar bearing various ritualistic items as well as a book written in spidery script (close inspection will show this to be the diary of Elthane Vanator). A similar altar on the southern wall is adorned by a bronze statue of a great horned beast.

If the players enter this room, give them a description and then within 1 round, they will hear a blood curdling shriek, followed by the flapping of leathery feet as they are attacked by 3 ghouls and a ghast from the hallway to the east.

Following their initial foray killing the miners, this pack of undead returned to the tunnels out of familiarity. While they have been venturing out at night, something gets dragging them back to the tunnels by the light of day. Hearing the party, they come forward to feed.

9 Ceremonial Room

This room is empty, save for a 5-pointed star painted on the floor and an extinguished candle placed in each corner.

10 Crypt

There are 8 sarcophagi in this room. Four of these are open and empty. The remaining four are closed and hold inanimate skeletons.

There is a small stone altar along the western wall. Besides it rests an open chest filled with gold and any treasures that would be appropriate for your game.

11 Cave-In

The northern wall of the passage has collapsed here. It appears that the passageway originally continued, however, clearing the cave-in would take multiple days.

Remaining Questions

If the party have explored the mine and located the diary, there are still a number of questions that will remain.

  • What is the purpose of the shadowy consortium that has been trying to find the diary?
  • What dark knowledge does the diary contain to make it worth going to all of this effort?
  • What will happen once the paymaster arrives? He always comes with guards, and they will surely want the diary if the party is still around. They also won’t want any witnesses!
  • Finally, what lies beyond the collapse at area #11? Is there a whole complex to explore with amazing treasures to be found?

Final Notes

That is all for now. I hope you have enjoyed yourself and thank you for reading this far. If you have any thoughts as to something to add or where we might take things from here, please leave a comment below. If you’d like to read something else, check out the links below.

For the Village of Cross Tree, go here.

For maps & plot hooks, go here.

For my Idea Chest posts, go here.

For some random tables, go here.

Finally, for a bit about me and some general stuff, this is the spot.

The Emerald Eye of Aramjapur

My basic D&D group has been continuing their adventures in my re-imagining of The Isle of Dread. Having spent their initial couple of sessions striking out from the village of Taranoa, the party opted to leave the relative safety of the peninsula and explore the island.

Following a successful hunt with the tribe’s Hawk Clan, party members heard legends of a great treasure hidden in one of the volcanic mountains to the west. The story claimed that an ancient race had lived on the mountain and worshipped a one-eyed god in a cavern temple. Aramjapur, as the deity was called, was said to be all-knowing. His followers prayed to a giant statue of the cyclops featuring an eye cut from an emerald that was the size of a human head.

Traveling cautiously, it took the party 4 days to make their way to the twin volcanos to the west. While they managed to avoid combat, the trip was not without incident.

Just before dusk on the first day, the party spied an allosaurus in the swampland to the north. This caused them to veer to the west and hug the coast.

In the afternoon of the 2nd day, the party stumbled across their first “pylon”. In my previous post I mentioned that I planned to borrow liberally from the old Land of the Lost television series for this adventure. Both this metallic obelisk-shaped booth and the strange tracks (Sleestak) that were found in the area were directly inspired by the show.

On the 3rd day, the party entered the broken lands surrounding the volcanos. A small river meandered between the twin mountains and the party took advantage to replenish their water supply. It took the better part of a day but the party found signs along the northern slope that matched descriptions provided to the by members of the Taranoa Hawk Clan.

Crossing the shallow waterway, the party confirmed that they were on the right track when they identified the crude handholds carved into the rock, leading up the side of the mountain. While hair-raising at times, this allowed even the party’s magic-user to ascend with relative ease.

Natural shelves in the rock were present along the way up, allowing for convenient resting areas during the climb. On the first of these the party discovered the desiccated corpse of what appeared to be a previous adventurer. This was of no great surprise, as the Taranoa had mentioned meeting other outsiders before. However, this did worry the party that perhaps the Eye of Aramjapur had already been claimed by others.

Outfitted in old chainmail, the corpse consisted of not much more than a skeleton. Nothing of value was found on the poor soul, though the party did uncover a sealed scroll case and a discarded short sword. Within the scroll case was a piece of parchment bearing instructions to “beware the children of Aramjapur.”

After encountering 3 resting shelves and covering about a 1000’ climb, the party arrived at a much larger shelf with some vegetation and a fairly obvious cave entrance (map location #1).

Map Locations

#1 Shelf

Occurring roughly three quarters of the way up the side of the mountain, this is a fairly large outcropping. A few trees seem to thrive up here and a pair of billitri bushes grow alongside a cave opening. Large cobwebs adorn the trees.

#2 Cave Entrance

Characters entering the caves here will notice that the air is quite warm from volcanic activity. One passage leads to the northwest, while another leads more due north. To the east, another passage leads back outdoors to a smaller mountain shelf, also covered with large cobwebs.

Giant Spider © Jeremy Mohler 2023. Standard Stock Art: Issue by Outland Entertainment.

#3 Spider Lair

A good deal of debris is piled up in this room. It also serves as the lair for 3 giant spiders who have taken up residence along the side of the mountain. The spiders will attack as soon as the party enters the cave. Digging through the debris will yield a silver dagger and an old coin purse containing 50 gp.

#4 Temple

The large cavern is the old temple to Aramjapur. The room is dimly lit from the lava pool, as well as a bit of sunlight coming in from both of the entrances to the east. Along the northern wall a 30’ tall bust of Aramjapur is ringed by the lava pool. True to the legend, the statue of the cyclops is adorned with a giant emerald eye. In the center of the room, a crude altar sits upon a raised pedestal. The room is otherwise empty, aside from rocks of various sizes and a number of patches of fungus growing about the room.

The lava pool radiates 5’ – 10’ out from the statue, depending on the location. Unless the party has the ability to fly, it appears that they will need to devise some way to safely cross the lava, if they wish to gain the emerald as a prize.

The party could gather sufficient debris from location #3 to build a makeshift ramp across the lava. However, this option would only be sturdy enough to support a character weighting 100 lbs. or less. The only other readily available option would be to cut down a tree outside of area #1 or #5. Assuming the party has a proper axe and goes this route, it will take them approximately 10 minutes to cut down a sufficient tree.

Whichever course of action the party chooses, it will be important to keep track of time. Any party members with applicable skills (or even any who specifically mention that they are looking) will notice numbers of dusty footprints coming and going from this central cavern. Roughly 15 minutes after the party first enters the cave (or earlier if they make a great deal of noise) the “Children of Aramjapur” will start coming to investigate (see location #6).

Children of Aramjapur. Artwork © 2015 Dean Spencer, used with permission. All rights reserved.

If a party member is able to access the statue, the Eye of Aramjapur may be pried loose in one round.

#5 Shelf

This tunnel leads out to another mountain shelf similar to the one to the south that the party entered from. The only thing of note out here are 3 stikricki bushes along the side of the cliff.

#6 Exit

3 of the “Children of Aramjapur” lounge in the shade outside of these 3 cavern entrances. These protohumans descended from those who lived on the twin volcanoes for centuries. Standing at roughly 7′ tall, these brutes have a heavy brow and somewhat resemble a cross between a man and an ape. Lacking any verbal language, they will defend their home and the cave system to their death. For my game, I used a reskinned troglodyte stat block (minus the special abilities) but you do what works for you.

Once they detect the party, they will attack immediately and make a great deal of noise. Their grunts and shrieks will soon draw others, so the party will have to act quickly. The “children” will focus their attacks on any party member visibly attempting to acquire the Eye of Aramjapur or approach the statue.

Wrap-Up

How things play out from here is largely up to you. This encounter takes the place of the “Caves of the Rock Baboons” from the original adventure, which seemed rather bland. I created the Emerald Eye of Aramjapur to give things a bit more depth.

There were 15 rock baboons listed in the original adventure and they have similar stats to the troglodytes that I modeled my children of Aramjapur after. Therefore, I surmised that there could be a settlement of roughly 15 of them inhabiting this part of the mountain.

For my game I turned it into a bit of a moral conundrum for my players. The Children of Aramjapur are not evil beings but they will keep coming and defending their home. 4 rounds after the initial 3 attacked and were dispatched, I sent in another 3. The waves of attackers made it increasingly difficult for the party to cross the lava and secure the emerald. At that point one of my players started to question whether this was a noble cause, while another worried that a whole village of the brutes might appear in the next wave. Ultimately my party ended up beating a hasty retreat back down the side of the mountain, leaving the Eye of Aramjapur safely behind.

That is all for now. Thank you for stopping by. If you’d like to browse through all of my other maps with plot hooks, you can find them all collected here. Please take a minute to say hello in the comments below. Have a great week!

The Isle of Dread is owned by Wizards of the Coast. All of my work on this post is strictly non-commercial, on a voluntary basis as unofficial Fan Content permitted under the Wizards Fan Content Policy. Not approved/endorsed by Wizards. Portions of the materials used are property of Wizards of the Coast. ©Wizards of the Coast LLC.