Real life responsibilities pulled me reluctantly away from tabletop role-playing games at some point in the late 1990s. It wasn’t until 2014 that I dusted myself off and started to participate in the hobby again. I wasn’t completely without an escape during this time. I started playing World of Warcraft about four months after launch and I played regularly until the end of the Wrath of the Lich King expansion.
While my WoW days are well behind me, something about working on my map for this week’s post kept bringing me back to the venerable video game that will be turning 20 next year. If you have fond memories of the Warcraft universe, enjoy this silly escape. If not, please allow me this indulgence and I’ll be back to regular posts soon enough.
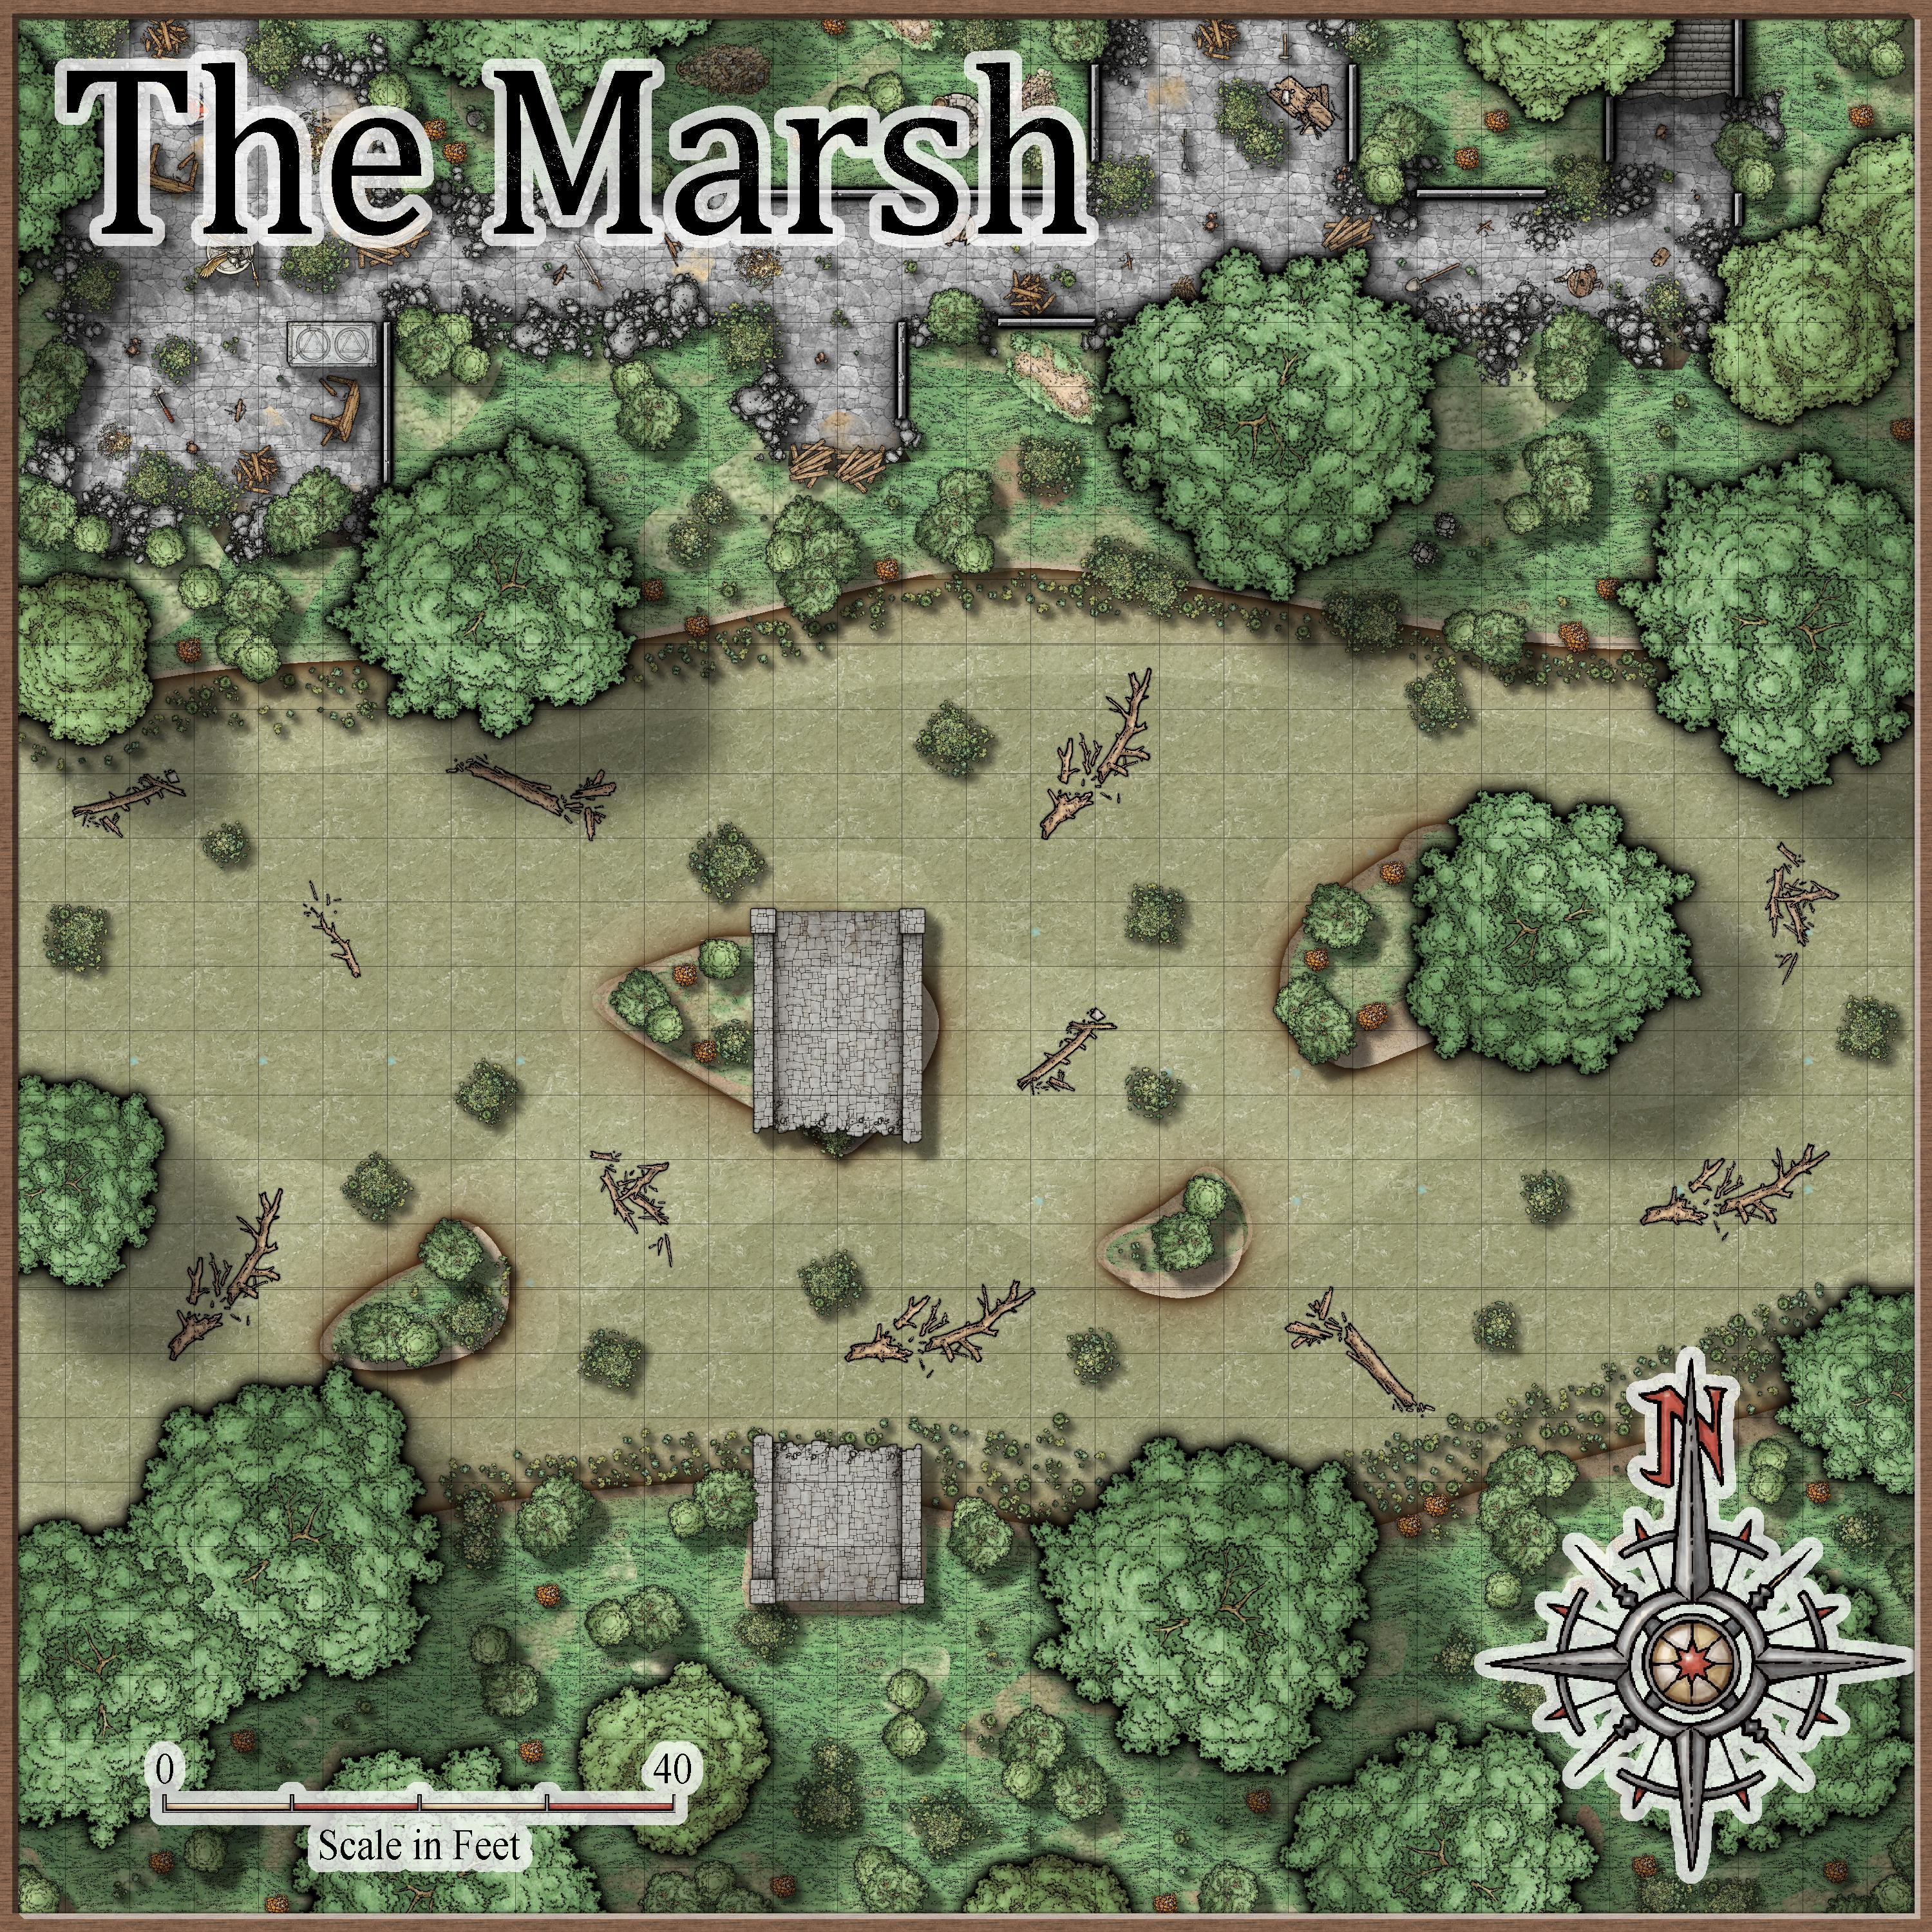
The Shadowhaven Crypt
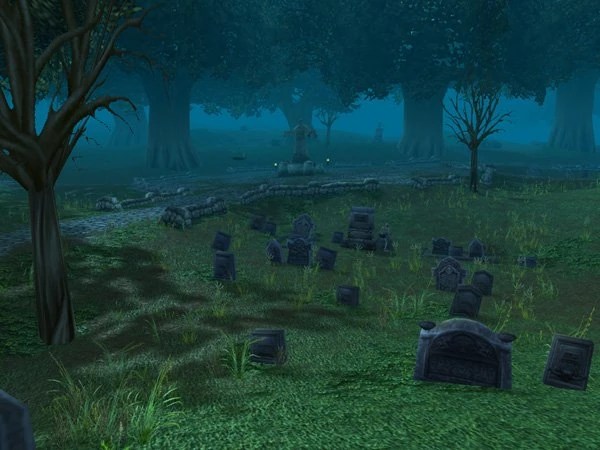
In Duskwood, hidden away just south of the Tranquil Gardens Cemetery lies the entrance to the Shadowhaven Crypt. Barnabas Shadowhaven was a wealthy Stormwind merchant who had retired to this region back in the days when it was still known as Brightwood. Whispers had circulated about Shadowhaven being involved in questionable practices. Some claimed that he dabbled in forbidden magics, while others believed he had dealings with unsavory entities from the shadowy realms. The exact nature of these rumors remained nebulous, but they were enough to create an air of suspicion and mistrust around him.
Such it was that there wasn’t a great deal of fanfare surrounding his passing. His estate in Grand Hamlet had been boarded up and razed some years later as the town expanded. By the time of Medivh’s passing and the change of the town’s name to Darkshire, Barnabas Shadowhaven was long since forgotten.
With the recall of the Stormwind army to other parts of the realm, the situation in Duskwood is turning grim. Their resources already stretched thin, the Night Watch has asked the party to investigate strange occurrences near the Shadowhaven Crypt and put to rest whatever dwells there.
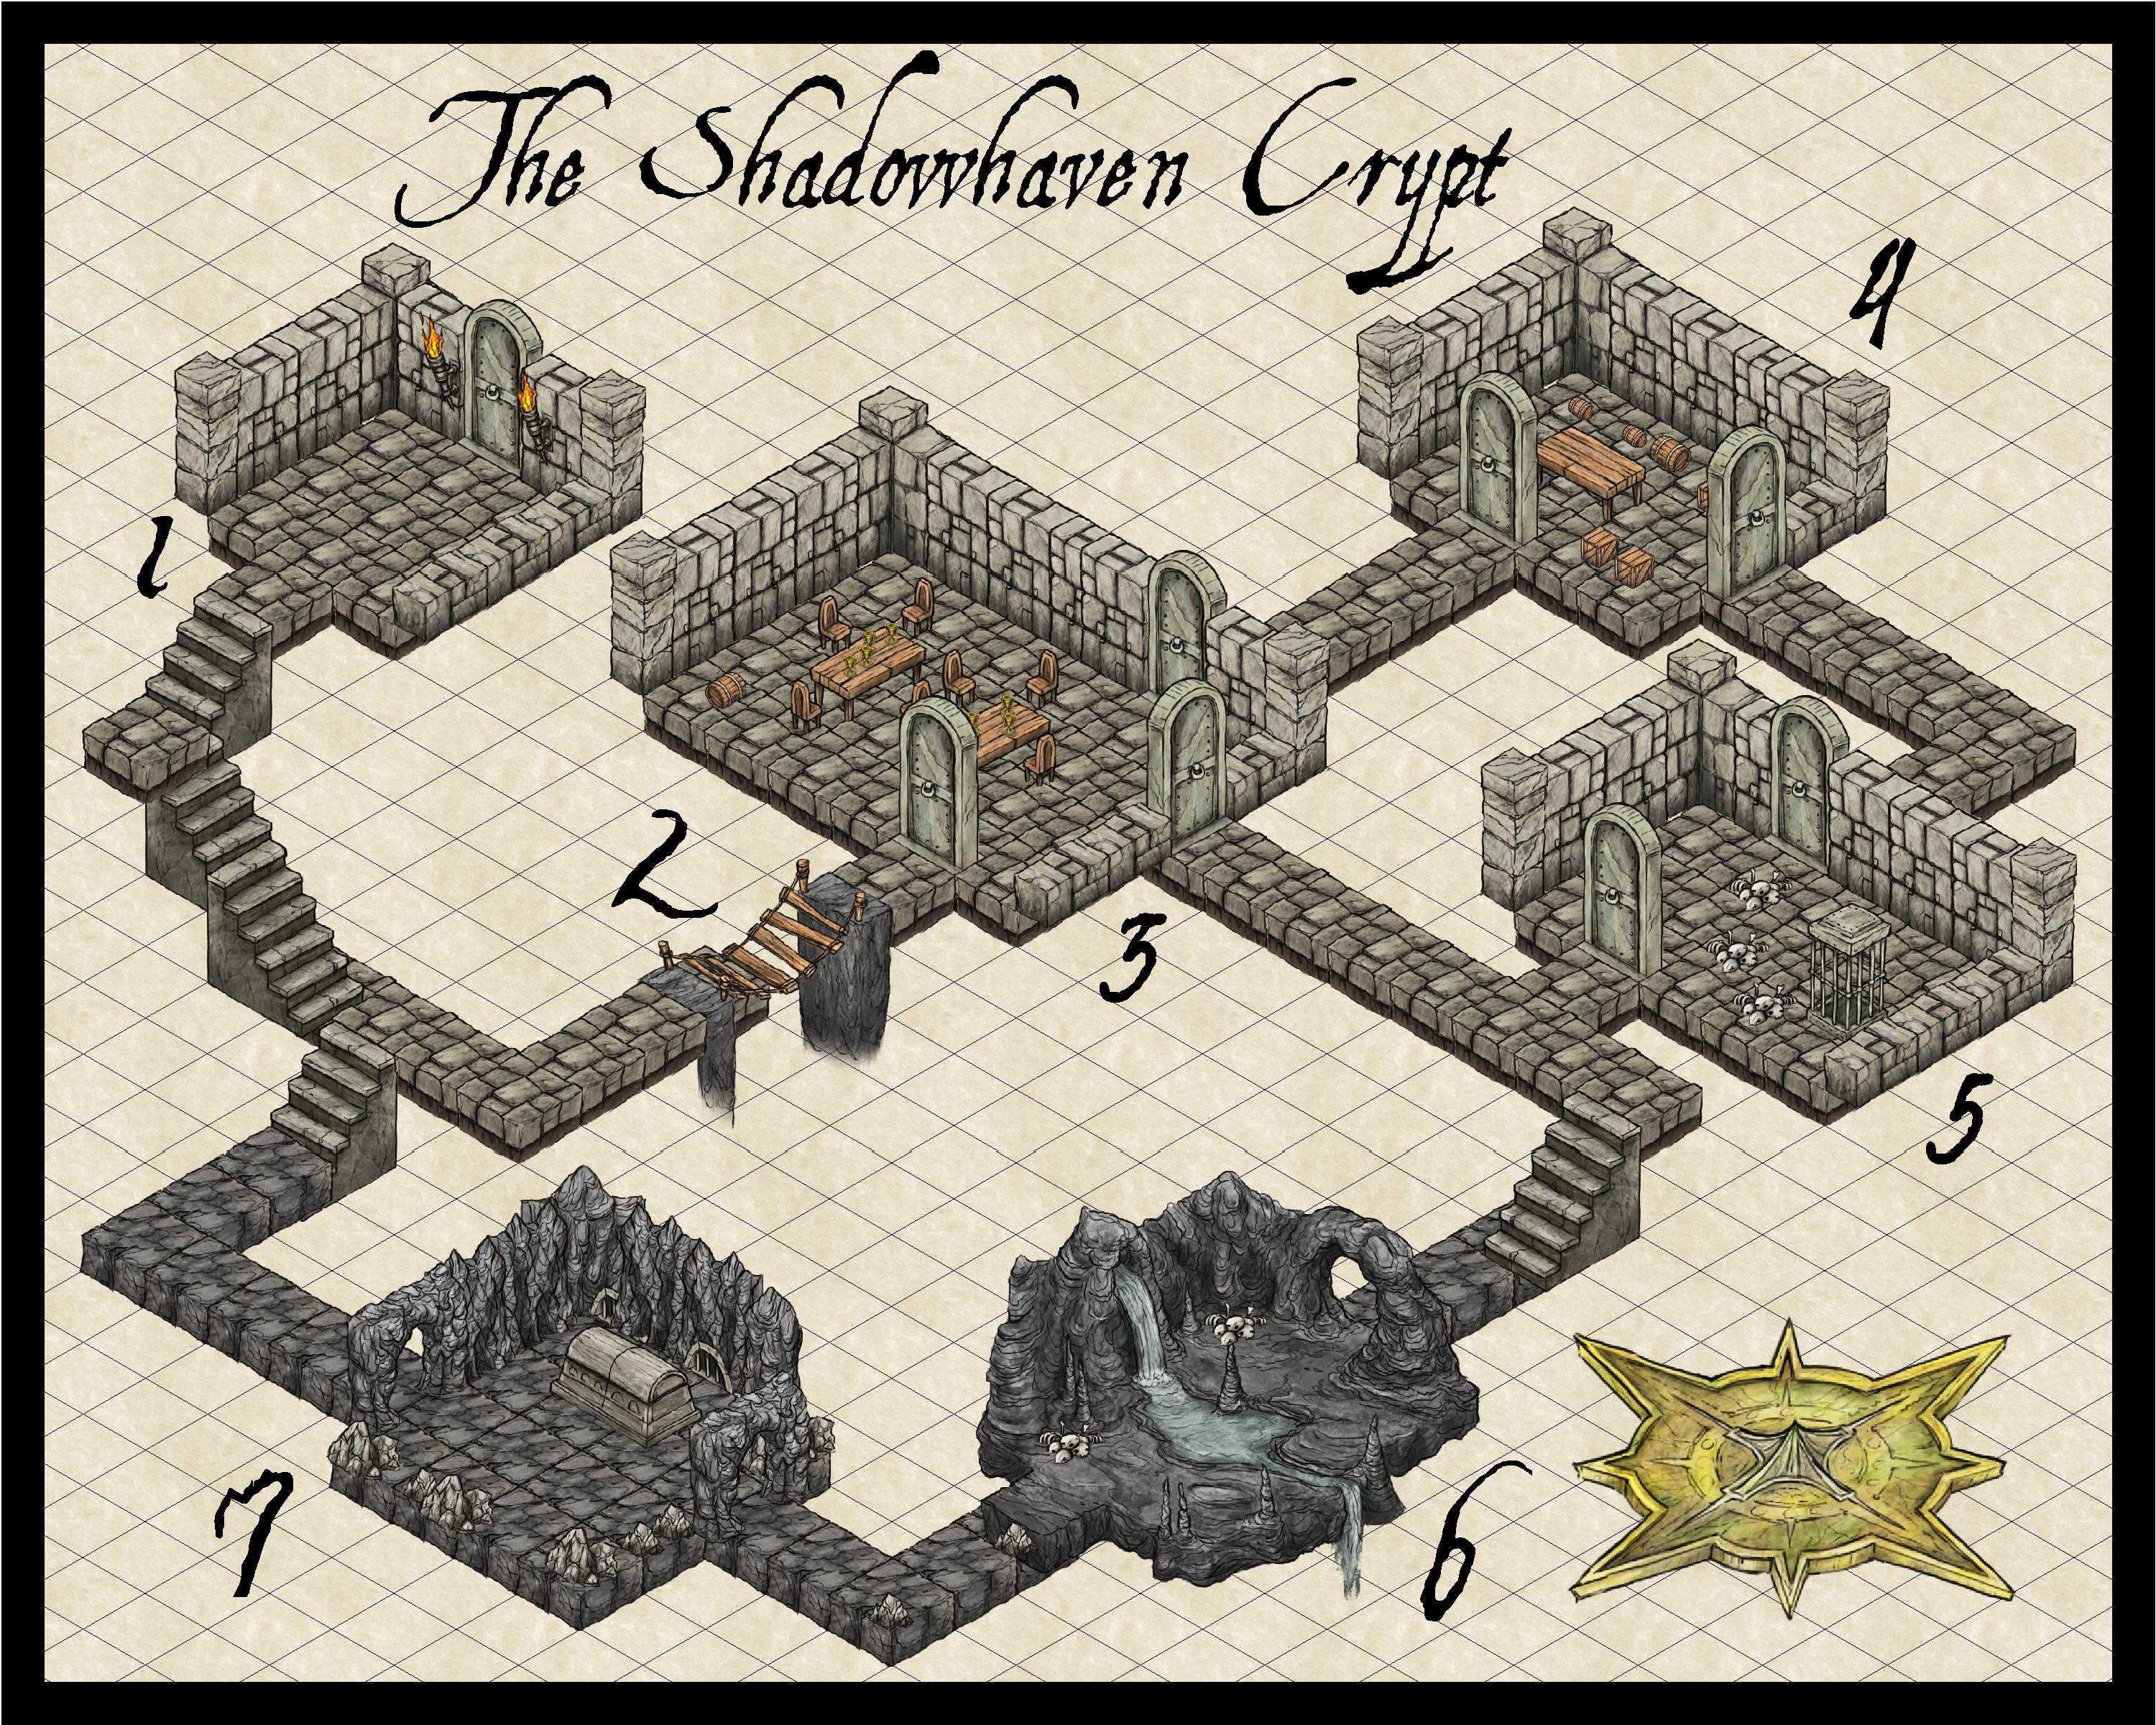
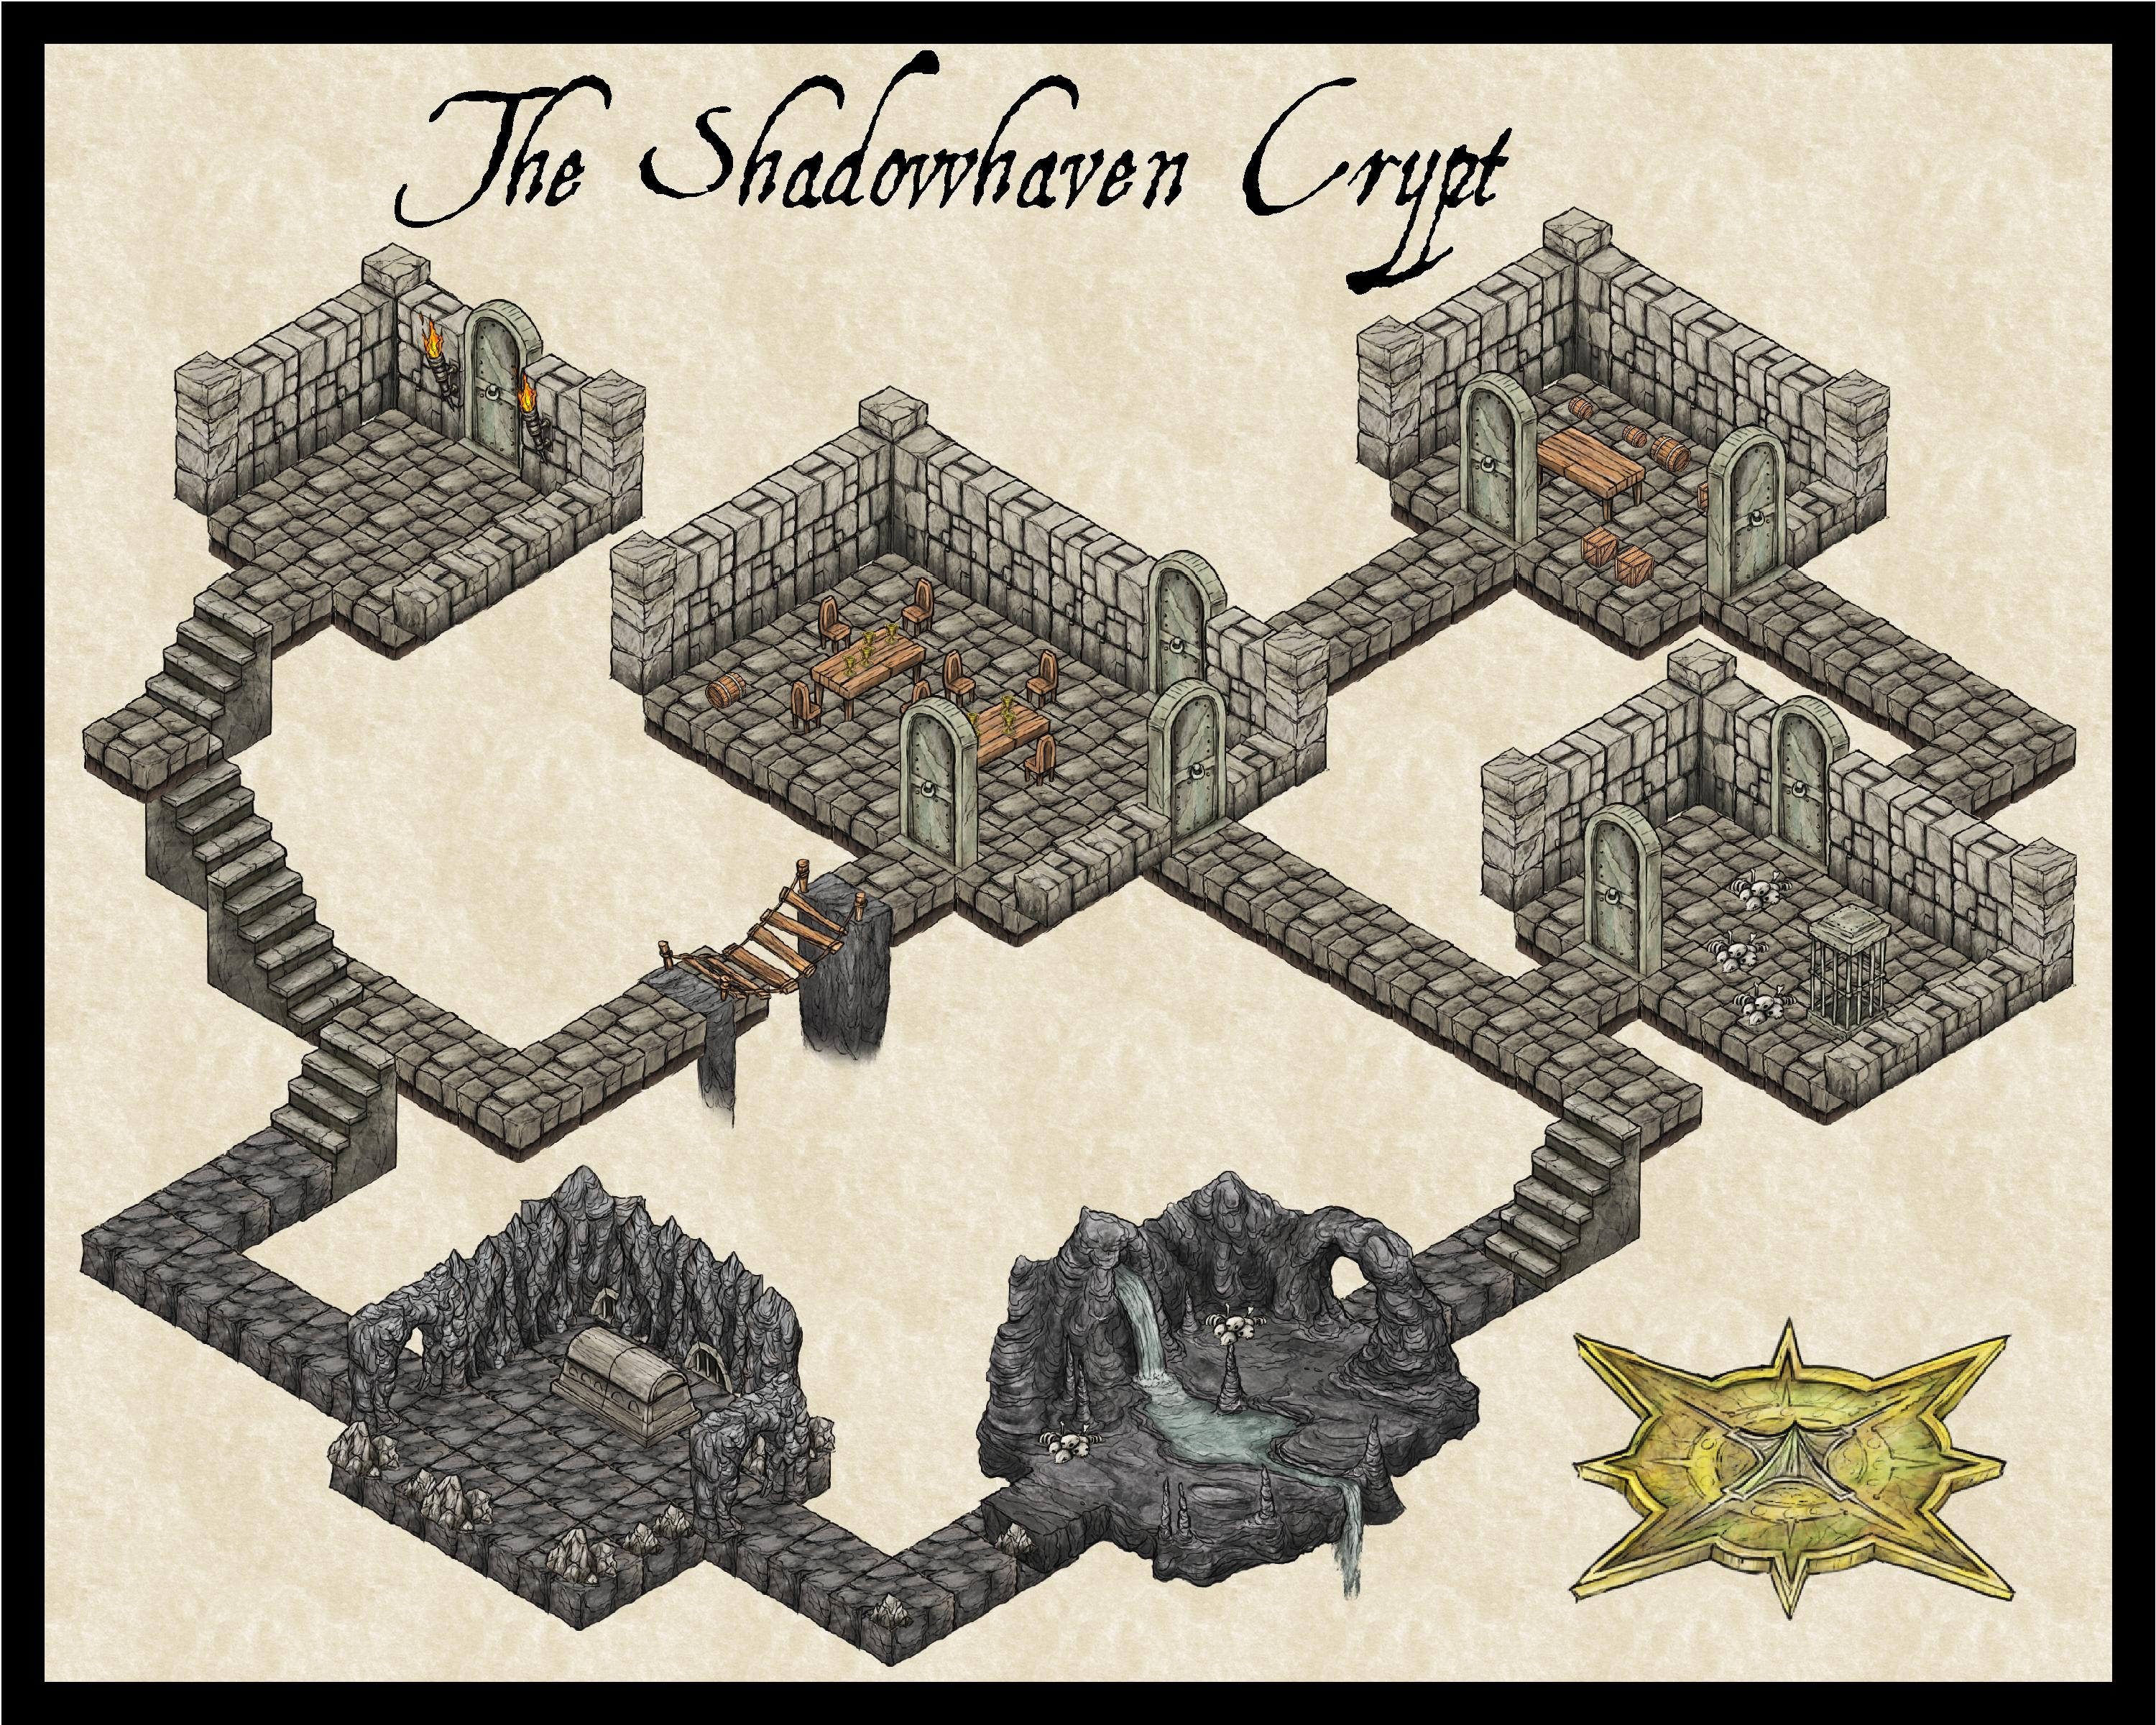
Entrance – 1
The entrance to the crypt is marked by a massive, banded iron door embossed with the name Shadowhaven. Its aged surface bears signs of wear, hinting at the passage of time and the mysteries that lie beyond. While the door appears quite old and the surrounding area is overgrown, it pulls open easily.
Upon opening the door, the party will immediately be attacked by 3 Skeletal Warriors, and 2 Skeletal Ghouls. If defeated, these mobs will yield the following: 20 silver pieces, 10 wool cloth, 2 delicious cave mold, a brocade cloak, & 3 moonberry juice.
Oddly, a lit torch a placed in a sconce on either side of the entrance. Opposite the door, the hall leads south to a staircase going down.
Rickety Swing Bridge – 2
A rickety swing bridge spans a 10-foot chasm here. It stretches precariously between 4 wooden stakes. As the party steps onto the bridge, they can hear the distant rush of water echoing from about 30 feet below. The bridge sways with each step, testing their balance and nerve as they carefully make their way across the gap. While this looks dangerous, the party has nothing to fear here unless they do anything crazy.
Dining Room – 3
While certainly an odd thing to be found within a crypt, this large room appears to be a dining room. 2 Restless Spirits are busily setting the table when the party arrives. Upon entering the room, both will crossly scold the party and inform them that “supper is not ready yet!”

If the party closes the door and does not enter the room, the spirits will go back to their work. Otherwise, they will attack. If defeated, the spirits will drop the following: 12 silver pieces, 6 copper pieces, 4 Silk Cloth, 1 Healing Potion, & a bludgeoning cudgel.
The Larder – 4
This room is empty save for an assortment of crates and barrels. The contents of most of these has long since rotted away. However, a thorough search turns up some old herbs and spices, along with oil & vinegar in earthenware containers.
Bone Chamber – 5
This small room is littered with bones and a cage toward the eastern edge of the room. If the part simply crosses through the room and exits via the door on the other side, nothing will happen. However, if the party disturbs any of the piles of bones or tampers with the cage, a chill wind will blow through the room and 3 Skeletal Raiders will form from the bones and attack.
If defeated, the following loot may be recovered from the room: 28 silver pieces, 8 pieces of Silk Cloth, & a broken mirror.
Natural Cavern – 6
This cave’s irregular walls bear the marks of untamed nature. Within this chamber, a natural spring emerges from a hole in the western wall, creating a small tranquil pool in the center of the room. The soothing sound of water echoes as it spills over a small waterfall and flows out through the eastern wall, lending an atmosphere of serenity amidst the crypt’s mysterious ambience.
While this cavern may seem calm, a nest of 4 Black Widow Hatchlings has made a nest in the opposite corner. Once any characters venture to the center of the room, they will scurry from their nest and attack! A thorough search of the nest will yield the following items: 1 Widow Venom Sac, 2 pieces of Spider’s Silk, and a pair of inscribed leather spaulders.
Burial Chamber – 7
This small, dimly lit cavern holds a stone sarcophagus at its heart. The stone surface is etched with intricate carvings and the room exudes an aura of reverence.
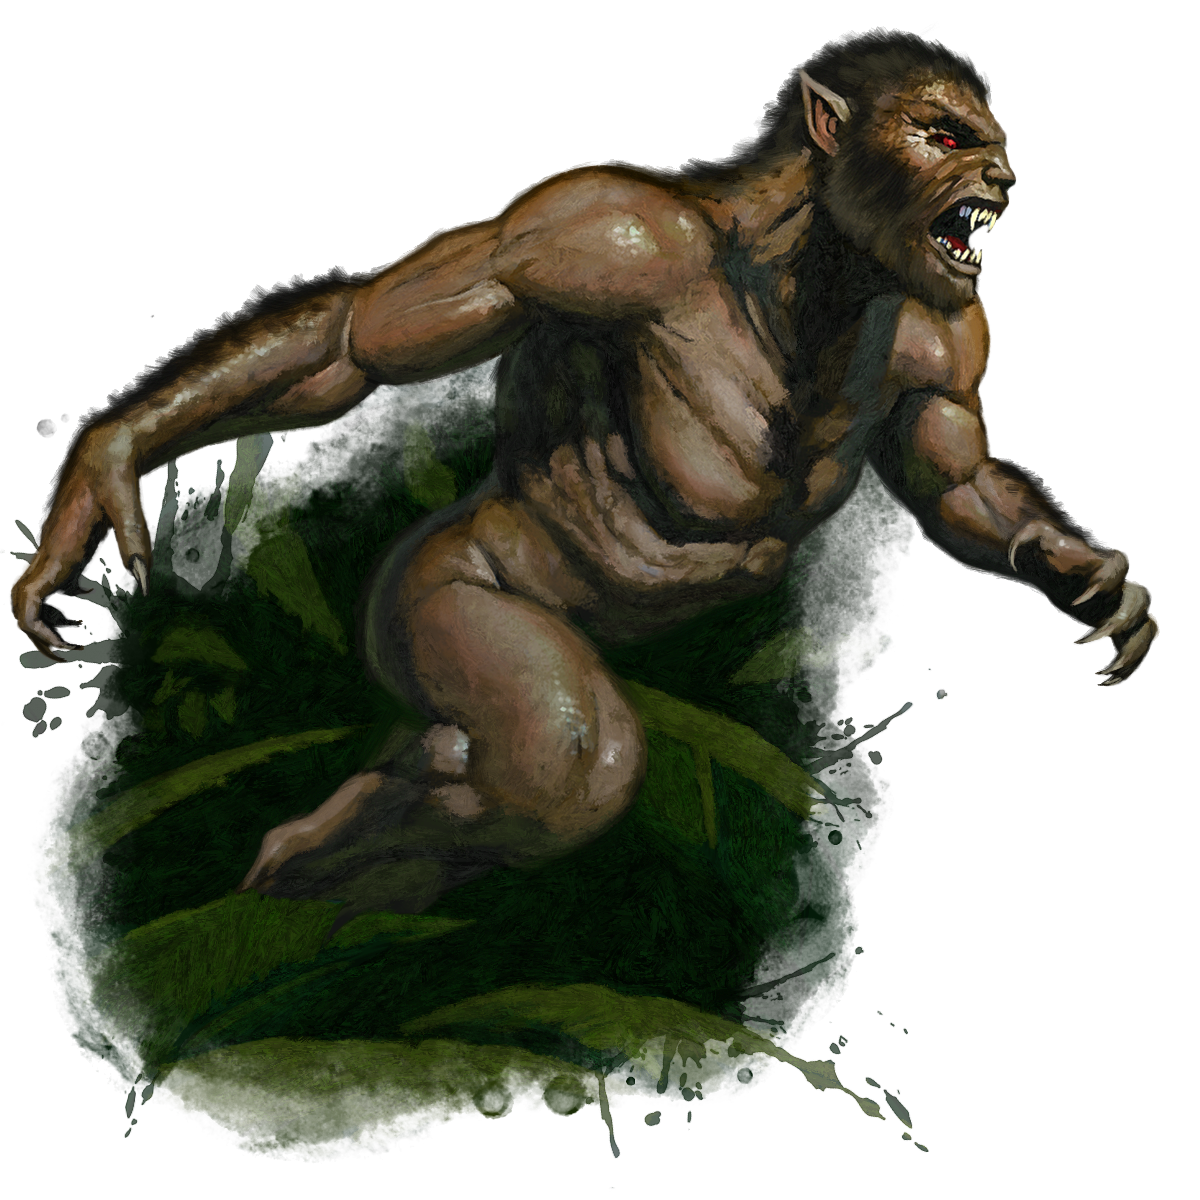
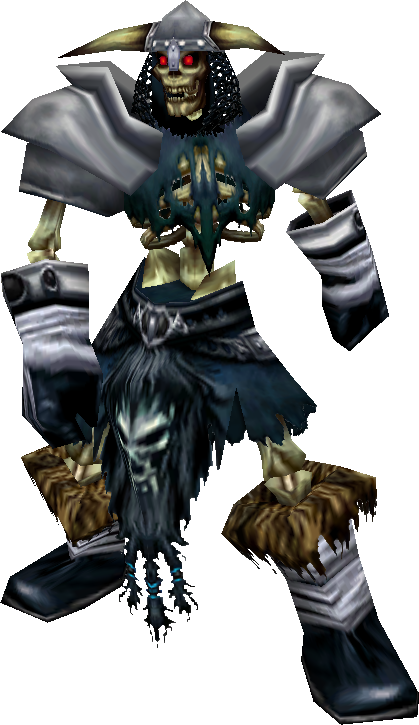
In death, Barnabas Shadowhaven has become a Rotted One. He will rise from his final rest to attack the party as soon as they enter the chamber. Joining in the attack will be d12 Plague Rats who scurry from the walls.
Following the fight, surviving party members will discover a small chest within the sarcophagus. Contained withing are papers indicating that Shadowhaven had dabbled in necromancy prior to his death. Apparently he fancied the idea of becoming a lich but must have met his end prior to mastering the art. Also located within the chest are 32 silver pieces, a moss agate, a jade, and a cobalt ring.
Final Thoughts
I’ve kicked around the idea of a Warcraft themed campaign from time to time. My players tend to be folks with very little gaming experience (tabletop or otherwise), so it would allow me with a lore-rich setting to run a West Marches style campaign. Love it or hate it, I know I could do a session zero with a group of friends and play them the original World of Warcraft cinematic trailer to generate a great deal of excitement.
Thanks for stopping by. What experience if any have you had with World of Warcraft? Have you ever dabbled with the setting along with your ttrpgs? Have you played Warcraft: The Roleplaying Game or World of Warcraft: The Roleplaying Game. I’d be curious to hear about either, as they each were released while I was away from the hobby.
Over the years I’ve stumbled across some folks who have put quite a bit of work into some Warcraft resources for 5e. I’m thinking of going in another direction but if this sort of thing interests you, check out:
That’s all for this week. Thanks again & have a great week. If you’d like to see some other maps with plot hooks, here you go.
World of Warcraft Copyright Notice
©2004 Blizzard Entertainment, Inc. All rights reserved. World of Warcraft, Warcraft and Blizzard Entertainment are trademarks or registered trademarks of Blizzard Entertainment, Inc. in the U.S. and/or other countries.
Blizzard Entertainment Media License
Blizzard Entertainment® hereby grants you a personal, non-exclusive, non-transferable and non- assignable license to use and display, for home, noncommercial and personal use only, one copy of any material and/or software that you may download from this site, including, but not limited to, any files, codes, audio or images incorporated in or generated by the software (collectively the “Downloaded Content”) provided, however, that you must include or maintain all copyright and other notices contained or associated with such Downloaded Content.
You acknowledge and agree that you may not sublicense, assign or otherwise transfer this license or the Downloaded Content and that no title to the Downloaded Content has been or will be transferred to you from Blizzard Entertainment® or anyone else. You also agree that you will not alter, disassemble, decompile, reverse engineer or otherwise modify the Downloaded Content.
Also, we reserve the right to revoke this limited use license at any time, for any reason, and at the sole discretion of Blizzard Entertainment®. You may not use our materials on sites that feature defamatory pornographic, or inflammatory content, including, but not limited to, hacks and cheats for any of our games or any other content that Blizzard Entertainment® find objectionable or unlawful.
END OF LICENSE