-
Have You Played Any Solo TTRPGs?
Over the past year or so, have been seeing people mention solo role-playing game experiences. Up until very recently I have ignored the topic entirely. As someone who was born an only child and is a bit of an introvert by nature, TTRPGs have always been the one part of my life where I have specifically craved social interaction.
To be honest, I have not even experimented with virtual tabletop gaming. It just doesn’t seem appealing to me. I think VTTs are wonderful. I am sure they have brought many more people to the hobby and provided access to games for many who would not be able to partake. It is just that to me, gaming is all about having a bunch of people over, sitting down and rolling dice.
Even my decision to write this blog was largely out of the desire to interact with people and share. The process of reading someone’s comments or posting my own thoughts on someone else’s post is enjoyable to me. It is just very pleasant to interact with a community like this.
All of that aside, I have been unable to escape the topic of solo games. This post is my white flag of surrender. I am going to dip a toe in and see what it is all about.
My History With “Solo Games”
I have written previously about how I came to discover role-playing games. While I have never actually played a solo TTRPG, I guess you could say that my first experience with some type of solo game would have been with the Encyclopedia Brown books by Donald J. Sobol.
These children’s mysteries focused on a boy detective in a contemporary setting, solving local crimes. Hints would be provided throughout the book and then the reader would attempt to solve the mystery by the end of the book. These were a bit juvenile for me by the time I discovered them, but the concept was very interesting.
My first genre specific solo game book came in 1982 with Dungeon of Dread by Rose Estes. Released by TSR Hobbies, this was part of their new “Endless Quest” line of paperbacks. To my recollection, the Endless Quest line was preceded by and similar to the Choose Your Own Adventure books by Bantam Books.
Written in the second person, these stories followed a pattern of providing the reader with options as to how to continue after a number of pages. Each option would direct the reader to flip to a specific page within the book, where the story would continue. This process would continue until you ultimately arrive a one of numerous endings to the story.
The following year, while browsing a downtown bookstore, I landed a copy of The Warlock of Firetop Mountain by Steve Jackson and Ian Livingstone. This first book in the famed “Fighting Fantasy” series, this built on the “choose a path” idea by adding actual die rolls, which further simulated playing a TTRPG. From there I recall exploring the Steve Jackson’s Sorcery! series, which built on the Fighting Fantasy series by allowing players to take on the role of either warrior or a wizard.
By the time I was done with these, I was in my mid-teens and my interest in these types of books was waning. It was another 10 years or so before the grind of real life pulled me away from RPGs altogether but in terms of any type of solo gameplay, that was it for me.
Current State of Things
It has been about 10 years now since I have made my way back to the TTRPG hobby. Since that time, I have tinkered with a number of new systems, as well as more old ones than I would have expected. As I mentioned previously, I have been aware of actual solo games being “a thing” for a few years now. However, in the past couple months I have really started to take the idea seriously.
In my ignorance I had assumed that these solo games would not amount to much more than more of what I had experienced in the 80s. However, with the more I read, it becomes clear that it is possible to weave creative tales with these systems. I have decided to investigate a bit deeper and see what I can learn.
I am most likely to start with Ironsworn by Shawn Tomkin. It seems to be the title that crosses my path more frequently than any other. In addition, the few interactions I have had with people who have played the system have been very positive. However, the purpose of this post was to reach out to the folks I interact with the most on here and see what you might be able to suggest.
Have you played any solo TTRPGs? If so, which ones and what were your experiences? Do you have any suggestions to share with someone who is just starting to explore this part of the hobby? I am really starting from square one here, so I would appreciate any input that you might be able to provide.
That is all for now. I hope you have a great week. Good gaming!
-
Consider a Who’s Who for Your Campaign
Whether we are running published adventures or using a world of our own creation, I suspect most gamemasters want to feel that their players are invested in the game. There is nothing quite as nice as wrapping up a session and listening to players discussing how they can’t wait to get together next week. Ever have a player tell you that they were daydreaming about the game while stuck in a meeting or commuting to work? It’s the best.
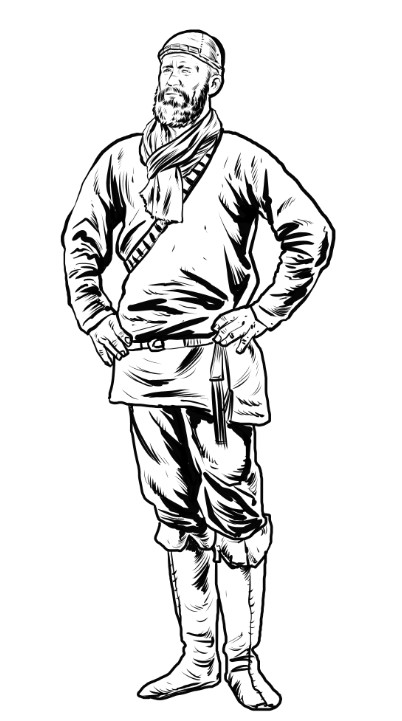
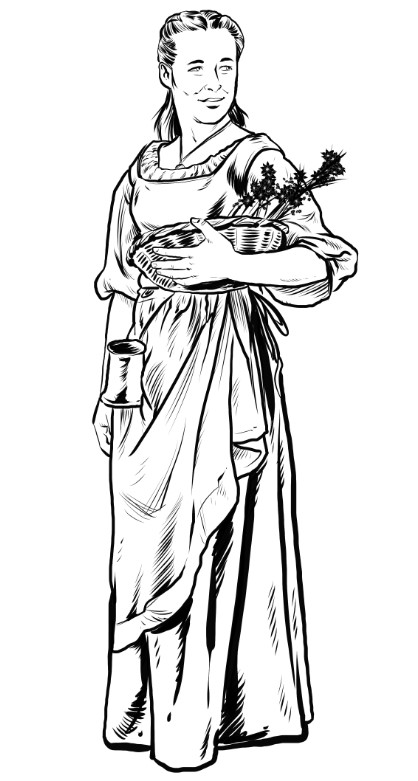
Does your party know these people? Publisher’s Choice Quality Stock Art @ Rick Hershey / Fat Goblin Games. http://www.fatgoblingames.com I believe that populating your game with interesting and believable characters is key to hooking your players. That’s not to say that every character in your world needs to have a dossier complete with birthdate, star chart, and defined goals. Sometimes Wilbur the fish monger, is simply Wilbur the fish monger. Having said that, the more fleshed out your NPCs appear to be, the easier it will be for your players to escape into your imaginary world.
Who’s Who?
I believe that creating a “Who’s Who” for your campaign is a great tool for building rich NPCs that your players will want to engage with. I’ve been doing this for over 40 years and the practice has served me well. The process is simple enough and until recently I just assumed that everyone did it.
While I’m doing my prep for each session, I just keep a notebook or Word document open. Whenever I come to an NPC who the players are likely to meet, I jot down their name and maybe a line or two. If you want to go crazy, you can do this for places as well.
If you’re someone who struggles with names, there are countless name generators floating around online. Just plug in what you’re looking for and you’ll have something in a pinch.
By adding no more than 10 minutes to my prep time, my players no longer meet the dockmaster, city guard, and innkeeper. Instead, armed with this information they encounter Buckeye Crabcracker the halfling wharf-keeper, Sgt. Atheld of the city watch, & Suleiman the Kosantian owner of the Blushing Siren Inn.
Coming up with names for NPCs is pretty basic but it’s only the first step in creating a Who’s Who for your campaign. The next part is up to the players. I visit this after every few sessions, at the end of an arc, or whenever it seems convenient.
Our game nights usually start with players arriving one by one. It can be a bit chaotic. Everyone is usually chit-chatting and I need to get them to switch gears and focus on the game. During this time I announce that we’re going to update the Who’s Who.
I go around the table and ask all of the players who their characters have met during the sessions since we last updated the list. At this point everyone chimes in with the names of NPCs that they remember, as well as what they remember about them. I document all of this as they do, including only what the players themselves remember. The whole process takes no more than 10 minutes but it serves to both center the players on the game, as well as offer an interactive recap of recent sessions.
Is this fellow simply the “ship captain” or is he Ebeneezer Bellows, captain of the Tiburon? Publisher’s Choice Quality Stock Art @ Rick Hershey / Fat Goblin Games. http://www.fatgoblingames.com I will usually reward the player who contributes the most with some small boon. For OSR games this might be an XP bonus, 5e players might get Inspiration, Savage Worlds players get a benny, and so on. I find that this really helps to get everyone to participate.
After every session, I send the revised document out to all players. However, I only share the version with the names of people and places that the group remembered. If the group as a whole missed any NPCs, those do not get passed along.
Over the course of time, I find that having access to this reference document really engages my players. When your cities feel like they are populated with living and breathing people, it increases the chances that your players will interact with them.
It’s satisfying to see the group break out with the Who’s Who as they are heading back to town following an adventure. Often each player will be flipping through the pages, deciding who they want to go see first. Maybe they know the perfect buyer for a piece of loot or perhaps they’ll seek out an old contact for important information.
On the flipside, the document acts as a tool for me during session prep. I can briefly scan through and pick different NPCs to drop into different scenes. Do I need someone to pass along a juicy tip? That sounds like the perfect job for young Jacob, who the party saved on their first adventure. Do I need a victim for the big bad evil guy? Hearing that Fletcher Orlem was slain while out hunting will ratchet up the tension more than some nameless villager.
Since we update entries for NPCs after every time the players mention them, they really start to take on a life of their own. Over the years, some of my most mundane NPCs (like Wilbur the fish monger) have ended up playing important roles in my games.
Finally, the Who’s Who gives me a nice souvenir from each campaign. Whether we run for years or a handful of sessions, having this document gives me something fun to look back on. Sometimes names and sub-plots get recycled and that’s all part of the fun.
Recap
That’s it for this week. Thank you for stopping by. If you do something akin to this or even something more elaborate, please drop a note below and let me know. Have a great week!
-
The Mine at Mt. Morris
The hills making up the Archian border with Caledos are pocked with dozens of abandoned mines. These leave a lasting reminder of the rush for silver in the years prior to the rise of the Graun Empire.
Without drawing much attention from local officials, a nebulous consortium of investors has been purchasing old dig sights along the coastal region. The mine at Mt. Morris was one such purchase. About 12 months ago, a group of ten men re-opened the dig, in what locals were sure was folly.
After spending a couple weeks repairing the base camp, the team resumed the dig. None but the foreman had any previous mining experience. Most of the “miners” consisted of farm hands or former members of the stevedores’ guild. None were strangers to hard work, but they were a motley group to be certain. However, the strangers who came and offered them the job assured that they would be paid handsomely.
The past year had been difficult. The team had failed to find any substantial amount of ore and they often assumed that their work would soon come to an end. Despite this, the paymaster and his retinue of guards would appear every month and the dig continued.
Recent Events
Seven days ago, a strange thing happened, breaking the monotony for the miners. While digging in the eastern tunnel that morning, the team struck what appeared to be a rock wall. Further investigation confirmed that they had indeed stumbled upon a bit of masonry crafted by human (or demi-human) hands.
Foreman Fugue seemed particularly interested in this development and ordered that there always be three men digging until such a time as the wall was breached. Unfortunately, Fugue himself explained that he was feeling ill and retired to his office in the storehouse.
Later that evening, just before dusk, the wall gave way and opened into a chamber beyond. The crew initially thought to go fetch the foreman. However, they knew he was not feeling well. There was no telling what might lie beyond the wall, and they reasoned that they might find something of value. Gathering up torches, the trio decided to enter the chamber alone. None of the miners were heard from ever again.
Foreman Fugue
Bartholomew Fugue is a wiry little weasel of a fellow. Just shy of 50 years old he appears to be more of a bookworm than a miner. That said, in his younger days he did indeed work during the great silver rush.
Two years ago, Fugue was approached by a group who held certain interests in the region. They were seeking the diary of Elthane Vanator, a necromancer and occultist of some renown. Apparently something about this diary made it incredibly valuable and they wanted it found.
The belief was that the book was hidden away in Vanator’s old lair, which lay buried under the Archian hills, somewhere nearby.
Thus is was that Fugue was assigned a crew of nine and set about digging in the old silver mine. He had been sworn to secrecy and warned that his life would be forfeit if his true purpose were ever discovered.
Fugue was no fool. Prior to being stationed at the mine, he did his research. He took with him a number of books on the occult, as well as what bits of information he could gather regarding Elthane Vanator. From these readings he gathered that the necromancer, having been hanged some 100 years earlier, was known to employ the living dead as guardians over his dwellings.
What Happened?
Foreman Fugue had almost forgotten his original job of finding the diary. His employers had been paying him well and he had been skimming off the meager bits of silver that his miners had been finding.
When word came out of the mine that the diggers had found a wall, his blood ran cold. Knowing that Vanator’s lair may hold undead guardians, the foreman feigned illness and excused himself from the proceedings. He briefly considered warning the others but thought better of it. He had been warned not to disclose the true purpose of the mine, and this was not the time to start taking chances. Stopping briefly at the stables, he left extra water for his horse and placed a padlock on the stall. Then he proceeded to his office and locked himself away.
Sure enough, later that evening the sound of blood curdling screams could be heard throughout the camp. From he vantage point in the office, he spied a pack of cadaverous looking creatures burst forth from the mine entrance. With bestial swiftness the animated corpses fanned out and swarmed the camp. A terrible stench of carrion filled the air, as Fugue steadied the barricade in front of his door.
More screams were heard in the hours to follow. The foreman sat watching in terror, too scared to make so much as a sound. At one point there had been pawing and scratching at his door, but his defenses held. Not long after that he viewed the shapes of the undead retreating back into the cave.
Too craven to risk leaving his sanctuary, he has been holed up in the storehouse for the past week. The days have been quiet, though at night he has heard sniffing and panting outside his walls. The paymaster is due today, along with his armed guards. Once they arrive he plans to let the guards deal with the guardians and then hopes to take some credit for finding the diary that surely must be within the discovered vault.
The Mine at Mt. Morris
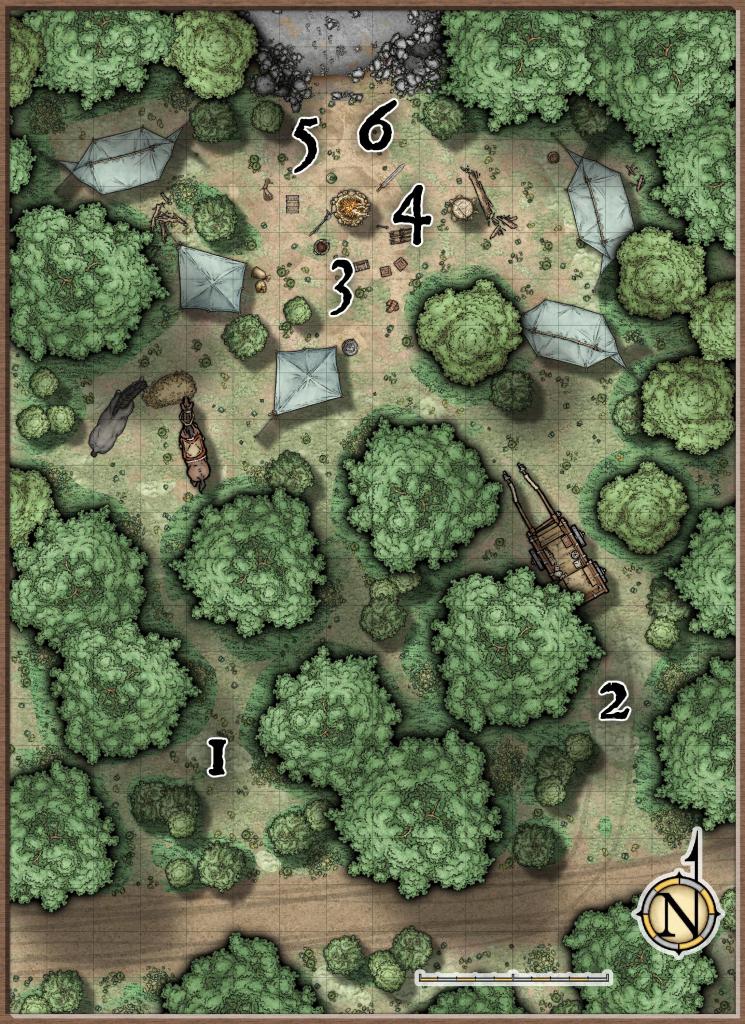
How you get your party to the camp is entirely up to you. One easy method would be to have a relative or friend from a nearby town hire them to deliver something to one of the miners. I happened to know that my group was filled with inquisitive types, so I allowed them to stumble onto the camp randomly, as they were traveling across the countryside.
1 Bunkhouse
This L-shaped building is the bunkhouse that served as the living quarters for the miners. Characters will recognize the stench of rotting flesh as they get near. The back doors are slightly ajar, and the front doors are unlocked.
The remains of two of the miners may be found here. It is a grisly sight and will be clear that something has been eating the corpses and that they have been dead for the better part of a week.
There is nothing of great value in the room, though the party might turn up a decent bag of copper and silver coins if the absolutely turn the place upside down and go through all of the miners’ belongings.
The most curious thing in the whole room is to be found in a footlocker under the northernmost bed (Foreman Fugue’s). Tucked away under some handkerchiefs and small clothes will be found a book and some hastily scribbled notes. The book is titled A Treatise on Reanimated Beings and seems to be a bit of a bestiary imparting knowledge on minor undead creatures. Reading through the notes will indicate that someone was expecting to encounter undead guardians.
2 Mess Hall
This is where the miners prepared their meals and relaxed when they were not working. As with the other structures, this was built back when the mine was first created and it’s clear that it has been serving considerably fewer people.
As with the bunkhouse there are two sets of remains here as well. Both seem to have met the same fate as their fellows.
There is not much of value to be found here, though the party could stock up on the equivalent of iron rations, wine, and ale as they wish.
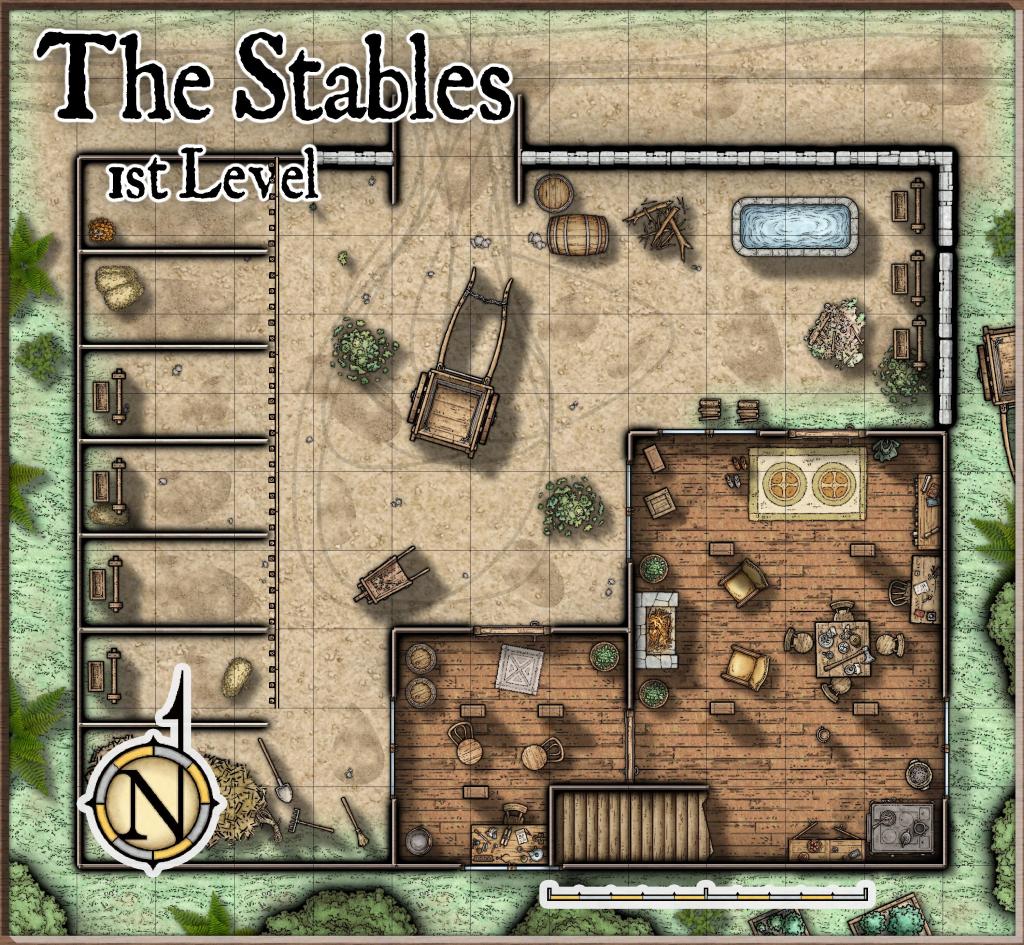
3 Stables
The stables area makes for another unsettling scene. The remains of one miner can be found in the stable yard. Two horses appear to have met a similar fate in their stalls.
Oddly, one living horse remains. Scratches and claw marks mar the door to the stall. A locked padlock seems to have saved the poor creature, but it is quite dehydrated and appears to be starving. Close inspection will show that someone left extra water in the stall for the beast, but the containers are bone dry.
To the west of this building is a great deal of debris, earth, and rocks that have been removed from the mine.
4 Storehouse
The front and rear doors to this building are closed and locked. There are windows on each facing of the building, though all appear to be barricaded with an assortment of boxes and crates.
On a roll of a 1 or 2 on a d6, characters will hear movement from within the building as they approach.
Entering via any of the doors may be obtained through a regular open doors check. Entering via any of the windows will simply be a matter of breaking the glass and pushing the haphazard barricade aside.
Characters will be able to tell that this building is used to store all of the equipment for the mine. All manner of digging equipment and supplies may be found here.
The smaller room in the northeastern corner of the building is where Foreman Fugue has locked himself away, cowering in fear. He will not call out to the party if he hears them enter the building. Upon entering the office area, characters will find Fugue in the fetal position and he will immediately “surrender” to the party and beg them not to hurt him.
While he is terrified, this is partly an act. The foreman does not want to reveal what is going on and has no explanation for why he has stayed locked up in the office for days. If questioned, he will lie and claim that some creatures came out of the woods two days ago and he barely managed to escape with his life. If asked about the horse in the stables or the book and notes in the footlocker, he will lie poorly and show signs of great discomfort.
If threatened with physical harm, Fugue will break down crying and attempt to save himself. Bit by bit he will start to reveal what actually happened. However, he will only reveal what he judges to be enough to save his wretched hide. If the party does press him to the point of revealing anything about his employer, he will strive to make it seem that he was an unwilling participant, at the risk of death. He will not mention that the paymaster is due to arrive today unless his life is absolutely on the line.
5 Mine Entrance
The corpse of one of the unfortunate miners lays here.
6 Cave Intersection
Here the tunnel branches off in 4 directions. The northern path only goes a short distance and yet another dead miner can be found here.
7 Western Tunnel
3 nights ago, a green slime made its way into the mine complex and has taken up residence along the roof of this tunnel. If party members are not paying attention and come to the end of this tunnel it will drop on them.
8 Altar Room
This is the room where the mine intersected with the previous underground complex. As the party moves in this direction the will be assailed by the smell of carrion. Four pillars support the ceiling. A pool of 2’ deep murky water dominates the center of the room. On the northern wall is a stone altar bearing various ritualistic items as well as a book written in spidery script (close inspection will show this to be the diary of Elthane Vanator). A similar altar on the southern wall is adorned by a bronze statue of a great horned beast.
If the players enter this room, give them a description and then within 1 round, they will hear a blood curdling shriek, followed by the flapping of leathery feet as they are attacked by 3 ghouls and a ghast from the hallway to the east.
Following their initial foray killing the miners, this pack of undead returned to the tunnels out of familiarity. While they have been venturing out at night, something gets dragging them back to the tunnels by the light of day. Hearing the party, they come forward to feed.
9 Ceremonial Room
This room is empty, save for a 5-pointed star painted on the floor and an extinguished candle placed in each corner.
10 Crypt
There are 8 sarcophagi in this room. Four of these are open and empty. The remaining four are closed and hold inanimate skeletons.
There is a small stone altar along the western wall. Besides it rests an open chest filled with gold and any treasures that would be appropriate for your game.
11 Cave-In
The northern wall of the passage has collapsed here. It appears that the passageway originally continued, however, clearing the cave-in would take multiple days.
Remaining Questions
If the party have explored the mine and located the diary, there are still a number of questions that will remain.
- What is the purpose of the shadowy consortium that has been trying to find the diary?
- What dark knowledge does the diary contain to make it worth going to all of this effort?
- What will happen once the paymaster arrives? He always comes with guards, and they will surely want the diary if the party is still around. They also won’t want any witnesses!
- Finally, what lies beyond the collapse at area #11? Is there a whole complex to explore with amazing treasures to be found?
Final Notes
That is all for now. I hope you have enjoyed yourself and thank you for reading this far. If you have any thoughts as to something to add or where we might take things from here, please leave a comment below. If you’d like to browse through all of my other maps with plot hooks, you can find them all collected here. Have a great week.
-
The Lost Children of Tollengard
Children had started disappearing from the frigid Borean city of Tollengard since the season’s first snowfall. By the turn of the new year, a total of 6 had gone missing. Each had vanished, seemingly without a trace.
In the beginning, this would simply occur overnight, with cribs being found empty in the light of the morning. However, as the winter wore on, the final pair were apparently snatched when their distraught mothers had simply turned their backs.
No direct ties could be found between the victims’ families and no apparent clues were left behind at the scenes of any of the abductions. There were no tracks nor signs of forced entry. The stricken families seemed to come from all walks of life.
The effect on the morale of the city was notable. Citizens of Tollengard were typically a stoic lot, who suffered through the long winters without complaint. However, the passions rose in even these long-suffering folk as they demanded answers as to what had happened to their children.
The lord mayor, Pavel Ivanov, was feeling the heat. People demanded answers; demanded that he act. Even with doubling the city watch, it was feared that citizens would riot or break down into mobs seeking vigilante justice.
Many speculated that a wood witch had taken up residence on the outskirts of the town and was luring the children away. Others claimed that some ghostly wolf would come and snap the children up in its terrible maw. The theories were numerous, and some made little sense. People simply wanted their children back; they wanted justice.
This was the state of things in Tollengard on one sunny winter morning, when things changed forever. Parishioners arrived at the Abbey of Ladina as they did daily. They came to beseech the goddess, patron of the city, for help in returning their children. On this day though, something was not right.
Normally the three monks who tended the church were up an around, welcoming citizens as they came to pray. However, no torches were lit, and no incense burned in the braziers. It was not like the pious brothers to shirk their duties. Clearly something was wrong.
Concerned citizens made their way downstairs to the rectory, to see if perhaps a member of the order had fallen ill. Accessing the monks’ living quarters via the northern staircase, they were greeted by a queer sight.
The foyer at the foot of the stairs was in a state of disarray. In numbers of spots the stone floor was cracked and broken, exposing the earth underneath. It looked as if some great plow had churned through the masonry itself, yet what could have caused this?
The floor of the mess hall to the east was flooded with murky water. This was found later to also be the case with the storeroom further to the south.
There was no sign of the brothers in the sleeping quarters. In fact, all three of their beds were still made. It appeared to the crowd investigating the rectory that all of their modest belongings were also in place.
Coming at last to the sanctuary in the westernmost room of the rectory, the citizens beheld a sight that will vex Tollengard for the rest of its days. The statue there of Ladina appeared to have been desecrated. Some type of viscous green liquid had been splattered about it.
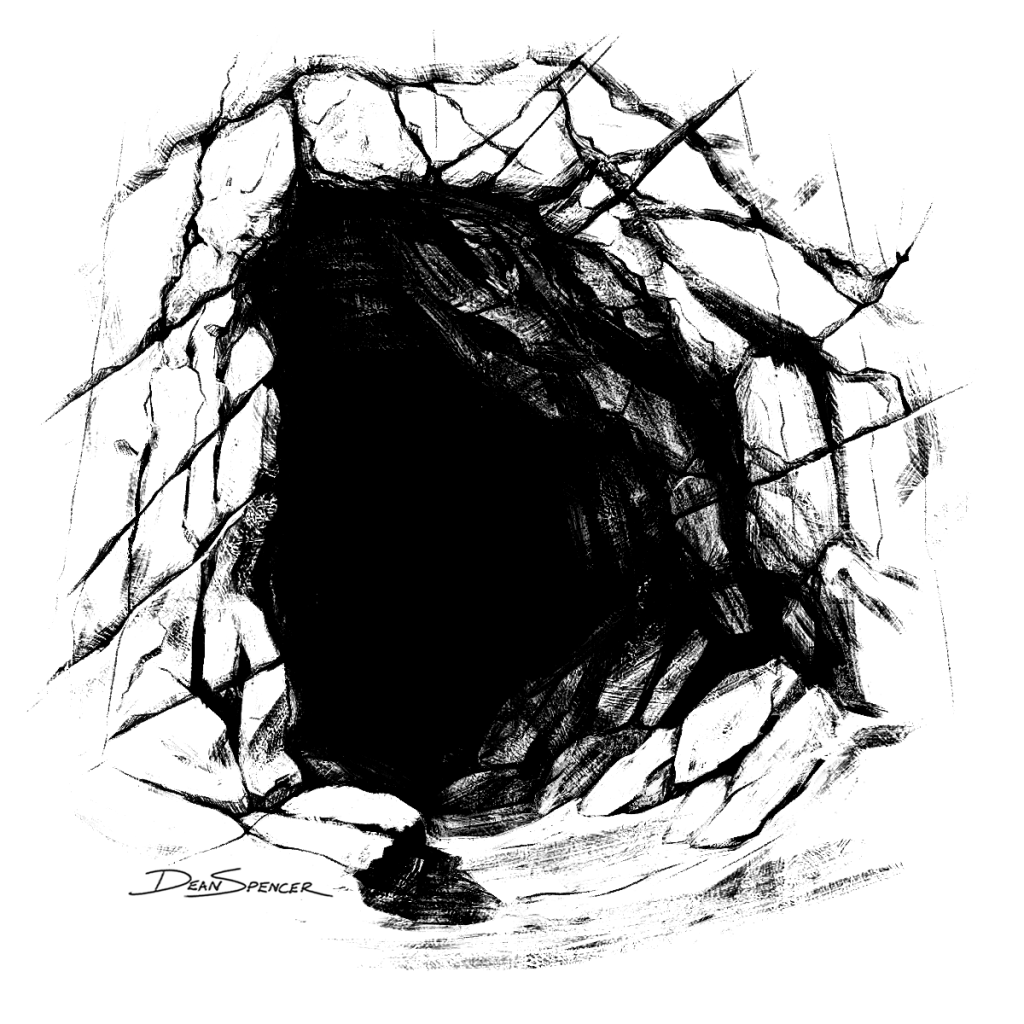
The mysterious sarcophagus. Artwork © 2015 Dean Spencer, used with permission. All rights reserved. Resting at the foot of the stature, a large stone sarcophagus lay partially open. All assembled knew that this was out of place here. The vessel was empty and obviously ancient, though none of the stone crafters in the city were able recognize its point of origin. On its lid was carved a macabre likeness of a human skeleton, lying under a thin shift.
As bizarre as all of these sights were, they paled in comparison to the final discovery of that chilly morning. For there, snuggled together on the floor of the abandoned rectory of Tollengard, were found the six missing children. All were in good health and appeared unmolested. Being of various ages, all too young to speak, there was no hope of receiving any answers from the babes.
Grateful parents recovered their sons and daughters. In the following days, townsfolk turned both the abbey and the rectory upside down, looking for something to explain the mysterious occurrences. Nothing else of note was ever found, and the missing monks of the Abbey of Ladina were never seen or heard from again.
Final Notes
Thank you so much for taking the time to stop and read this. I hope you find some spark here that you might find useful for a future game. Please drop me a note below if you have any thoughts or suggestions. If you’d like to browse through all of my other maps with plot hooks, you can find them all collected here. Have a great week!
-
The Emerald Eye of Aramjapur
My basic D&D group has been continuing their adventures in my re-imagining of The Isle of Dread. Having spent their initial couple of sessions striking out from the village of Taranoa, the party opted to leave the relative safety of the peninsula and explore the island.
Following a successful hunt with the tribe’s Hawk Clan, party members heard legends of a great treasure hidden in one of the volcanic mountains to the west. The story claimed that an ancient race had lived on the mountain and worshipped a one-eyed god in a cavern temple. Aramjapur, as the deity was called, was said to be all-knowing. His followers prayed to a giant statue of the cyclops featuring an eye cut from an emerald that was the size of a human head.
Traveling cautiously, it took the party 4 days to make their way to the twin volcanos to the west. While they managed to avoid combat, the trip was not without incident.
Just before dusk on the first day, the party spied an allosaurus in the swampland to the north. This caused them to veer to the west and hug the coast.
In the afternoon of the 2nd day, the party stumbled across their first “pylon”. In my previous post I mentioned that I planned to borrow liberally from the old Land of the Lost television series for this adventure. Both this metallic obelisk-shaped booth and the strange tracks (Sleestak) that were found in the area were directly inspired by the show.
On the 3rd day, the party entered the broken lands surrounding the volcanos. A small river meandered between the twin mountains and the party took advantage to replenish their water supply. It took the better part of a day but the party found signs along the northern slope that matched descriptions provided to the by members of the Taranoa Hawk Clan.
Crossing the shallow waterway, the party confirmed that they were on the right track when they identified the crude handholds carved into the rock, leading up the side of the mountain. While hair-raising at times, this allowed even the party’s magic-user to ascend with relative ease.
Natural shelves in the rock were present along the way up, allowing for convenient resting areas during the climb. On the first of these the party discovered the desiccated corpse of what appeared to be a previous adventurer. This was of no great surprise, as the Taranoa had mentioned meeting other outsiders before. However, this did worry the party that perhaps the Eye of Aramjapur had already been claimed by others.
Outfitted in old chainmail, the corpse consisted of not much more than a skeleton. Nothing of value was found on the poor soul, though the party did uncover a sealed scroll case and a discarded short sword. Within the scroll case was a piece of parchment bearing instructions to “beware the children of Aramjapur.”
After encountering 3 resting shelves and covering about a 1000’ climb, the party arrived at a much larger shelf with some vegetation and a fairly obvious cave entrance (map location #1).
Map Locations
#1 Shelf
Occurring roughly three quarters of the way up the side of the mountain, this is a fairly large outcropping. A few trees seem to thrive up here and a pair of billitri bushes grow alongside a cave opening. Large cobwebs adorn the trees.
#2 Cave Entrance
Characters entering the caves here will notice that the air is quite warm from volcanic activity. One passage leads to the northwest, while another leads more due north. To the east, another passage leads back outdoors to a smaller mountain shelf, also covered with large cobwebs.
#3 Spider Lair
A good deal of debris is piled up in this room. It also serves as the lair for 3 giant spiders who have taken up residence along the side of the mountain. The spiders will attack as soon as the party enters the cave. Digging through the debris will yield a silver dagger and an old coin purse containing 50 gp.
#4 Temple
The large cavern is the old temple to Aramjapur. The room is dimly lit from the lava pool, as well as a bit of sunlight coming in from both of the entrances to the east. Along the northern wall a 30’ tall bust of Aramjapur is ringed by the lava pool. True to the legend, the statue of the cyclops is adorned with a giant emerald eye. In the center of the room, a crude altar sits upon a raised pedestal. The room is otherwise empty, aside from rocks of various sizes and a number of patches of fungus growing about the room.
The lava pool radiates 5’ – 10’ out from the statue, depending on the location. Unless the party has the ability to fly, it appears that they will need to devise some way to safely cross the lava, if they wish to gain the emerald as a prize.
The party could gather sufficient debris from location #3 to build a makeshift ramp across the lava. However, this option would only be sturdy enough to support a character weighting 100 lbs. or less. The only other readily available option would be to cut down a tree outside of area #1 or #5. Assuming the party has a proper axe and goes this route, it will take them approximately 10 minutes to cut down a sufficient tree.
Whichever course of action the party chooses, it will be important to keep track of time. Any party members with applicable skills (or even any who specifically mention that they are looking) will notice numbers of dusty footprints coming and going from this central cavern. Roughly 15 minutes after the party first enters the cave (or earlier if they make a great deal of noise) the “Children of Aramjapur” will start coming to investigate (see location #6).
If a party member is able to access the statue, the Eye of Aramjapur may be pried loose in one round.
#5 Shelf
This tunnel leads out to another mountain shelf similar to the one to the south that the party entered from. The only thing of note out here are 3 stikricki bushes along the side of the cliff.
#6 Exit
3 of the “Children of Aramjapur” lounge in the shade outside of these 3 cavern entrances. These protohumans descended from those who lived on the twin volcanoes for centuries. Standing at roughly 7′ tall, these brutes have a heavy brow and somewhat resemble a cross between a man and an ape. Lacking any verbal language, they will defend their home and the cave system to their death. For my game, I used a reskinned troglodyte stat block (minus the special abilities) but you do what works for you.
Once they detect the party, they will attack immediately and make a great deal of noise. Their grunts and shrieks will soon draw others, so the party will have to act quickly. The “children” will focus their attacks on any party member visibly attempting to acquire the Eye of Aramjapur or approach the statue.
Wrap-Up
How things play out from here is largely up to you. This encounter takes the place of the “Caves of the Rock Baboons” from the original adventure, which seemed rather bland. I created the Emerald Eye of Aramjapur to give things a bit more depth.
There were 15 rock baboons listed in the original adventure and they have similar stats to the troglodytes that I modeled my children of Aramjapur after. Therefore, I surmised that there could be a settlement of roughly 15 of them inhabiting this part of the mountain.
For my game I turned it into a bit of a moral conundrum for my players. The Children of Aramjapur are not evil beings but they will keep coming and defending their home. 4 rounds after the initial 3 attacked and were dispatched, I sent in another 3. The waves of attackers made it increasingly difficult for the party to cross the lava and secure the emerald. At that point one of my players started to question whether this was a noble cause, while another worried that a whole village of the brutes might appear in the next wave. Ultimately my party ended up beating a hasty retreat back down the side of the mountain, leaving the Eye of Aramjapur safely behind.
That is all for now. Thank you for stopping by. If you’d like to browse through all of my other maps with plot hooks, you can find them all collected here. Please take a minute to say hello in the comments below. Have a great week!
The Isle of Dread is owned by Wizards of the Coast. All of my work on this post is strictly non-commercial, on a voluntary basis as unofficial Fan Content permitted under the Wizards Fan Content Policy. Not approved/endorsed by Wizards. Portions of the materials used are property of Wizards of the Coast. ©Wizards of the Coast LLC.
-
Weeds of Wonder
Gather round the fire, you children of the jungle. Let it be known by you that the wilds of our homeland can be harsh indeed. Even our mighty heroes and wise elders are, at times, at the mercy of the land. You must learn that, in times of need, the jungle itself can provide for its people. Beware, however, for just as an incautious man may find himself in the belly of the tiger, so too can malady befall one who is careless with the bounty of the wilds.
-Bhagiro Hatti, Gowandian Scholar
Intro
I mentioned in a previous post that one of my groups will be revisiting The Isle of Dread. I spent some time over the holidays prepping for our January sessions and stumbled across some old articles that I had written for the Polyhedron Newsine. I wrote Weeds of Wonder for issue #108 in 1995, as part of the RPGA’s Living Jungle campaign. Since I am going to be dealing with a jungle setting, I decided to reprint it here.
Weeds of Wonder
Below is a partial list of some of the more useful plants to be found within the jungles of Malatra. There are, of course, many others awaiting discovery; some of these will have benign properties, while others will be harmful or even toxic.
Most intelligent inhabitants of Malatra should be aware that plants like these exist. Heroes with herbalism, survival, or other appropriate skills should be allowed a proficiency check to identify or locate these plants.
Stikricki Bush
Part used: Whole Bush
Description: Found only in dry areas of the Rayanna Savannah, this gnarled, woody Bush appears dead even when flourishing. Actually, it is nothing more than a tangled ball of razor-sharp thorns. The Bush seems to serve no other purpose than to shelter small animals which often seek its cover on the otherwise open savannah.
Uses: After carefully harvesting the Bush and allowing it to dry in the sun (this normally takes two to five days, assuming that it is not the rainy season), the bush may be broken into many pieces. These pieces may then be efficiently used as caltrops. Any person with bare feet moving through an area containing stikricki bushes suffers one hit point of damage. In addition, he will have to make a successful save against paralyzation in order to keep moving through the caltrops. Two mature stikricki bushes will bear enough thorns to cover effectively a 10-foot square area.
Tiki
Part Used: Root
Description: This distinctive plant has stems that vary in length from two to four feet. Broad leaves surround the plant, and its flowers are large and white with Violet centers. The root is sandy brown and very bitter to the taste. The tiki is found only in humid regions which receive a fair amount of sunlight.
Uses: For as far back as they can remember, the inhabitants of Malatra have been using the root of the tiki plant. Anyone versed in the knowledge of this plant can boil the roots in water to create a thick, pungent brew which will slow poison as does the second level priest spell slow poison. These benefits, however, are granted only if the person drinking the brew also gets complete bed rest.
Gualla
Part Used: Juice from stem
Description: This is a fairly large plant, growing to nearly six feet in height. The leaves range in color from light green to yellow and are long and thin. The flowers are delicate and yellow, and the gualla produces clusters of golden berries. There is a common legend among various tribes that the Ancients brought gualla with them when they came to Malatra.
Uses: Within the stem of the gualla is a thick chartreuse liquid, the juice has a luminescent property which causes it to glow in the dark period objects or persons covered in gualla juice will glow with a faint green light which will be visible from up to 60 yards away in the dark period the juice will lose its luminescence approximately 12 hours after being exposed to the air, although it can be stored in an airtight container for months.
Magasorium
Part Used: Crushed leaves
Description: Magasorium is a short, stocky plant with thick, flat leaves. It is entirely green, except for black ribbing along its leaves. Magasorium grows abundantly throughout the Malatran jungle. However, since it grows close to the ground, often it can be hard to find.
Uses: Magasorium is an excellent repellent against the many insects of the jungle. For personal use, the leaves are crushed, and the juice is rubbed on the skin. This application will remain effective for approximately 4 hours (less if the recipient is engaged in strenuous activity). Some tribes also burn the plants in order to keep insects away from their villages.
Billitri
Part Used: Crushed leaves
Description: Billitri is a fragrant, delicate looking plant with numerous slender leaves. It is commonly found on hills and on the sides of mountains. The stem is about 6 inches long and usually produces 3 flowers, which are lavender with golden centers in color.
Uses: The juice from the leaves of the billitri is so fragrant that its scent will remain for days with a person who has applied it to his skin. Many hunters of Malatra use crushed billitri leaves to mask their scent while stalking their prey. The fragrance is strong enough to mask their natural scent, rendering them difficult to detect by creatures that rely on their senses of smell. Some crafty heroes, when being chased by keen nosed predators have been known to lead the creatures through a patch of billitri. Even in its natural state, billitri’s fragrance is strong enough to deaden temporarily the sense of smell of a creature that gets too close to the plants. Although this is not a guaranteed method of throwing off prey, it has worked often enough to make it worth an attempt.
Biseechee Bush
Part Used: Berries
Description: This is a short Bush with slender branches. It grows in dry soil, near the edges of the Rayanna Savannah. Its stems are covered with tiny, cactus-like thorns. The flowers are delicate and white with four petals. Those harvesting the berries of the biseechee bush must do so cautiously, for cobras often make their homes in the areas where these bushes are found.
Uses: The berries of the biseechee bush have incredible healing properties. Many of the Nubari believe these bushes to be gifts from the Ancients. Eating the berries will heal 1hp per berry, to a maximum of four hp over a 24-hour period. Unfortunately, these berries lose their special healing properties within a day, so heroes must seek them out whenever they need them.
Manriki Bush
Part Used: Berries
Description: This short bush looks very similar to the biseechee bush and the one is often mistaken for the other. A close inspection will show that manriki berries are a deeper shade of red and its flowers have only three petals. As with the biseechee, the manriki can be found on the outskirts of the savannah.
Uses: The berries of the manriki bush are extremely toxic to most humanoids. Though they taste sweet and pleasant at first, they quickly cause intense headaches, nausea, and dizziness. Anyone eating them will need to save against poison at +2. If the save fails, the victim will start to see spots shortly after ingestion. Within an hour, the victim will become blind. Any method of slowing or neutralizing poison will affect the onset of this blindness. The blindness will wear off on its own in 3-10 rounds. Blinded characters suffer a – 4 penalty to their attack rolls, and their opponents gain a + 4 to their attack rolls against them, for the duration of the blindness.
Manshooki Tree
Part Used: Vines
Description: The manshooki is a towering tree found in the deepest recesses of the jungle. It closely resembles a massive willow tree, with hundreds of vines dangling down to the jungle floor. The limbs of the manshooki tree are more than strong enough to support humans. Many of the Malatran tribes build storage platforms on these trees high enough off the jungle floor to protect their provisions from prowling jungle animals.
Uses: The vines of full grown manshooki trees are extremely strong and vary in length from 20 to 130 feet. As they are even stronger than hemp, more limber, and narrower in diameter, many inhabitants of Malatra prefer them to ropes woven from hemp. Ultimately, the vines are not as durable, becoming dried out within 3-4 days after being removed from the tree, after which time they could break at any time.
Final Notes
The RPGA’s Living Jungle campaign was written for Advanced Dungeons & Dragons 2nd Edition and was located within the Forgotten Realms campaign setting. Because of this, some of the proper names are specific to Toril. If you are using another campaign setting, such as Mystara or a homebrew, it should be easy enough to make the necessary changes.
While these were originally written for AD&D 2e, I think everything is tame enough that it should work with pretty much any old school or current system with minor tweaks. For instance, I do not believe slow poison existed in B/X or BECMI but I that would be easy to work around.
Thanks for stopping by and have a great week!
Weeds of Wonder is owned by Wizards of the Coast. I am reprinting this post in a strictly non-commercial, voluntary basis as unofficial Fan Content permitted under the Wizards Fan Content Policy. Not approved/endorsed by Wizards. Portions of the materials used are property of Wizards of the Coast. ©Wizards of the Coast LLC.
-
The Hall of Tentacles
This week I am focusing on an individual encounter. Our basic D&D group was nearing the end of their second arc of adventures, and I put The Hall of Tentacles together to give them a challenging boss fight.
My villain was initially a lone spellcaster. This presented me with a challenge in terms of how to set up the fight and make it entertaining for my players. I wanted to avoid an anti-climactic fight, where the 5 party members simply rushed the antagonist and beat her into submission. On the other hand, if I built her strong enough to take a beating, my fear was that she would be too deadly.
I settled on using a bit of DM fiat and making up some special mechanics & creatures specifically for this fight. While my players are fairly new to the hobby, I wanted to keep them on their toes. Rather than pulling directly from the Rules Cyclopedia or Creature Catalog, I created some things of my own. If you are a stickler for RAW, this type of thing might not be for you. That said, my group was really engaged for the duration of the fight and at times you could cut the tension with a knife.
As always, I will keep this system agnostic and refrain from any specific stats. Instead, I’ll simply lay out what worked from me. Hopefully it will be useful to spark some ideas for your own games. From there it should be an easy matter of dialing things up or down to suit your needs.
The Setup
A Kosantian witch named D’Sara Shahari has been the driving force behind a number of the party’s early adventures. Hoping to impress her patron, she has been on a streak of dastardly deeds. D’Sara has recently taken up residence in Rohrbach Castle, on the outskirts of the small village of Brindle.
Baron August Rohrbach has always dabbled in the dark arts. Never able to obtain any real power, he leapt at the chance to offer shelter to the witch and hopefully learn her ways. Unfortunately for the nobleman, he learned too late that D’Sara had no desire to take on a pupil but rather was interested in something sinister below the castle.
Over the past few weeks, the witch has effectively taken control of Rohrbach Castle. Most of the staff have run off and the baron has been reduced to being her mindless thrall. Gaining access to the laboratory in the catacombs under the keep, she summoned a tentacled horror from the murky waters below. Having kidnapped two young children from the nearby village, she plans to sacrifice the youths in a gesture to honor her patron.
The party tracked D’Sara to Brindle, where they learned of the missing children and gathered enough intel to believe that the witch was residing within the castle walls. After surveilling the structure, the party discovered a cave entrance along the riverbank.
Wading through ankle-deep water and catching occasional glances of something slithering on the periphery, the party made their way through the caverns below the castle. Finally coming to higher ground, they saw light coming from the passageway to the north. This ultimately lead them to location #13, the entrance to the laboratory cavern.
The wicked D’Sara Shahari. Artwork © 2015 Dean Spencer, used with permission. All rights reserved. The Laboratory Cavern
This large room is well lit with torches around its circumference. Tables with various jars, bottles, and equipment will make it immediately clear to the party that this is some type of laboratory.
Already aware of the party’s presence, D’Sara will be waiting for them at the top of the stairs (location #14). Baron Rohrbach stands nearby (location #15) awaiting the bidding of his master.
Interspersed about the room are 12 pools, open to the water below. Each is circled with a bronze band featuring strange runes. The reflection of the torchlight on the water gives the cavern’s ceiling a queer look, as if it is undulating.
Suspended 10’ over the pool at location #3 is an iron cage holding Ulli & Greta Stoll (the children from the village). The cage is held by a rope that goes up to the ceiling and then over to the far wall (location #16) where it is tied off.
The Fight
When the party enters the room, allow them a moment to take in their surroundings. Unless immediately rushed, D’Sara will deliver a villainous soliloquy and the children will call out for help. As soon as any of the party members start to close the distance to either the children or D’Sara, roll for initiative and the encounter will begin in earnest.
The crone has no intention of going toe to toe with a party of adventurers. She will hold her position and hurl spells at the do-gooders when they come within range. If things start to go poorly for her she will not be averse to the concept of turning and attempting to flee.
Baron August Rohrbach has been under the witch’s spell for weeks and is barely clinging to his humanity. Gaunt from lack of food, he could easily be mistaken for some type of undead. At this point he is really no more than an automaton mindlessly following orders. Dressed in his family’s ceremonial plate armor and carrying a longsword, the baron moves at 50% of the speed of a normal human.
His ensorcelled state will leave him immune to charm or fear effects. He should have fairly high HP but only dish out moderate damage. He will ignore ranged attacks but will immediately turn and engage anyone who enters into melee with him
With a word from his mistress at the start of the fight, Baron Rohrbach will shamble to location #16 and start hacking at the rope that holds the children’s cage over the pool. Unless interrupted by the party, he will succeed in cutting the rope in 3 rounds and the cage will splash into the pool below.
If the rope is cut and the cage hits the water, it will be fully submerged within 2 rounds. The combination of cage and children weigh a total of 190 lbs. The water under the cavern is shallow enough that the cage may be reached even if fully under water. The children will perish if they are underwater for more than 3 rounds.
If the evil witch, her mesmerized lackey, and the trapped children were not enough, the party will face one final peril. D’Sara chose this location because she wanted to make a sacrifice honoring her patron. She knew of an unspeakable horror residing in the river that runs alongside the castle. This tentacled monstrosity is lurking and waiting for an opportunity to strike.
I never had any intention of having my group face some giant beastie here. However this served to build the tension while also making the encounter more interesting. At the top of every round, roll a d12. A hideous pink tentacle will then burst out or the corresponding pool. The tentacles have a reach of 5’ from their point of origin and will attack the closest party member that they can reach.
Play with the tentacle mechanics as you see fit, based on the level and capabilities of your party. For my group, I kept things easy and avoided bogging things down. I had a hit indicate that a tentacle had grabbed the party member. A grabbed party member would suffer 1d4 points of damage from being constricted each round that they were grabbed. They could not move and made attacks with a -1 penalty. Grabbed party members are freed either through destroying the tenacle (I made this relatively easy, giving each tentacle only 4 HP) or after making a successful “Open Doors” check.
The tentacled creature itself will never make a full appearance. Once D’Sara has been dealt with or fled, the tenacles will retreat into the murky depths.
Recap
This yielded a fun encounter for our group. I realize it is a bit unorthodox, but it gives you a number of variables to tune as needed in order to challenge your party. The abilities for D’Sara & Baron Rohrbach are obviously wide open for you to play with. The tentacles themselves could easily be tweaked by adding greater frequency, longer reach, or more damage.
No grid/No labels I purposely strayed from known creatures and tried to focus on mechanics that would make for an exciting evening around the table. Thinking back to Robert E. Howard or HP Lovecraft stories, I always enjoyed how the abilities and origins of magic users or eldritch horrors were left very vague. While it may be blasphemy to some, I think it avoids a lot of meta gaming on the player side to keep them on their toes a bit and show them something that they have not seen before.
Thank you for stopping by. Please take a minute to say hello and if you’d like to read some more, here are some convenient links
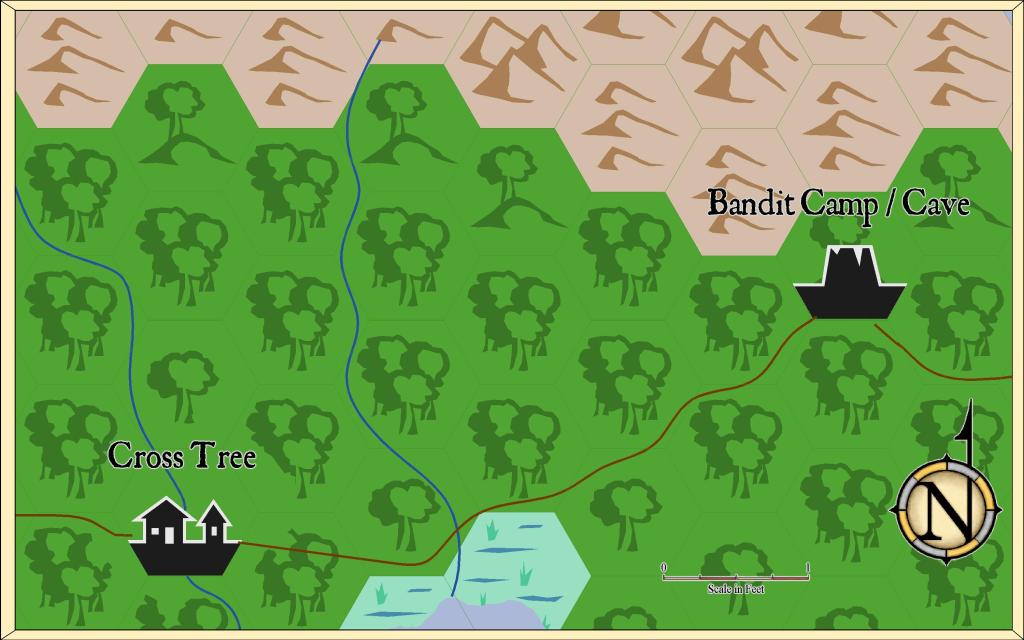
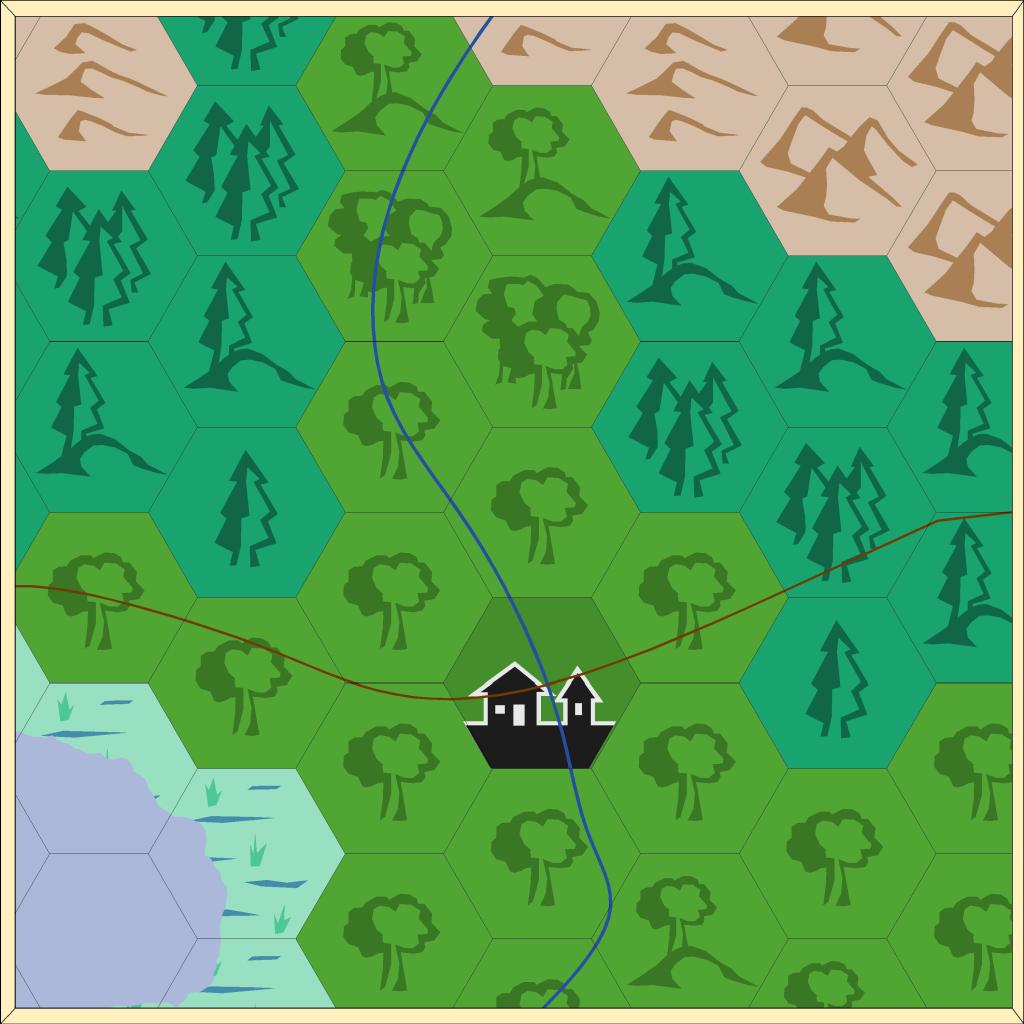
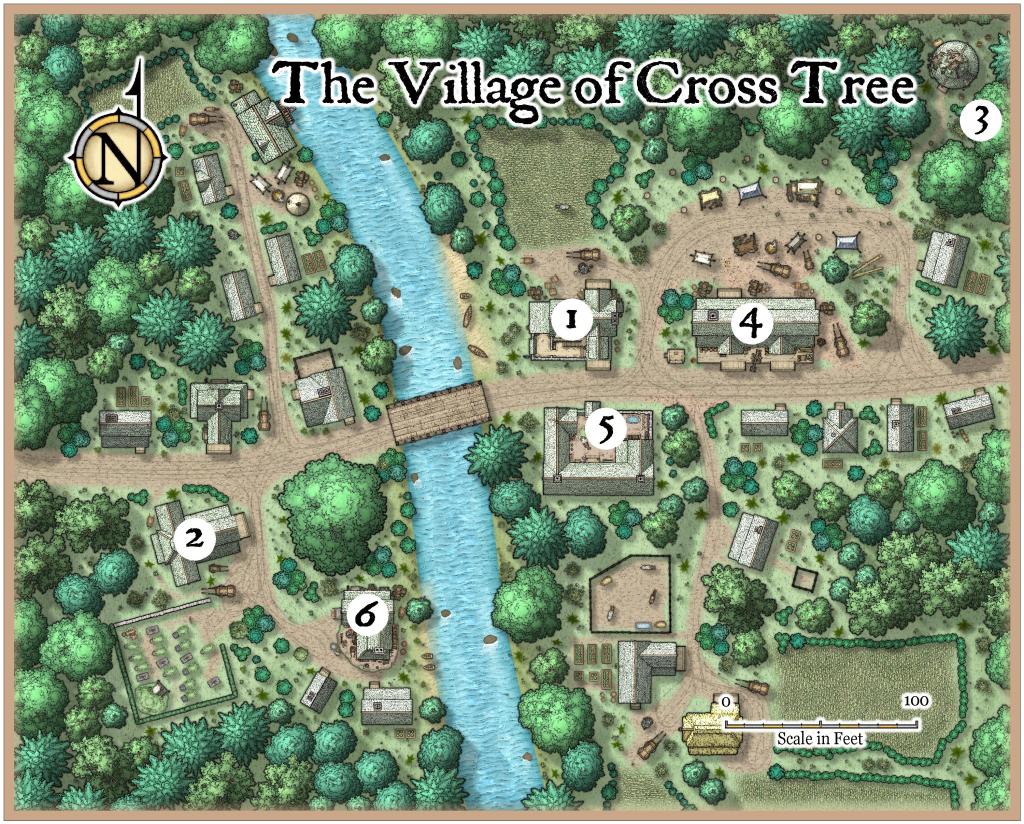
All of my posts detailing the locations in Cross Tree are located here.
For a list of all of my adventure hooks with maps, click here.
My random tables are collected here.
Finally, I’ve stuck everything else here.
Good Gaming!
-
Revisiting the Isle of Dread
I have been running a group using the Rules Cyclopedia (with various tweaks) for about 6 months now. While it started as an experiment, it has become a fun endeavor. Up to this point, I’ve put them through their paces in “The Tower of Zenopus”, “Caves of Chaos”, and various homegrown one-shots.
Going into our holiday hiatus, the group consensus is that they would like to continue. I’ve spent the past week deciding where to take them next. Having enjoyed our previous romps through classic adventures I’ve decided to continue retracing the steps of my youth and chart a course for The Isle of Dread.
My stab at the classic Isle of Dread map. Made using the Campaign Cartographer annual Spectrum overland style. If you are reading this, it’s quite likely that you are well-versed with the module already. Released in 1981, I received my first copy of the David “Zeb” Cook & Tom Moldvay adventure inside the Dungeons & Dragons Expert Set.
As the adventure is largely a wilderness exploration, this will be a perfect opportunity to shift my game a bit. Some of our other friends have been eager to join, while a couple of my current players are going through a hectic period at work. Exploring The Isle of Dread will allow me to take more of an episodic approach to my game, with somewhat of a West Marches style.
After making contact with a group of islanders on the southeastern peninsula, the party will establish a base camp. My sessions will then start as one-shots, with different groups of PCs striking out each week to explore the mysteries of the island. This will hopefully keep us nimble and allow us to get through the winter without any cancelled sessions due to the lack of players. As we progress a bit, it’s likely that the group will find another location suitable for a forward base deeper within the island.
These days I derive as much fun from making maps as I do from running the games themselves. This practice seems to fill the void created when I stopped painting minis years ago. While the original hex style map for The Isle of Dread will always be dear to my heart, I wanted to make my own version. I settled on the Annual Spectrum style for Campaign Cartographer and took a stab at it.
While I have a lot of fond memories of The Isle of Dread, the adventure as written does not really lend itself to the story I am looking to tell. I will still introduce the island as a location by allowing the party to discover a secret page from a ship’s log and partial map (I created a new version of this as well). However, aside from these details I’ll be changing quite a bit.
Ideally, I would like to hit my players with a number of stand-alone adventures, while also sprinkling some bread crumbs of an overarching story. To do this, I plan to steal liberally from a couple old guilty pleasures of mine.
Inspiration
Sir Arthur Conan Doyle’s The Lost World was a syndicated television series, very loosely based on the 1912 novel. The book itself was likely an inspiration for The Isle of Dread in the first place. It premiered in 1999 and ran for three seasons. The show follows a diverse group of early 20th century adventurers after their hot air balloon crashes on an uncharted plateau where prehistoric creatures still exist.
It was a cheesy production; I suspect owing much to the previous successes of shows like Hercules: The Legendary Journeys & Xena: Warrior Princess. Like these predecessors, each episode loosely followed a “problem of the week” format, while also occasionally touching on the larger story of who the characters were and how they might get off the plateau.
I am not here to claim that this was great television. However, it crossed my path at a time in my life when I was about as far removed from the hobby as I had ever been. I suspect this is why it stuck with me. Something about turning on the TV and seeing these silly stories play out really stoked my imagination. It brought back memories of my youth and playing D&D with my friends. I started to daydream about a time in my life when I might have the time to start gaming again.
The entire 66-episode run is currently available for Amazon Prime subscribers. I have been binging it while I doodle on my maps and making notes. Despite the fluff and gratuitous cleavage shots, I am mining a number of good ideas for one-shot adventures.
The other source that I will be looting for ideas is The Land of the Lost. To be clear, I am not referring to the Will Ferrell movie but rather the 1974 children’s adventure television series by Sid and Marty Krofft.
The show’s 3 seasons tell the tale of the Marshall family, who while on a river rafting trip, end up in an alternate universe. Rick Marshall and his children Will and Holly become trapped in a land that time forgot, a place inhabited by dinosaurs and other strange creatures.
The Land of the Lost was every bit as cheesy as the Lost World and was clearly aimed at young children. However, despite all of this there are some elements that I think would make compelling additions to my revised Isle of Dread.
The Sleestak were a race of reptilian bipedal humanoids native to the Land of the Lost. Covered mostly in green scales, they have claws on their feet and hands which can function as pincers. Typically armed with crossbows and nets these unique creatures captured my imagination as a child and will make for great reoccurring villains.
The remnants of a dying race, the Sleestak reside in a Lost City with subterranean tunnels built by their ancestors. All of this sounds like a great fit for the caldera location in the center of the Isle of Dread.
Finally, scattered about throughout the Land of the Lost are numerous pylons. These futuristic constructs contain matrix tables filled with crystals, each serving as the power source to control different aspects such as the weather or passage of time. The World of Warcraft paid homage to the pylons & crystals in the Un’Goro crater zone, and I think they will be a fun addition to my game as well.
Final Thoughts
That is my plan. Do you ever go in and add your own touches to classic adventures? If so, please share in the comments. I would love to hear what has inspired you and what sources you use for inspiration. I would also like to hear from anyone else who may have been inspired by either of these properties in the past.
Thank you for stopping by. Please take a minute to say hello and if you’d like to read some more, here are some convenient links
All of my posts detailing the locations in Cross Tree are located here.
For a list of all of my adventure hooks with maps, click here.
My random tables are collected here.
Finally, I’ve stuck everything else here.
Good Gaming!
My version of the incomplete map found by the characters. The Isle of Dread is owned by Wizards of the Coast. All of my work on this post is strictly non-commercial, on a voluntary basis as unofficial Fan Content permitted under the Wizards Fan Content Policy. Not approved/endorsed by Wizards. Portions of the materials used are property of Wizards of the Coast. ©Wizards of the Coast LLC.
-
The Final Rest of Grondo-Ri
Our group has been running using the Rules Cyclopedia with a few tweaks for the past year. The party has been doing quite a bit of river travel lately. I’m not big on completely random encounters but sometimes I need an interesting little drop-in to keep everyone entertained. This was the case with The Final Rest of Grondo-Ri.
The name of the titular character comes from my dear friend Mike’s Fantasy Hero campaign from the early 1990s. As was often the case with that game, certain elements have stuck with me over the years.
At the end of last session, the PCs completed an objective. I’m not entirely sure where they will head off to. However, I’m fairly certain that they’ll be traveling by riverboat. I also know that wherever they head will be a journey of at least a couple of days. Rather than just handwave the travel, I decided to have something interesting for them to encounter.
Hard to say whether they take the bait or not. It’s possibly that they will pass right on by. That said, I’ve found that if I keep a few encounters like this on hand, I tend to be more prepared for things coming at me out of the blue.
As I have mentioned previously, my intention for this blog is to provide GMs bite-sized source material. Hopefully some of you will find something that you can plug into your game and run with. These will likely never be full scenarios, just enough to get the juices flowing and set you on the path to adventure.
Grondo-Ri
Grondo-Ri was an orc shaman who lived roughly 100 years ago. He was cruel, even by orc standards, and lead his tribe with an iron fist. The brute was infamous for leading raids against the dwarves of Khared Draz and even successfully moved his people into some former dwarven territories.
It’s unlikely that the PCs will have ever heard of this fellow prior to this encounter. However, he was fairly notorious in the region. It should be relatively easy to dig up lore about him after the fact.
While historical accounts of Grondo-Ri exist. There is no mention of whatever became of him or his tribe. Lost to the sands of time is the fact that the orc was killed by his own people.
The tribe had taken up residence in an abandoned dwarven outpost near Dhag Ladur. Intoxicated by frequent victories, most of the tribe followed the shaman blindly. However, there were some among them who felt that a change was needed. Tribal elders disagreed with the acts of cruelty they had witnessed and felt that the spirits of their ancestors demanded a change.
Following a skirmish with a band of mercenaries from the human settlement of Sarburg, Grondo-Ri received minor wounds. Seeing this as their opportunity, the elders poisoned the poultices used to treat the shaman and allowed him to die.
The mummified body of the tyrant was entombed in the southwestern corner of the complex. They then completed their coup by convincing the rest of the tribe that they could communicate with the shaman from beyond the grave. Holding elaborate rituals around a large brazier, the elders would claim to receive direction from the fallen leader. They had succeeded in wresting control of the tribe.
However, something unforeseen happened. One day, whether by pure coincidence or spurred on by the restless soul of the shaman, the earth shook. Despite having been expertly crafted by dwarves, the subterranean complex started to collapse. Pillars crumbled and ceilings failed, until the entirety of the orcish tribe lay dead and buried. There, in the dust and rubble, the mummified body of Grondo-Ri awoke.
Map Locations
1. The Shore
The shore is indeed muddy here. PCs will have difficulty walking anywhere on the beach proper and until they make their way into one of the cavern passages.
Various bits of junk have washed up along this stretch and you should tell the players that they can make out the shape of items just under the mud. For any characters wishing to dig through the mud to investigate, roll a d10 and consult the following table to tell them what they’ve found:
1. A Bottle of Rum
2. Purse with d10 gold coins
3. Broken Necklace
4. A Lone Sock
5. Table Leg
6. Candle
7. Piece of Chalk
8. Broken Lute
9. 10’ Pole
10. Oar
A giant freshwater crab has been using the stretch of beach to hunt and is lurking in the water nearby. If the party spends more than 5 minutes on the beach, the creature will attack. Adjust the crab’s difficulty (or possibly add other crabs) as you see fit, depending on your party and their capabilities. Due to the mud, the beach area should be considered difficult terrain for the PCs to move around in. The crab will experience no such hindrance.
Should the party defeat the crab, close inspection of its carcass with reveal a silver dagger with a pearled handle that had been buried in its shell during some previous encounter.
2. Pool Cavern
This pool is fed by a freshwater stream and is considerably more clear than the water back in the river. It is roughly 20’ deep.
The item in the pool is actually a jewel encrusted goblet that once belonged to a dwarven clan leader. It was looted by the orcs under the leadership of Grondo-Ri and came to rest at the bottom of the pool after the collapse of the complex.
The goblet is worth a substantial amount of money but would require someone to strip down and fetch it unless the PCs can come up with another means of retrieval.
3. Mushroom Cavern
There is nothing of note in the cavern aside from the mushrooms. Despite the odor, they are edible and tasty. If harvested, the large mushrooms will effectively produce the same amount of light as a single torch.
Once removed from the cavern, the mushrooms will lose their glow and edible properties within 1 day.
4. Meeting Room
Before the collapse, the orcish tribal elders would use this room as a secret meeting place. After concluding their ceremonies in the shrine, they would access this room via the hallway and secret door (location #5). The bones in the room are actually the remains of two of the elders who happened to be here at the time of the collapse.
Yuri Perkowski Domingos
yuri.perkowski@gmail.com
https://www.artstation.com/perkowski
@yuri.perkowskiSince the water level dropped, two carrion crawlers have been exploring the caverns. Hearing the approach of the party, they have retreated to area #5. However, they are hungry and will immediately attack any party member who comes within 5’ of the fallen door.
If thoroughly searched, the room will yield the following items.
- 2d20 gold coins
- 1d10 silver coins
- An antique bullseye lantern
- 4 assorted gemstone
5. Hallway
The entrance to this hallway was nearly blocked off by the collapse. However, if party members can squeeze through the first 5 feet, the remainder of the hall is in relatively good shape.
It should be clear to PCs that unlike the caverns, this passageway has been dug intentionally. Characters who would have such knowledge will recognize this as dwarven construction.
A set of stairs leads downward for 10’, before coming to an apparent dead end. The secret door leading into area #6 should be quite easy to find, as it was intended only to be a secret to those who were inside area #6.
6. The Shrine of Grondo-Ri
This is the room were Grondo-Ri was buried. The elders would perform their pseudo rituals here in order to convince the rest of the tribe that they were receiving guidance from their departed leader.
The jars and pots in the room contains all manner of herbs and concoctions. All of these are long past their usefulness. The bits of the shaman that were removed during the mummification process were also stored in these containers. However, they have long since turned to putrefied liquid and evaporated.
The sarcophagus is indeed lacking its inhabitant. However, an ornately designed staff is held within. The Staff of Grondo-Riis a roughly 6” tall iron-shod oak staff. It is topped off with the head of a horned beast. The staff will radiate magic if any party members happen to attempt to detect such things.
The exact properties of the staff are up to you and what would work for your game. However, I will give you some further lore about the item to help you make your decision.
- The shaman was quite charismatic and was never without his staff. One might speculate that they was something about the staff that made him seem larger than life to his followers.
- He was said to have wielded elemental magics; this was thought to be an ability imparted to him by the spirits of his ancestors but it’s certainly possible that some of this came from the staff.
- It is also possible that the staff itself was cursed. This could account for his turn to cruelty and brutality.
Grondo-Ri’s undead corpse has aimlessly wandered rooms #6 & #7 for decades. It is currently in room #7 and will attack in 1d4 rounds after the PCs enter room #6.
I’ve mentioned that Grondo-Ri was mummified after his death and I have also mentioned that he awakened in undeath after the collapse. All of that aside, it’s entirely up to you to decide what exactly he has become.
Since I’ve put this together without knowledge of what system you are playing or what power level your players possess, it’s impossible for me to fully define this encounter. In my game, I’m running this as a fairly low-level one-shot, though I think you could scale things up easily enough.
My suggestion would be to make him be a unique creature, so as to best keep your PCs on their toes. He cannot speak but he will approach the party with unbridled rage and make horrible guttural sounds as he attacks.
If you need to flesh things out a bit, I suppose you could mention the lifeless skeletons of some of the departed elders lying about the room. Then, at a certain point in the combat, Grondo-Ri could cause them to rise and fight. Whatever you like. Just have fun with it.
7. Antechamber
The contents of the coffers, sack, and books I will also leave up to you. My suggestion would be to make these rewards commiserate with the level of difficulty of the Grondo-Ri fight. One thought would be to have one of the books contain a couple spells that would be useful for one of the party members. The other could be a history book pertaining to something in your campaign setting, thereby setting you up for more adventures down the road.
Beyond the double doors to the north, the hallway is completely caved in. No amount of digging by the PCs will allow them to continue further.
Plot Hooks
How you use this is entirely up to you. I am merely trying to plant some interesting seeds for you to run with.
- Straight: You could run this as a straight random one-shot with no ties to any other part of your story. In this case, the party stumbles onto the cave complex, explores it and ultimately deals with the undead version of Grondo-Ri. Making their way out with whatever treasure they find; the party never looks back.
- Research: Perhaps the party was quested by some interested party to uncover whatever became of Grondo-Ri.
- Find the MacGuffin: Someone wants something located within the complex. It could be the Staff of Grondo-Ri, the jewel encrusted goblet in the pool, or some other item that you have decided to place there.
- Knowledge is Power: If word gets out of the party’s discovery after the fact, it could open doors to other adventure threads. A mysterious sage may wish to investigate the complex and uncover the embalming methods used on the orc shaman. Dwarves may travel to reclaim the lost settlement. A superstitious young orc leader may seek to reclaim the remains of Grondo-Ri, as a manner of ascending to power within his tribe.
- Cursed!: Rather than a straight fight, perhaps the undead orc places a terrible curse on the party, requiring them to go on yet another adventure in order to cleanse it.
The End
Thank you for stopping by. Please take a minute to say hello and if you’d like to read some more, here are some convenient links
All of my posts detailing the locations in my starting town of Cross Tree are located here.
For a list of all of my adventure hooks with maps, click here.
My random tables are collected here.
Finally, I’ve stuck everything else here.
Good Gaming!
-
The Chapel of St. Sigmund & the Grotto of Mareen
For hundreds of years, the residents of the northern shores of the Sea of Harne have been followers of the cult of Mareen. These simple seafaring people regularly sacrificed a portion of their catch to the brooding queen of the seas, in hopes of fair weather and bountiful waters.
As the Graun Empire’s influence spread over the land, the church of Aunul grew in power. Sailors spread word to the seaside communities that the emperor and his ever-present religious advisors did not view worship of the elder gods as acceptable.
Statue of Mareen under the chapel of St. Sigmund. Artwork © 2015 Dean Spencer, used with permission. All rights reserved. Fearful that inquisitors would arrive one day and brand them as heretics, the residents of Hammondsport acted. A new chapel for the church of Aunul was constructed over the underground grotto that housed their shrine to Mareen. In a comical twist, the chapel was named after a St. Sigmund, a devout follower of Aunul who drowned while trying to spread the faith.
The community goes through the motions of having shifted to the faith of Aunul. However, it is largely a show for outsiders. On all of the old holy days, townsfolk don their robes and meet, well after dark. Slipping through the secret door located in the office, they make their way down into the grotto. There they gather at the altar and make their sacrifices to Mareen as they have for generations.
If you’d like to browse through all of my other maps with plot hooks, you can find them all collected here.
You must be logged in to post a comment.