The Lost Spellbook of Elthane Darkstalker

This week’s entry picks up where I left off with The Mine at Mt. Morris. As a refresher, at the end of that tale, the party had recovered the diary of a long-dead necromancer named Elthane Vanator (known as the Darkstalker). In interrogating Foreman Fugue from that adventure, they also learned that a shadowy consortium had been feverishly seeking out the diary.

Being generally averse to shadowy consortiums as a whole, my players decided to not only guard the diary themselves but also go about collecting any other artifacts the necromancer left behind. The object in question for this week happens to be one of the Darkstalker’s spellbooks.

As always, change the MacGuffin as necessary for your game. This is merely presented as something to help spark ideas you your game.

Island map w/grid. Created with Campaign Cartographer SS4 Dungeons of Schley.

The Circle of Cairns

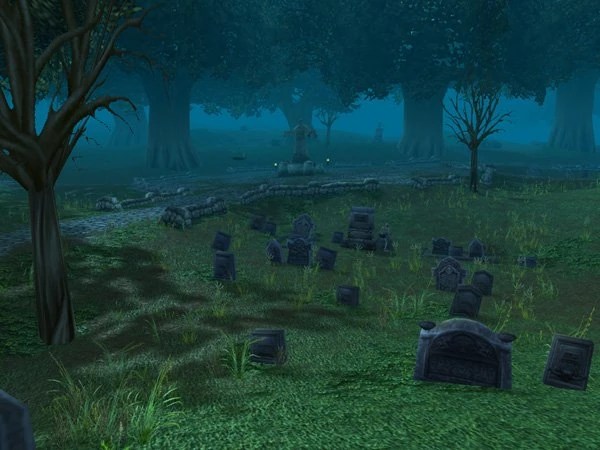
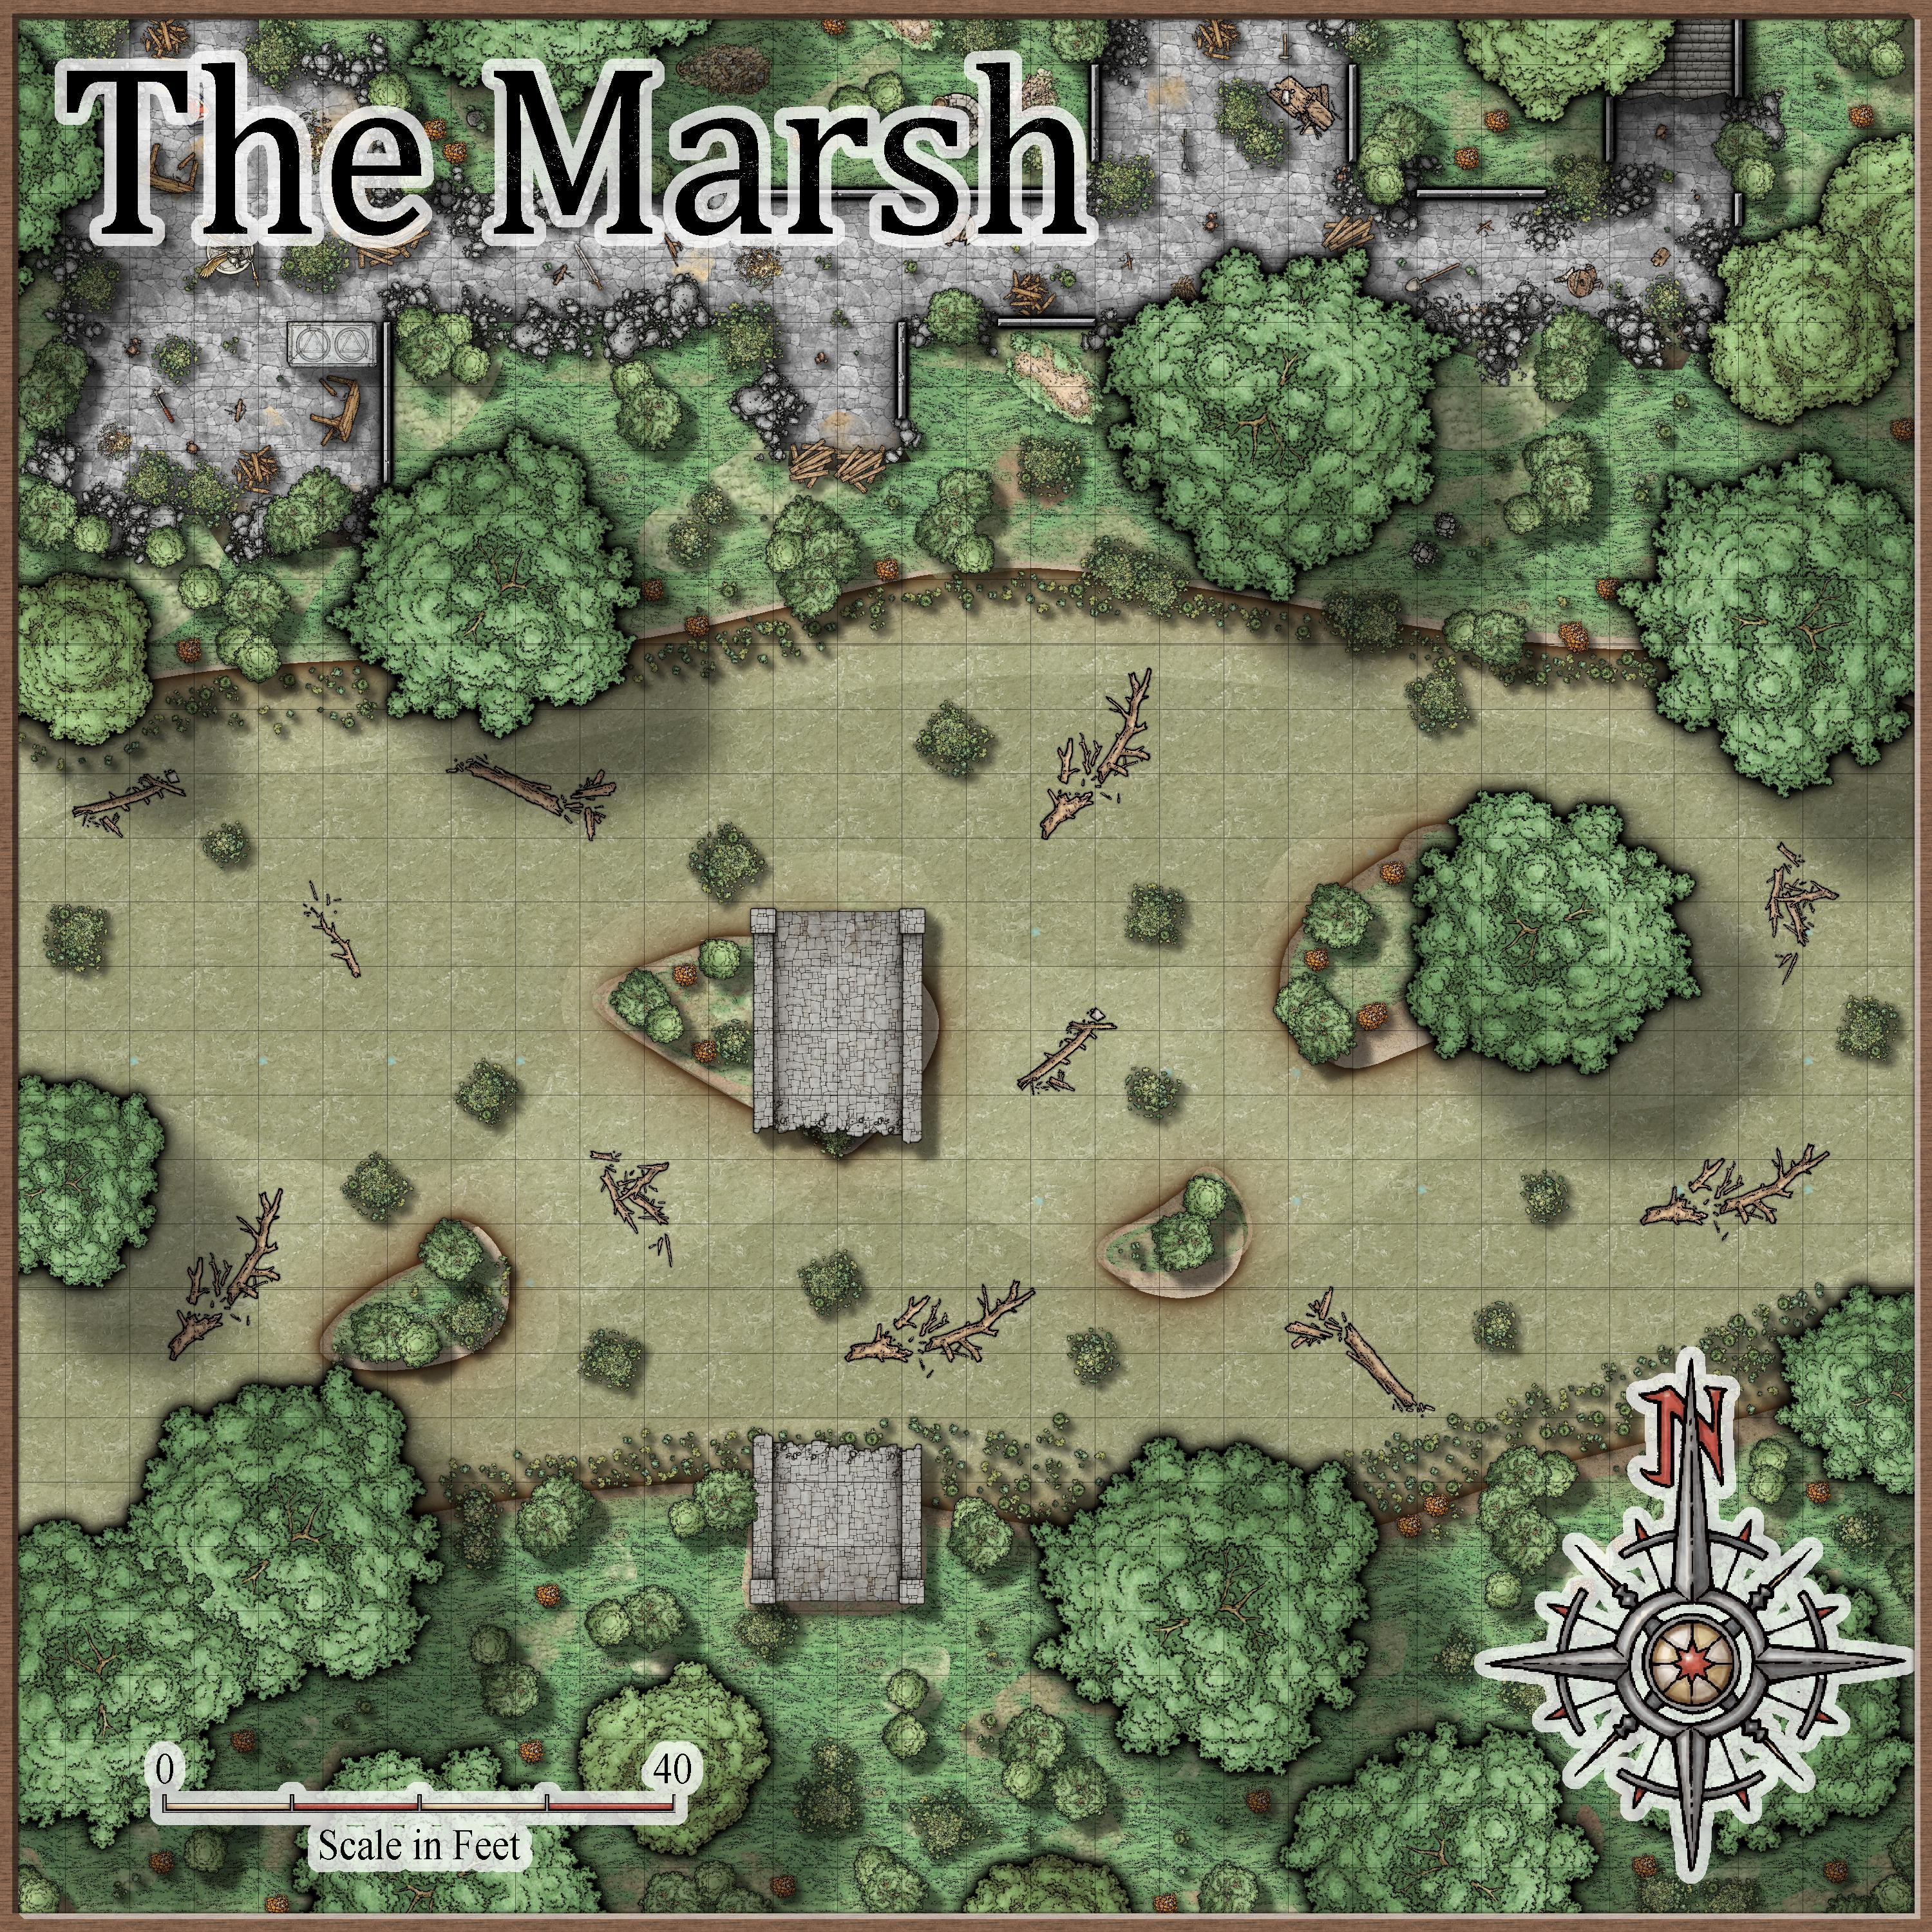
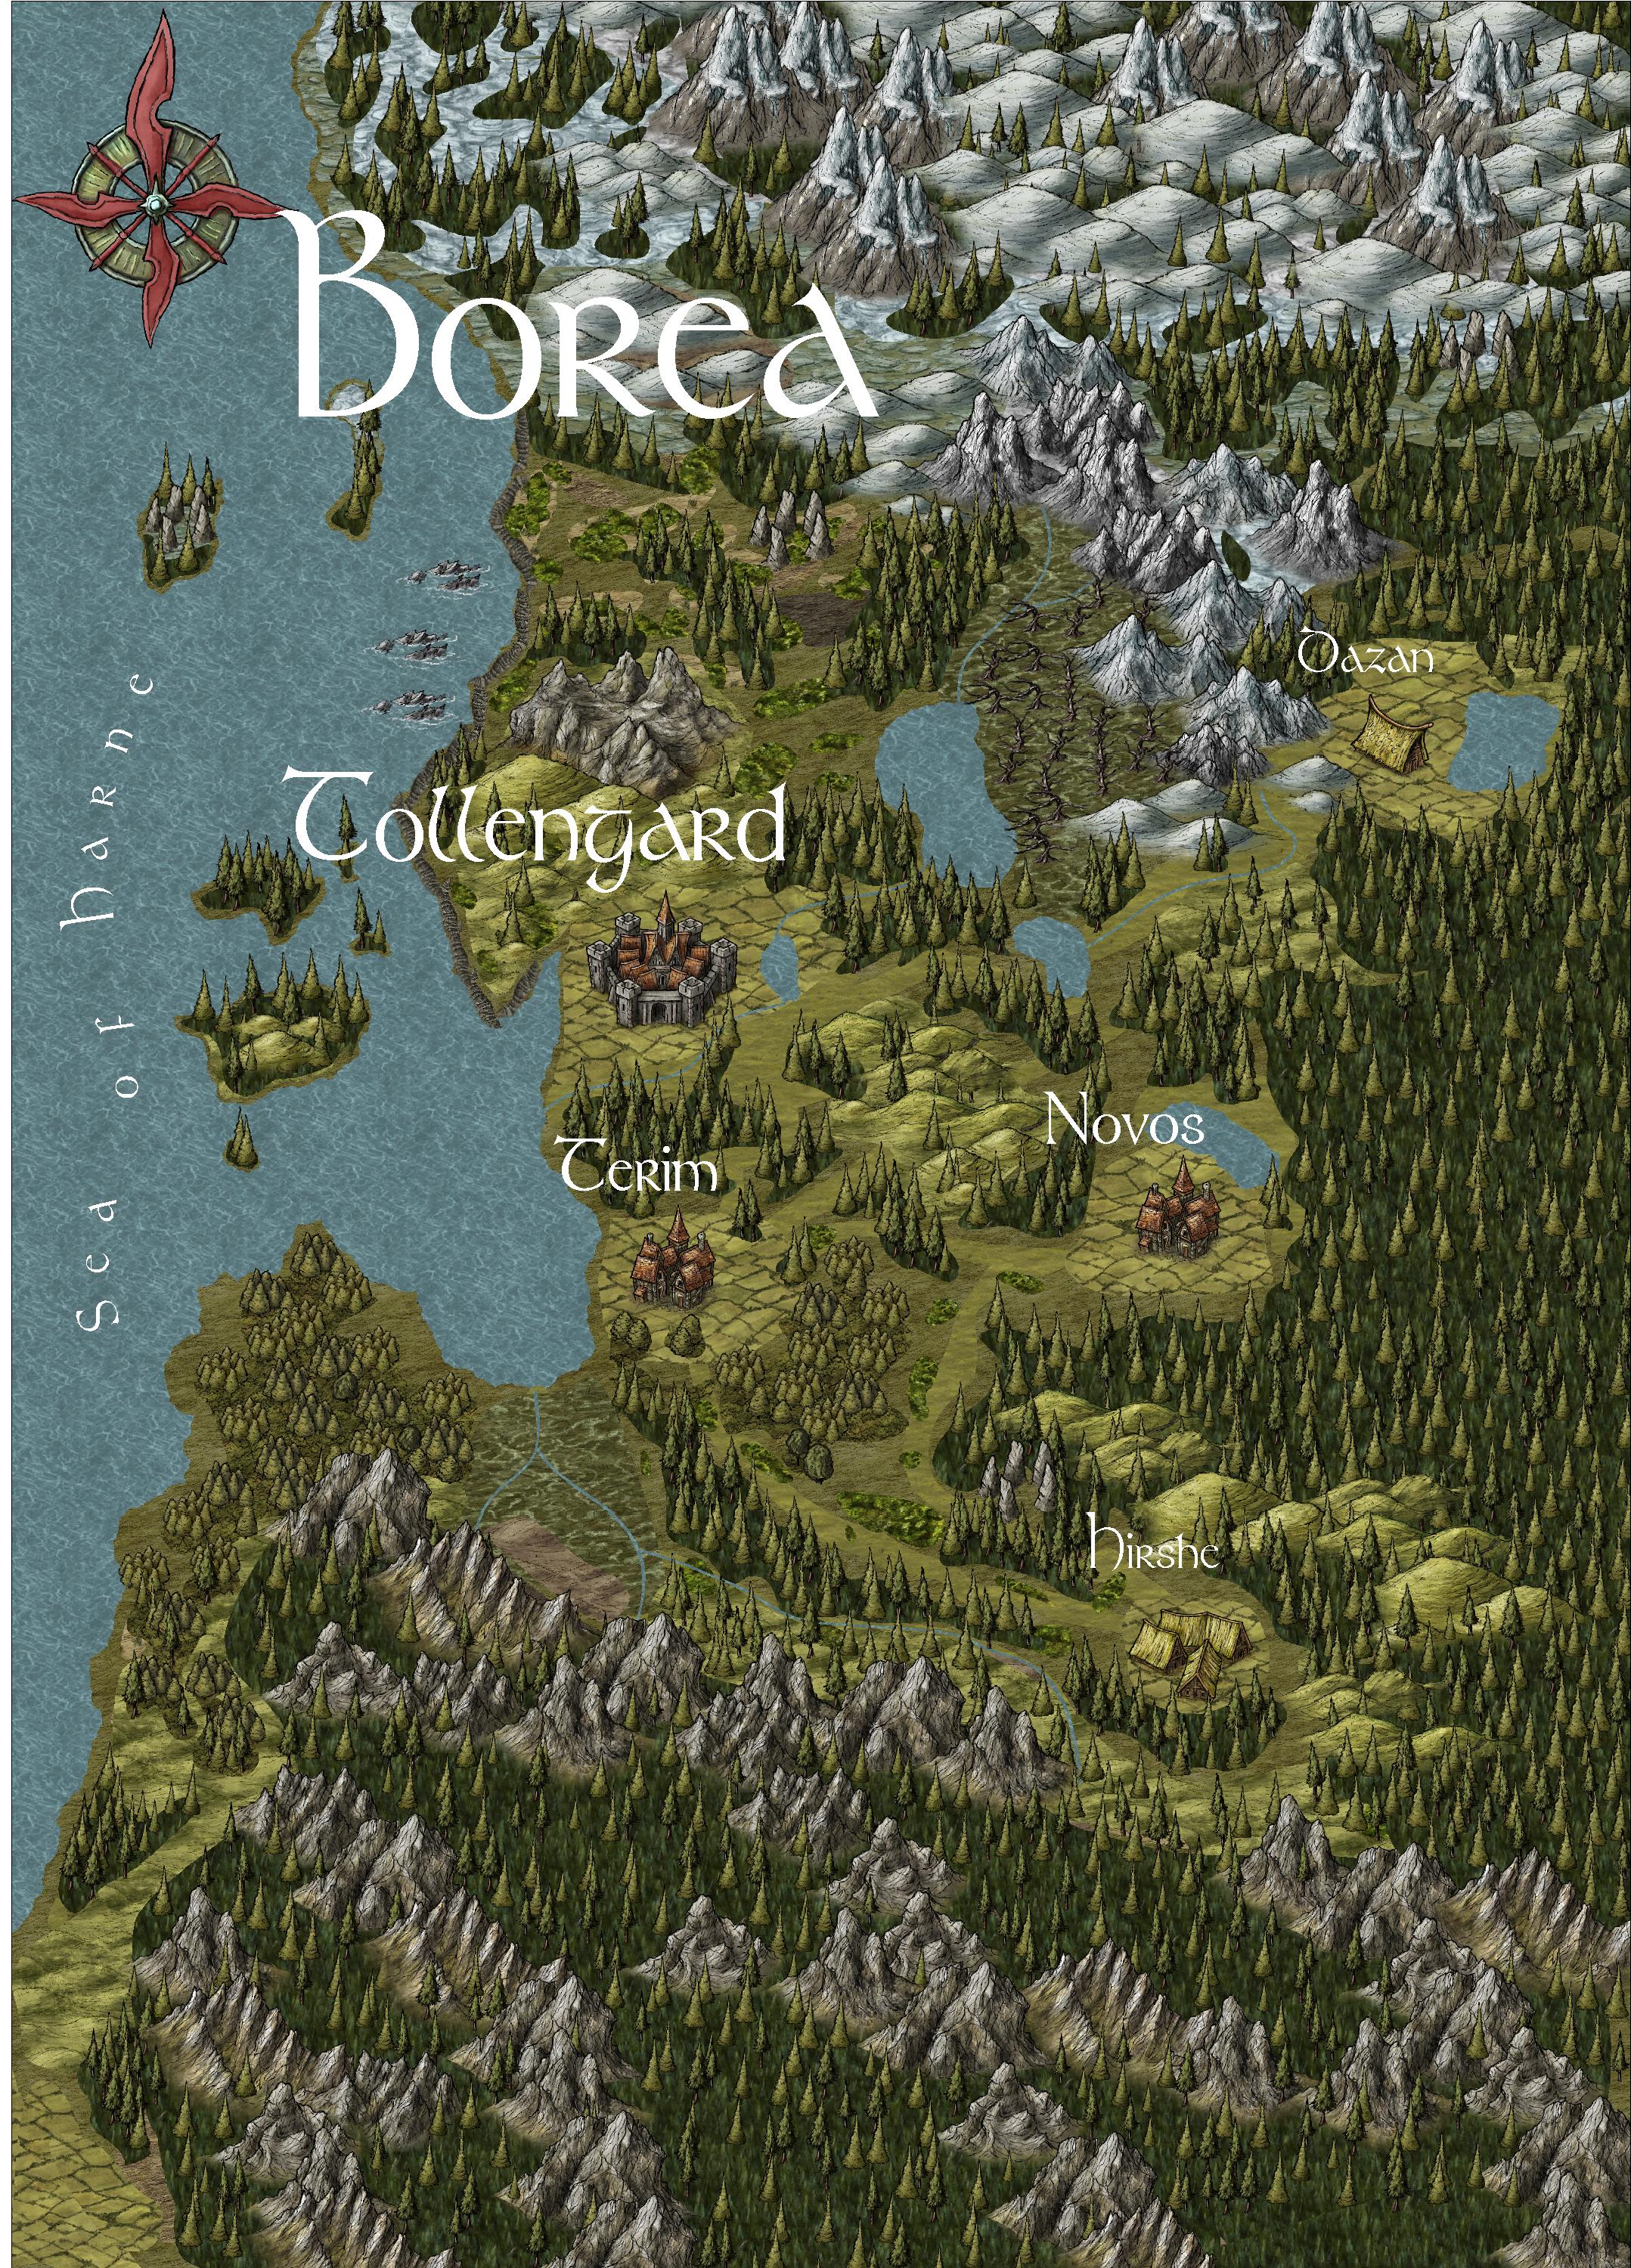
The party has traveled for days, to the northernmost reaches of Archia, to a place where the notorious necromancer Elthane Darkstalker is said to have left one of his spellbooks. Over 100 years ago, this border region was hotly contested with the neighboring country of Caledos. The locals believe this forest to be haunted to this day.

Bushwhacking nearly 8 hours from the nearest settlement, the party has arrived at a small lake. A rickety old wooden bridge leads to a small island. While the bridge will be able to safely support the party across, you should play up the fact that it is old and not in great shape.

Crossing the bridge, the party will discover a ring of nine stone cairns circling a roughly hewn altar. Each of the cairns stands roughly 10’ tall, though the one to the southwest appears to have been toppled long ago. The altar itself stands 5’ high and is roughly 5’ in diameter. Atop the altar sits the spell book of Elthane Darkstalker. While it has clearly been exposed to the elements for all these years, it shows no signs of wear.

As soon as the first party members sets foot within the circle defined by the cairns, a pulse of purple light will flash from the spell book, as a wave of energy shoots out. This will immediately be followed by a low humming sound that will begin to emanate from the cairns. Depending on the game system you are using, you may wish to allow your players to make a saving throw, to avoid experiencing a mild wave of nausea. There will be no mechanical effects to a failed save. This is merely to drive home the fact that they are interacting with something that is very evil. Obviously, any character with any latent abilities to detect evil will be aware that this is a vile location.

Island zoom.

Unbeknownst to the party, the pulse of energy serves another purpose. Fanning out past the small lake, it reaches the woods beyond. In this haunted forest, lie the skeletal remains of ancient combatants. As the pulse washes over them, these old warriors animate and are drawn to protect the spell book.

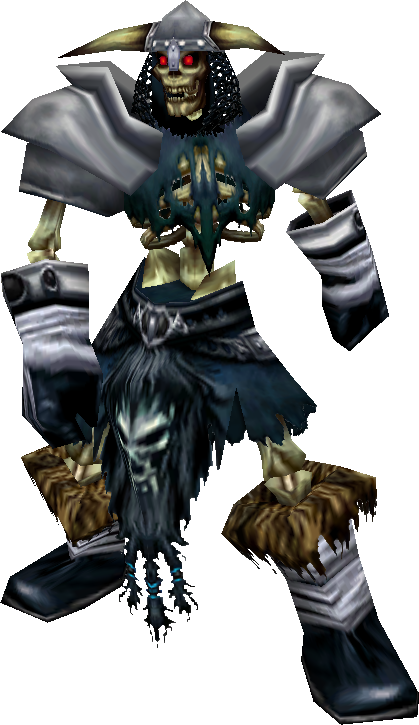
There are a total of 48 skeletons affected by the pulse. Wearing antique armor from both Archia & Caledos, they are each armed with either a short sword or a spear. These ancient skeletons are brittle and will be considered to only have 1 HP each, in addition they only move at a rate of 15’ per round. Obviously, you may decide to adjust this as you see fit, to ratchet things up for your game.

Ancient Archian soldier awaiting reanimation. Artwork © 2015 Dean Spencer, used with permission. All rights reserved.

Unless the party happened to leave a sentry to watch the bridge, the humming sound from the cairns will be enough to mask the sound of the skeletons moving about in the forest. Arriving at the bridge, the skeletons will be forced to proceed 2 by 2. At this point the sounds of the creaking bridge will be enough to allow the party a chance to perceive the approach of the undead band.

How this encounter plays out will largely depend on when the party becomes aware of the skeletons. If a number of skeletons make it to the island undetected, while more follow behind them, this could become a tricky encounter. If the party is able to engage the undead while they are bottlenecked on the bridge, the party has a good chance of holding their own, at least long enough for them to figure out another plan.

When I ran this for my group, it was never my intention for the party to fight all 48 skeletons. However, you must take into consideration that your players won’t know everything that you know. Seeing a seemingly endless stream of undead marching toward them may be very intimidating. I always enjoy seeing how things like this will play out.

Aside from engaging with all of the skeletons, there are a number of other ways to wrap up this encounter. Toppling over another of the cairns will instantly cause any remaining skeletons to fall over in a pile of bones.

The bridge itself is old and fragile. A concentrated effort from the party will succeed in destroying the bridge. In the event of a bridge collapse. Any remaining skeletons will not enter the water. Instead, they will stand motionless at the shore. After 12 hours they will fall and become unanimated.

Finally, the party may opt to flee across the water themselves. The water is on average only 6’ deep and 10’ in the deeper blue sections. With the skeletons only focused on getting to the altar, this would be an easy, if ignoble, way to exit. Skeletons on the shore will completely ignore feeling adventurers.

Wrap Up

Assuming the party makes it out with the pollbook, they are now in the possession of two of the notorious necromancer’s most important belongings. What are they goals of this shadowy consortium that are seeking them out. What do you do with such items?

That’s all for this week. Real life work has been a bear lately, so I’ll take any good vibes you can send me. I hope you all have a great week and appreciate you stopping by.

For more maps & plot hooks, go here.

For some random tables, go here.

Finally, for a bit about me and some general stuff, this is the spot.

Island map without grid.
Zoom map without grid.

Morgan Ravenswing – The Imperial Highwayman

I am excited to share this week’s post. Since starting this endeavor, it has been my goal to share things that would help spark ideas with GMs and ultimately make the process of running their games easier.

This week’s plot hook is one that I stole from my dear friend Mike Capron’s Fantasy Hero campaign, all the way back in 1988. I have used this thread, or some version of it, in pretty much every campaign I have run as an adult. As always, this is system agnostic and could easily be dropped into the TTRPG of your choosing.

Act I

At some point early in my adventuring party’s career, I will have them meet a stranger. This generally occurs as a means to break up a period of overland travel. For instance, the group may literally be headed from their starting town to their first adventure when they cross paths with a lone traveler.

Sometimes this fellow is broken down by the side of the road and requests aid, sometimes he asks to camp with the party for the night, and sometimes he’s simply passing by. It does not matter how the traveler meets the party or how long he spends with them.

He will introduce himself as “Cedric Farnum”. The stranger should seem completely non-threatening and polite. He should appear a bit foppish but have a couple of telltale hints that there is something more to him. Perhaps he has striking eyes, his sword is of fine quality, or his boots are not quite as worn as one would expect for long-distance travel. If asked about any of these things, be sure to have a logical answer prepared for him.

Whatever the means of introduction, and whatever transpires while he is with the party, Cedric will not linger long. Even if he spends a night camping with the group, he will be up early, thank everyone for their hospitality, and head on his merry way.

Act II

The second part of this plot hook will involve waiting for a bit to let things breathe. 2-3 game sessions are generally sufficient. For instance, if your party had been on their way to an adventure when they met Cedric, perhaps wait until the party returns to civilization with their spoils.

Making their way through the bustling city, the party will spy a wanted poster. The poster reads:

WANTED

Dead or Alive

Morgan Ravenswing

The Imperial Highwayman

There is a hefty reward being offered for this individual. However, that is not what catches their eyes. There on the poster is the spitting image of the stranger they knew as “Cedric Farnum”. If you happen to have a player who is religious at taking notes, this reveal is a great way to reward them. In that case, I might just describe the person and let the player take the credit for the recognition.

If the party inquires with any locals about this Morgan Ravenswing fellow, they will receive all sorts of information. The most common tale will be that he and his band of cutthroats are notorious for ambushing travelers on their way to and from the city. Some of the townsfolk see him as a villain while others seem to view him as something of a local folk hero. Build what you want from there and don’t be afraid to ham it up.

Should the party mention to any local authorities that they believe they have met this fellow before, they will be very interested in the details. They will pester the adventurers with all sorts of questions regarding where this took place, as well as how large of a band Ravenswing had with him. Hearing that he was by himself and did nothing to accost the party will leave the officials somewhat uncertain regarding the validity of the claims.

Once again it’s best to sort of let this whole thread go cold. I’ve never had a party want to immediately pack up and search for this highwayman, though I suppose it could happen. Most often the party will move on to their next adventure and largely forget that this ever happened.

Over the course of the next adventure or two, it can be fun to drop in little reminders. Perhaps they see more wanted posters or perhaps they stumble upon a band of nobles in their skivvies, who claim to have been robbed by Ravenswing. However you go about it, I find that it’s a fun exercise. It reminds players that other events are happening in your world, outside of whatever they have been up to.

ACT III

Finally, we have arrived at the payoff. There are really only 2 keys to pulling this off. You want to make sure that since the initial meeting, you have brought up Morgan Ravenswing enough that everyone will immediately know who you are talking about. You will also need to have let things go cold enough that the party isn’t expecting to meet a highwayman around every corner. If you manage to nail both of these, you’ll have a memorable encounter on your hands.

As the party is returning from or heading to their next adventure, they cross a small bridge heading to a crossroads. Up ahead, a wagon blocks the road, surrounded by odd planks and debris. A figure stands atop the wagon, waiving frantically to the party.

“Hello. Hello, my friends.” the figure calls, once the party is within earshot.

By the time that they can hear the greeting, you may describe the figure as a tall, slender fellow, dressed in flamboyant, colorful attire. His clothing is a mixture of fine silks, velvets, and lace, adorned with intricate embroidery and shimmering jewels that catch the light with every move he makes.

His hat, adorned with an ostentatious plume of feathers, sits at a jaunty angle atop his head, giving him an air of casual elegance. He is, as surely your party will have guessed, Morgan Ravenswing, the Imperial Highwayman.

Perceptive characters will immediately be aware that they are surrounded. While the exact numbers are hidden within the woods, there are clearly quite a few other people out there. From those that can be seen, it’s clear that they are armed with bows. While they are not directly aiming at the party, they have arrows knocked.

By this stage in their careers, most parties will likely be itching for a fight. Ravenswing will attempt to reassure them that he merely wants to talk. At the same time, sufficiently describing the number of archers in the woods is likely to give even the most trigger-happy party members a moment of pause.

Where you take it from here is up to you but allow me to point out a few different options:

The Highway Robbery

My least favorite option. If the party is too big for their britches or it works best for your story, this could devolve into a fight. Ravenswing & his band will fight the characters if need be. A victorious party will be allowed to head back to town and collect a bounty. Should Morgan Ravenswing and his band win, they’ll not kill the party unless absolutely necessary. Instead, party members will be stripped down to only what is required to maintain their modesty. The highwayman will express his disappointment in the party and leave them, bound, and gagged, for someone else to find.

The Philanthropist

If the party can keep their cool long enough to hear Ravenswing out, things will get interesting. The party will be led deep into the forest, to the band’s secret hideaway.

The highwayman will apologize for the surprise but claim that it was necessary due to not knowing how the party would react. Once everyone is calm, he will explain that he has been following the party’s actions for some time and is reaching out to them for help.

In this scenario, Morgan Ravenswing is essentially a Robin Hood type character. He’s a philanthropist who has wrongly been labeled a criminal. Yes, he may occasionally bend or break some laws. However, he always does it with the best of intentions.

Having some knowledge of the “big bad evil guy” of the campaign, the highwayman and his gang have waylaid the party specifically to provide them with vital information and to lend their support in the future.

This is a very cinematic twist, that often leaves players squirming with excitement. Build on it from there.

The Dread Pirate Roberts

In a shameless riff on The Princess Bride, the highwayman reveals that he is not the only “Morgan Ravenswing” but rather that a number of different people have taken up the mantle over the years. As with the last option, he’s a bit of a philanthropist but for some reason must step down from the role.

Having watched the party for a while now, he believes that one of the party members would be the perfect candidate to take on the persona and continue carrying out good deeds across the empire.

Final Thoughts

I hope that you find something here that inspires you in some way for your game. If so, please drop me a note down below and let me know what you would do. I appreciate you taking the time to stop by.

If you would like to see more of my maps with plot hooks, you may find them here.

That’s all for now. Have a great week and don’t forget to daydream a bit if the week gets you down. We all share an amazing hobby, and those fantastic places can be a great escape! Good gaming.

When the Cat’s Away…

This week I’m sharing this simple battlemap from a short game session for my group. It could serve in a number of possible scenarios but I will briefly explain how I used it for my game.

Battlemap with grid & labels.

The Story

In the bustling city of Summerville, a wealthy merchant sought the aid of a capable party to retrieve a jeweled dagger he had recently agreed to purchase. The dagger belonged to a retired adventurer; a renowned rogue known as Alphonse “the Cat” Richter. With a bag of gold in hand for the purchase, the party embarked on a day’s journey to Richter’s modest cottage, eager to secure the prized treasure.

Unbeknownst to the party, a pack of four wererats had recently killed Richter. Led by a particularly cunning fellow named Gravik, they sought to recover the dagger for themselves. Having dispatched the rogue, they set about trying to locate the treasure with no luck.  

With two of the band keeping watch, the wererats were aware of the party’s approach. Gravik remained in the cottage (location #1) in his human form, pretending to be Richter. The others each waited for signs of trouble (at locations #2, #3, & #4 respectively) and observed from a distance.

Gravik. Art used by permission.
© Thomas Denmark. All Rights Reserved.
thomasdenmark.com

Expecting to meet a dashing and experienced rogue, the party was taken aback when “Richter” appeared unremarkable and disinterested. Claiming to no longer desire the merchant’s payment for the dagger, Gravik nervously sent the party away without even inviting them in.

Making their way back to the bridge, doubts began to arise within the party. Two of the adventures mentioned that “Richter” seemed a bit off. Another had noticed odd tracks leading around behind the cabin.

In the meantime, Gravik decided that if he couldn’t find the dagger, he might as well end up with the bag of gold from the merchant. Before the party could act on their suspicions, Gravik transformed into his hybrid form and ran out to attack. Seeing their leader spring into action, the rest of his band joined the fray. A ferocious battle ensued, and the party fought for their lives against the lycanthropes.

Battlemap without grid.

The party emerged victorious from the encounter, though one of the characters suffered a concerning bite. Richter’s lifeless body was discovered beside a freshly dug burrow in the garden (location #5). A search of the flower beds to the south of the cabin (location #6) yielded the jeweled dagger, wrapped-up burlap bag.

With the mystery unraveled, the party headed back to Summerville to claim their fee from the merchant.

That is the tale that this simple map was for used for in my game. As is always the case, a number of other questions were raised. What would have happened if the party had decided to keep the dagger for themselves? Aside from being jeweled, what was so special about the dagger in the first place? Were Gravik and his band acting on their own or is there a larger pack lurking around the Summerville area? If so, will the party have a target on their back?

Closing

That’s all for this week. Still tinkering to try to find the right mix of sharing maps with just enough of a plot hook to spark ideas. Thanks for stopping by. If you would like to see some more of my maps with plot hooks you may find them here. Good gaming!

Battlemap with grid.

The Shadowhaven Crypt

Real life responsibilities pulled me reluctantly away from tabletop role-playing games at some point in the late 1990s. It wasn’t until 2014 that I dusted myself off and started to participate in the hobby again. I wasn’t completely without an escape during this time. I started playing World of Warcraft about four months after launch and I played regularly until the end of the Wrath of the Lich King expansion.

While my WoW days are well behind me, something about working on my map for this week’s post kept bringing me back to the venerable video game that will be turning 20 next year. If you have fond memories of the Warcraft universe, enjoy this silly escape. If not, please allow me this indulgence and I’ll be back to regular posts soon enough.  

The Shadowhaven Crypt

In Duskwood, hidden away just south of the Tranquil Gardens Cemetery lies the entrance to the Shadowhaven Crypt. Barnabas Shadowhaven was a wealthy Stormwind merchant who had retired to this region back in the days when it was still known as Brightwood. Whispers had circulated about Shadowhaven being involved in questionable practices. Some claimed that he dabbled in forbidden magics, while others believed he had dealings with unsavory entities from the shadowy realms. The exact nature of these rumors remained nebulous, but they were enough to create an air of suspicion and mistrust around him.

Tranquil Garden Cemetery.

Such it was that there wasn’t a great deal of fanfare surrounding his passing. His estate in Grand Hamlet had been boarded up and razed some years later as the town expanded. By the time of Medivh’s passing and the change of the town’s name to Darkshire, Barnabas Shadowhaven was long since forgotten.

With the recall of the Stormwind army to other parts of the realm, the situation in Duskwood is turning grim. Their resources already stretched thin, the Night Watch has asked the party to investigate strange occurrences near the Shadowhaven Crypt and put to rest whatever dwells there.

Entrance – 1

The entrance to the crypt is marked by a massive, banded iron door embossed with the name Shadowhaven. Its aged surface bears signs of wear, hinting at the passage of time and the mysteries that lie beyond. While the door appears quite old and the surrounding area is overgrown, it pulls open easily.

Upon opening the door, the party will immediately be attacked by 3 Skeletal Warriors, and 2 Skeletal Ghouls. If defeated, these mobs will yield the following: 20 silver pieces, 10 wool cloth, 2 delicious cave mold, a brocade cloak, & 3 moonberry juice.

Oddly, a lit torch a placed in a sconce on either side of the entrance. Opposite the door, the hall leads south to a staircase going down.

Rickety Swing Bridge – 2

A rickety swing bridge spans a 10-foot chasm here. It stretches precariously between 4 wooden stakes. As the party steps onto the bridge, they can hear the distant rush of water echoing from about 30 feet below. The bridge sways with each step, testing their balance and nerve as they carefully make their way across the gap. While this looks dangerous, the party has nothing to fear here unless they do anything crazy.

Dining Room – 3

While certainly an odd thing to be found within a crypt, this large room appears to be a dining room. 2 Restless Spirits are busily setting the table when the party arrives. Upon entering the room, both will crossly scold the party and inform them that “supper is not ready yet!”

Duskwood.

If the party closes the door and does not enter the room, the spirits will go back to their work. Otherwise, they will attack. If defeated, the spirits will drop the following: 12 silver pieces, 6 copper pieces, 4 Silk Cloth, 1 Healing Potion, & a bludgeoning cudgel.

The Larder – 4

This room is empty save for an assortment of crates and barrels. The contents of most of these has long since rotted away. However, a thorough search turns up some old herbs and spices, along with oil & vinegar in earthenware containers.

Bone Chamber – 5

Skeletal Raider

This small room is littered with bones and a cage toward the eastern edge of the room. If the part simply crosses through the room and exits via the door on the other side, nothing will happen. However, if the party disturbs any of the piles of bones or tampers with the cage, a chill wind will blow through the room and 3 Skeletal Raiders will form from the bones and attack.

If defeated, the following loot may be recovered from the room: 28 silver pieces, 8 pieces of Silk Cloth, & a broken mirror.

Natural Cavern – 6

This cave’s irregular walls bear the marks of untamed nature. Within this chamber, a natural spring emerges from a hole in the western wall, creating a small tranquil pool in the center of the room. The soothing sound of water echoes as it spills over a small waterfall and flows out through the eastern wall, lending an atmosphere of serenity amidst the crypt’s mysterious ambience.

While this cavern may seem calm, a nest of 4 Black Widow Hatchlings has made a nest in the opposite corner. Once any characters venture to the center of the room, they will scurry from their nest and attack! A thorough search of the nest will yield the following items: 1 Widow Venom Sac, 2 pieces of Spider’s Silk, and a pair of inscribed leather spaulders.

Burial Chamber – 7

This small, dimly lit cavern holds a stone sarcophagus at its heart. The stone surface is etched with intricate carvings and the room exudes an aura of reverence.

In death, Barnabas Shadowhaven has become a Rotted One. He will rise from his final rest to attack the party as soon as they enter the chamber. Joining in the attack will be d12 Plague Rats who scurry from the walls.

Following the fight, surviving party members will discover a small chest within the sarcophagus. Contained withing are papers indicating that Shadowhaven had dabbled in necromancy prior to his death. Apparently he fancied the idea of becoming a lich but must have met his end prior to mastering the art. Also located within the chest are 32 silver pieces, a moss agate, a jade, and a cobalt ring.

Final Thoughts

I’ve kicked around the idea of a Warcraft themed campaign from time to time. My players tend to be folks with very little gaming experience (tabletop or otherwise), so it would allow me with a lore-rich setting to run a West Marches style campaign. Love it or hate it, I know I could do a session zero with a group of friends and play them the original World of Warcraft cinematic trailer to generate a great deal of excitement.

Thanks for stopping by. What experience if any have you had with World of Warcraft? Have you ever dabbled with the setting along with your ttrpgs? Have you played Warcraft: The Roleplaying Game or World of Warcraft: The Roleplaying Game. I’d be curious to hear about either, as they each were released while I was away from the hobby.

Over the years I’ve stumbled across some folks who have put quite a bit of work into some Warcraft resources for 5e. I’m thinking of going in another direction but if this sort of thing interests you, check out:

The WC5e Project

Champions of Azeroth

That’s all for this week. Thanks again & have a great week. If you’d like to see some other maps with plot hooks, here you go.

World of Warcraft Copyright Notice

©2004 Blizzard Entertainment, Inc. All rights reserved. World of Warcraft, Warcraft and Blizzard Entertainment are trademarks or registered trademarks of Blizzard Entertainment, Inc. in the U.S. and/or other countries.

Blizzard Entertainment Media License

Blizzard Entertainment® hereby grants you a personal, non-exclusive, non-transferable and non- assignable license to use and display, for home, noncommercial and personal use only, one copy of any material and/or software that you may download from this site, including, but not limited to, any files, codes, audio or images incorporated in or generated by the software (collectively the “Downloaded Content”) provided, however, that you must include or maintain all copyright and other notices contained or associated with such Downloaded Content.

You acknowledge and agree that you may not sublicense, assign or otherwise transfer this license or the Downloaded Content and that no title to the Downloaded Content has been or will be transferred to you from Blizzard Entertainment® or anyone else. You also agree that you will not alter, disassemble, decompile, reverse engineer or otherwise modify the Downloaded Content.

Also, we reserve the right to revoke this limited use license at any time, for any reason, and at the sole discretion of Blizzard Entertainment®. You may not use our materials on sites that feature defamatory pornographic, or inflammatory content, including, but not limited to, hacks and cheats for any of our games or any other content that Blizzard Entertainment® find objectionable or unlawful.

END OF LICENSE

The Beast of Zarechka – Part 3

This week I’m going to get to the bottom of things and expose the beast who has been terrorizing the village of Zarechka. With all of that aside I will wrap up by providing a number of suggestions and unanswered questions to hopefully spur ideas that you can use in your own games. For those of you who are just finding me, here are links to Part 1 & Part 2 respectively.

Up to this point the party’s investigations will point them toward the ruins of Kelthura. The remains of this ancient city are nestled at the foot of the mountains to the northeast. Little is known of the peoples who once lived there, though local legends claim that they were practitioners of dark magic. The ruins themselves are largely shunned by the locals and have gradually been swallowed up by the marsh over the years.

For the GM

It’s for good reason that all signs point toward the ruins of Kelthura. Unknown to the rest of the villagers, the young seamstress Anya Ivanova would sometimes visit the marshy area to gather mushrooms and enjoy the solitude. Six weeks ago, on a day when the foraging was particularly fruitful, she ventured deep enough into the marsh to actually come face to face with some of the Kelthurian structures that still stand.

Something compelled the young woman to continue exploring until she came to a crumbling wall covered with crude paintings. The scene on the wall seemed to portray a wizard dealing with what seemed to be a creature that was part man but yet part beast. She was inexplicably fascinated with the paintings and followed them until the came to a pedestal upon which rested a large ruby. Mesmerized by the beauty of the jewel, Anya snatched up the gemstone and took it back to her modest home.

There was no way for the young seamstress to know what calamity this simple act would unleash. You see, ages ago, the city of Kelthura was home to practitioners of dark magic. One such magic user had summoned into the world a terrible creature, bent on carnage. The wizard had bound the beast to his will and used it to put an end to his enemies. However, when the creature became too much too control, the thaumaturge performed a ritual that placed the beast in stasis, as long as the ruby was undisturbed. Removing the ruby had ended that and deep within the marsh, an unspeakable evil awoke.

While Anya arrived safely home to her cottage that day, the beast had been awakened. From that day forward its unsatiable hunger drove it to venture out from the ruins in order to feed.

Through the first couple of attacks, she remained completely unaware that the creature preying on villagers had anything to do with the ruins. However, on the terrible day that she finally came face to face with beast, she immediately recalled the crude paintings on the walls in Kelthura. With her dying act she attempted to scrawl out a message to warn whoever might find her body.

The Beast of Zarechka

I wanted the creature terrorizing Zarechka to be something different altogether. When I first sat down to write this I was picturing a werewolf as being the culprit. From there I went to a barghest and even something as simple as a giant wolf. Instead, I settled on a custom creature that combines wolf and humanoid features. As I often do in my home games, I wanted to maintain an air of mystery that would make the adventure more engaging and memorable.  

Since my posts are designed to simply provide little plot hooks and ideas for my readers, I’ll leave to true nature of the beast up to you. I suggest that you try to keep your players on their toes. Our players are frequently well-versed all of the different monsters in the published game books. The meta knowledge can really detract from what should be a chilling encounter.

The Beast of Zarechka. Artwork © 2015 Dean Spencer, used with permission. All rights reserved.

The Beast of Zarechka is a terrifying creature that appears to be a hybrid of a wolf and a human. Standing 9 feet tall on its hind legs, the creature weighs nearly 400 pounds. Having olive colored skin, a well-muscled physique is visible from a frontal view.  However, its back is covered from head to toe in jet black fur.

The monster has pointed ears and a mouth full of sharp, bestial teeth. Glowing red eyes seem to pierce through anyone who looks into them. Its hands are large and possess long, sharp claws, capable of tearing through flesh with ease. The creature’s legs are powerful and built like those of a great wolf. It moves with a grace and agility that belies its size and can seamlessly switch between sprinting on all fours and standing on two legs to fight or intimidate its prey.

Having spent an age in the ruins of Kelthura, the beast is still bound to the location. Whether this is due to some magical means or simply from a sense of familiarity, I will leave up to you. It ventures out to feed, ranging far enough to locate suitable prey but always returns to the ruins once sated. As such, it is likely that it will be in the marsh surrounding the ruins that the party will ultimately encounter the beast.

The Marsh

The villagers in Zarechka will gladly provide detailed directions to the marsh. As the party makes their way through the dense undergrowth, anyone with tracking or survival skills will pick up a trail. If the party investigated Dimitri Kozlov’s Farm, they would recognize these as being the same tracks. With the hind feet of a great wolf and occasional impressions of large, clawed human hands, they are indeed unique.

The ground beneath the party’s feet will gradually soften and the tracks will be easier to follow as they approach the marsh and the ruins of Kelthura. A broken stone bridge leads out into the stagnant water. Only a foot deep at the bank, the tracks clearly show that the beast passed through this way recently.

On the opposite bank, roughly 70’ away, the party will be able to make out some man-made structures. While crumbling and overgrown, these are the first signs of the ruins of Kelthura. If any of the party members set foot into the water, a piercing howl will ring out from across the way. Venturing forward, the party will find that the water is only 2’ deep, even at its deepest. Unfortunately, the water depth is not the problem. The same telltale mud that helped to direct the party here in the first place is also quite a hindrance. Consider this to be difficult terrain and movement speed will be halved.

After spending 1 full round in the water, characters will start to sink in the mud. At this point, to move through the mud, each party member must make a Strength check or Athletics check (whichever is higher). The DC will start at 12 for the lighter areas on the map and increase to 15 for the darker, more treacherous areas. If a party member fails this check, they become mired in the mud. They are restrained and unable to move until they are freed. A mired party member can be assisted by another party member who is not mired. The assisting character must use their action to make a successful Strength check or Athletics check against the same DC. If successful, they can pull their ally free from the mud.

As the party struggles through the treacherous mud, a chilling silence settles over the marsh. It’s at that point that the beast will attack. With a bestial howl, the beast rises from beneath the remnants of the bridge, on the small patch of dry land ahead.

As a lair action, I allow the beast to move through the water and mud while ignoring the penalties faced by the characters. In this manner I maintain some of the terror of the situation. Let’s face it, in real life (or even a movie) an encounter like this would be scary business. However, often in TTRPGs, the party can feel like a group of superheroes and a single foe is hardly intimidating. I opted for this as a way to ratchet up the tension. It allows this primal creature to move gracefully and attack where it will have the greatest impact. As with deciding upon the nature of the beast itself, choose its abilities based on what will best fit your game.

The Outcome

Assuming the party defeats the beast, they will surely want to return to Zarechka to claim their reward from mayor Russoff. However, there are quite a few other twists and turns that you could build on from here.

  • The ruins of Kelthura themselves could certainly be expanded upon. What mysteries and treasures lie deeper within the ruins? Certainly, the grateful people of Zarechka would be more that happy to allow the party to use the village as their base of operations for further exploration.
  • Will the party ever fi the ruby that Anya Ivanova discovered? If so, will they be able to puzzle out that the beast had been held in stasis for years? Are there other being held in a similar state?
  • While it didn’t come into play for this adventure, one of the rumors mentioned that old man Igor believed the attacks were the result of a curse brought upon the village by a witch who had been banished years ago. Is she still out there and will all of the recent commotion bring her around?

Closing Thoughts

This one got away from me a bit. My intention has always been to focus on “bite-sized” source material and I don’t think a 3-parter fits well within that framework.

Depending on the system that you are running, this will require some work on your part (particularly in terms of the nature of the beast and the mechanics of the marsh battle). That said, please understand that I’m merely trying to provide snippets of ideas for you to build on. Remember, everything can be tailored to fit your party’s power level and preferences. Feel free to adapt and modify everything to suit your game and create an exciting and memorable encounter. Take what you want and leave the rest.

I appreciate you taking the time to stop by. If you’ve found any of this useful, please drop a note in the comments and if you’d like to see some of my other creations, I’ve listed them here. Thanks and have a great week!

The Beast of Zarechka – Part 2

The week I’m going to continue the adventure. I had hoped to be able to knock this out in two posts but it looks like it’s going to be 3. If you missed part 1, you may find it here.

I will pick up were we left off last week with covering the remaining areas that the party may want to visit. As a result of their investigations, it is likely the adventurers will zero in on the ruins of Kelthura as a likely location to search for the beast.

Kelthura was an ancient city nestled at the foot of the mountains to the northeast. Little is known of the peoples who once lived there, though local legends claim that they were practitioners of dark magic. The ruins themselves are largely shunned by the locals and have gradually been swallowed up by the marsh over the years.

Location #3 Anya Ivanova’s Foraging Spot

If the party should inquire about Anya Ivanova, the villagers will be able to direct them to where her body was found.  The most recent victim, her remains were recovered 3 days ago. She was found in the woods, a little over two miles from the village and across a small stream. Luckily she was known to often forage for mushrooms and herbs in the area or it may have taken much longer to find her.

Arriving on the scene, the party will note signs of a recent disturbance at the location (marked with a #3 on the map). The earth is upturned and a few broken twigs and crushed leaves are scattered around. The area is surrounded by tall trees, their branches creating a canopy overhead, filtering the sunlight, and casting the forest floor in a dappled light.

Off to the side of the clearing, the party spots a large, flat rock. As they approach, they see that it’s been defaced with a chilling message. Scrawled in a deep red color, clearly blood, are the letters “Kel…” before the message trails off. It is possible that villagers may provide the party with this clue without them venturing out to the location themselves. However, without any of the other clues, none of the villagers will be able to speculate as to what it means.

Location #4 The Berry Patch

The berry patch is where Valentyna Russoff caught a glimpse of the beast. Alongside Alexi’s farm, this area is well-maintained. Rows of trees and bushes are neatly arranged in the fertile soil. The air is thick with the sweet scent of ripe berries, and the sounds of buzzing bees and chirping birds can be heard all around.

As the party arrives on the scene they will notice a group of rough-looking men milling about in the patch. This is the group of outsiders who arrived in town last week. They brought with them the carcass of a giant wolf and attempted to claim the reward for killing the beast. When the mayor refused to pay, the group became disgruntled and unruly.

There is some room here to play this out at you like. It is certainly possible that this group of 5 ruffians won’t take kindly to the fact that the party has been “snooping” around town and possibly honing in on their quarry. If you need to kill some time, the outsiders could become belligerent and end up fighting the party right in the berry patch.

In the event that a fight does break out, the group will surrender as soon as the party starts to get the upper hand. This is just a group of random thugs and they will not be prepared to go toe to toe with an equipped adventuring party.

Whether there is an altercation or not, this encounter is here to give you the ability to pass extra information on to the party as needed. If you are short on time and need to keep things clipping along, these fellows could pass along the clues found at any of the other sites. This could be done as an apology for getting involved in a skirmish or in hope of getting a few coins from the thankful adventurers.

Back to the Village?

To keep this as simple as possible there are 3 main clues the party might uncover while they investigate sites related to the attacks. Any other these on their own aren’t going to be enough to tip the party off in any particular direction. However, should the party inquire about the clues with the villagers, a clear picture will start to form that it would be wise to head to the ruins of Kelthura.

Villagers will recognize the rune on the pendant as being similar to those found in the ruins of Kelthura. Artwork © 2015 Dean Spencer, used with permission. All rights reserved.
  • The reddish mud found at location #1: Villagers with outdoorsy type occupations will be able to point out that mud resembling this is common in the marshy areas at the foot of the mountains to the northeast.
  • The pendant with the strange rune found at location #2: Old-timers will recognize the rune as coming from an ancient people who resided in a city named “Kelthura”. The ruins of Kelthura are actually located roughly 5 miles to the northeast. What they won’t realize is the fact that the pendant had been around the beast’s neck. Lawrence managed to rip it off during the struggle.
  • “Kel…”: The letters that Anya scrawled won’t mean much to anyone on their own. However, combined with either of the other two clues, the connection may be made that perhaps she was trying to write “Kelthura”. As someone who would often lose herself in her forest wanderings, Anya was known to sometimes venture to the ruins. Why she would choose to communicate the name of these ancient ruins would still be a bit of a mystery.

Armed with these bits of information it is likely that the party will want to know more about the ruins of Kelthura. If they conclude their investigations and are still not drawn to the ruins, I suggest having the beast make another attack on one of the outlying villagers. This will allow the adventurers to get to the scene while it is still fresh and find fresh tracks that will lead them to Kelthura.

To be continued!

That’s going to do it for me for this week. In my next post I’ll uncover the beast itself, describe the ruins of Kelthura, and provide a number of unanswered questions to hopefully spark ideas for your campaign.

In the meantime if you’d like to check out any other maps with plot hooks I’ve collected them here.

Hello future people! I’ve completed part 3 and you may find it here!

Thank you for reading and have a great week!

The Trident of Mareen

This week I am picking up where I left off with The Chapel of St. Sigmund & the Grotto of Mareen. The followers of the Cult of Mareen have grown increasingly concerned about the encroachment of the Graun Empire on their way of life. With the rise of the church of Aunul, the traditional worship of traditional deities like Mareen has been deemed unacceptable by the empire and its religious advisors.

Having encountered followers of Mareen in their travels, my party was tasked with recovering an ancient relic. A few years ago, the church of Aunul raided a seaside shrine to Mareen and stole a sacred golden trident that was said to have been blessed by the queen of the seas herself.

The Trident of Mareen has since been kept in the nearby town of Marion, at the Archive of St. Sigmund. Established by the church of Aunul, the archive is a museum and library that houses relics and documents related to the faith of Aunul. The archive serves as a museum and library devoted to the faith of Aunul. While the party’s contact was unsure of the trident’s exact location, they seemed fairly certain that it was being held on the 2nd floor of the building.

The party is offered a handsome sum of gold if they are able to retrieve the trident from the archive and return it to the cult of Mareen.

The Archive of St. Sigmund

The Archive of St. Sigmund is a two-story wooden building located on the outskirts of the seaside city of Marion. The structure is adorned with intricately carved wooden panels and boasts a large set of double doors at the public entrance on the south side of the building. The building is also equipped with a set of double doors on the north side, which appears to be used primarily for bringing in large items and collections.

The Archive’s façade is punctuated by numerous windows of varying sizes and shapes that allow natural light to flood the interior during the day. The windows are fitted with shutters and sturdy iron bars to prevent unauthorized entry from the outside. A large, weathered sign hangs over the main entrance, with the words “Archive of St. Sigmund” inscribed in ornate script.

The Golden Trident of Mareen

In order to recover the trident, the party will first need to locate it. While it’s not an armed camp by any means, it would not be wise for the party to storm the Archive of St. Sigmund by force. I would paint a picture to the party that the best chance of success would involve coming up with a plan to steal back the trident with as little commotion as possible. A wise party will not want to make an enemy of the church of Aunul if it can be avoided.

A subtle approach will be necessary to locate and retrieve the golden trident. Perhaps a stealthy infiltration under the cover of night, or even a cunning ruse to distract or deceive the guards would be a more suitable plan. The party will need to proceed with caution and avoid unnecessary violence if they wish to avoid attention and successfully complete their mission.

Upon close inspection of the building, the party will notice that the northernmost window on the east side of the building (leading into location #4) seems to have a rotted frame. With some effort, it may be possible to remove the bars and gain access to the building. However, caution must be taken, as any loud noises or damage to the window could alert the guards.

Entrance

The entrance to the Archive of St. Sigmund is guarded by two Inquisitors of Aunul around the clock. The pair is swapped out following 4-hour shifts. They spend the majority of their shift posted at the front entrance, though every so often one will circle the building.

Inquisitor of Aunul. Artwork © 2015 Dean Spencer, used with permission. All rights reserved.

Guests are permitted to visit the archive without appointment during daylight hours. The party would be able to learn this fact from other townspeople without raising any alarm. When entering during regular business hours, visitors would be greeted by an acolyte in the cozy entranceway. This cleric would ask visitors what business they have at the archive and ask them to sign-in for their visit. Visitors would then be ushered up the stairs directly opposite the entrance, in order to view the library and exhibit rooms.

During a daytime visit like this, there will be other visitors and staff members milling about. The party will need to be cautious about attracting attention. People will be keeping an eye on the exhibits and the staff will be watching to make sure that nothing is damaged or stolen.

Office

The office is neatly organized, with a sturdy wooden desk in the center of the room and a simple chair behind it. An inkwell and quill adorn the desk.  Shelves on the walls display scrolls, tomes, and various knick-knacks. The room is tidy, and the air is filled with the faint scent of aged paper and ink.

If the party spends any time reading through the documents here, they will find that it consists mostly of boring information regarding items comings and goings of objects from the archive.

The Laboratory

The laboratory is a cluttered room with various scientific equipment and specimens, including alchemical items. There are shelves filled with jars of preserved creatures and a large dissecting table.

The Storage Room

This is clearly a storage area. Items not on display in the exhibit space, as well as those being shipped off to other parts of the empire are stored here. The space is filled with bookshelves, crates, and boxes of various sizes.

The party should have been advised by their contact with the Cult of Mareen that the trident is believed to be hidden on the 2nd floor of the building. If they do not heed this advice, they could easily waste a great deal of time rummaging through items in this area.

While there would not be any magical items stored in this room, there certainly are a number of interesting objects. Feel free to allow the party to find some useful items as you see fit.

Research Room

This appears to be a research room. Oil lamps hang from the ceiling of this spacious room. The walls are lined with bookshelves and two large tables are pushed together in the center of this room. Tomes on the shelves are largely contain information on religious history and folklore. The wooden tables in the center of the room are cluttered with parchment scrolls, inkwells, and quills. The chairs are sturdy and comfortable.

If any amount of time is spent digging through the parchment on the tables, a handwritten note will be discovered mentioning that followers of St. Sigmund’s believe uneven numbers to be unlucky. It seems to hint at a hidden significance of odd numbers in the religious practices of the order.

The Library

The library is filled with shelves of old books that stretch up to the ceiling. The shelves are made of dark, polished wood, and the books themselves are covered in leather bindings, many of which are worn and faded with age. There are several wooden chairs placed throughout the library, each one sturdy and well-worn from years of use.

Do what works for your game but whenever my players happen to have access to a library like this I like to make it worth their while. Obviously it would be impossible for me to rattle off the name of every title present in the library, let along what they contain. However, if I have a player asks about something specific I’ll often consider it and at least come up with a percentile chance that they will find what they are looking for.

For instance, if they party happened to be planning future travel to the country of Kosantia, a player might inquire whether there are any books about Kosantia present. I might decide that the party finds one such book and if they take it along, I’d be willing to allow for some reasonable bonuses to skill or knowledge-based checks pertaining to the area.

The Exhibit Room

The exhibit room is a spacious chamber filled with various artifacts from the church’s history. The room has several display cases arranged around the room and along the walls, containing items such as ancient manuscripts, ceremonial armor, and textiles.

In the southwestern corner of the room is a stone statue of St. Sigmund himself, standing at a height of 7 feet. Holding a great mace in its hands, the statue is finely crafted and appears to radiate a sense of power and authority.

On the eastern wall, hangs a large painting of St. Sigmund, surrounded by a golden frame adorned with 5 golden roses. The space for the sixth rose is noticeably empty. Players who searched the Research Room (area #4) may recall that followers of St. Sigmund believe odd numbers to be unlucky or they may simply decide to look for the missing rose on their own. At any rate, if the party spends any time actually looking for the missing rose, they should be able to easily find it within d4 rounds.

Placing the rose into the empty slot on the picture frame will cause the eastern wall to shift, revealing the secret room beyond.

Secret Room

The small secret room is cramped, with a low ceiling and dusty walls. The air inside is musty and stale. The room is empty except for a small table and a cot containing a mummified body. The Trident of Mareen rests on top of the body. The body appears to be ancient and is wrapped in tattered, brown linen bandages. It is impossible to tell the gender or race of the person from the remains. What, or rather who, the body is will be a secret that I’ll leave up to the GM. The identity and reason for the remains to be here could be completely inconsequential or it could be another plot hook altogether.

One round after the party enters the secret room, they will hear a loud, grinding sound coming from the exhibit room. The statue of St. Sigmund in the Exhibit room is actually a living statue and will move to attack once the secret room has been breached!

Wrap-Up

Since I’m merely trying to spark ideas, I’ll leave the rest up to you.

  • Will the fight with the statue draw the inquisitor’s attention?
  • Could even more reinforcements arrive?
  • What’s up with the mummified body in the secret room?
  • Does the Trident of Mareen have any magical properties?
  • Did the Cult of Mareen have any ulterior motives in hiring the party to retrieve it?

That’s all I’ve got for this week. Thank you for stopping by. Please take a minute to say hello and if you’d like to read some more, here are some convenient links

All of my posts detailing the locations in Cross Tree are located here.

For a list of all of my adventure hooks with maps, click here.

My random tables are collected here.

Finally, I’ve stuck everything else here.

Good Gaming!

The Lost Children of Tollengard

Children had started disappearing from the frigid Borean city of Tollengard since the season’s first snowfall. By the turn of the new year, a total of 6 had gone missing. Each had vanished, seemingly without a trace.

In the beginning, this would simply occur overnight, with cribs being found empty in the light of the morning. However, as the winter wore on, the final pair were apparently snatched when their distraught mothers had simply turned their backs.

No direct ties could be found between the victims’ families and no apparent clues were left behind at the scenes of any of the abductions. There were no tracks nor signs of forced entry. The stricken families seemed to come from all walks of life.

The effect on the morale of the city was notable. Citizens of Tollengard were typically a stoic lot, who suffered through the long winters without complaint. However, the passions rose in even these long-suffering folk as they demanded answers as to what had happened to their children.  

The lord mayor, Pavel Ivanov, was feeling the heat. People demanded answers; demanded that he act. Even with doubling the city watch, it was feared that citizens would riot or break down into mobs seeking vigilante justice.

Many speculated that a wood witch had taken up residence on the outskirts of the town and was luring the children away. Others claimed that some ghostly wolf would come and snap the children up in its terrible maw. The theories were numerous, and some made little sense. People simply wanted their children back; they wanted justice.

Borea in the northern reaches.

This was the state of things in Tollengard on one sunny winter morning, when things changed forever. Parishioners arrived at the Abbey of Ladina as they did daily. They came to beseech the goddess, patron of the city, for help in returning their children. On this day though, something was not right.

Normally the three monks who tended the church were up an around, welcoming citizens as they came to pray. However, no torches were lit, and no incense burned in the braziers. It was not like the pious brothers to shirk their duties. Clearly something was wrong.

Concerned citizens made their way downstairs to the rectory, to see if perhaps a member of the order had fallen ill. Accessing the monks’ living quarters via the northern staircase, they were greeted by a queer sight.

The foyer at the foot of the stairs was in a state of disarray. In numbers of spots the stone floor was cracked and broken, exposing the earth underneath. It looked as if some great plow had churned through the masonry itself, yet what could have caused this?

The floor of the mess hall to the east was flooded with murky water. This was found later to also be the case with the storeroom further to the south.

There was no sign of the brothers in the sleeping quarters. In fact, all three of their beds were still made. It appeared to the crowd investigating the rectory that all of their modest belongings were also in place.

Coming at last to the sanctuary in the westernmost room of the rectory, the citizens beheld a sight that will vex Tollengard for the rest of its days. The statue there of Ladina appeared to have been desecrated. Some type of viscous green liquid had been splattered about it.

The mysterious sarcophagus. Artwork © 2015 Dean Spencer, used with permission. All rights reserved.

Resting at the foot of the stature, a large stone sarcophagus lay partially open. All assembled knew that this was out of place here. The vessel was empty and obviously ancient, though none of the stone crafters in the city were able recognize its point of origin. On its lid was carved a macabre likeness of a human skeleton, lying under a thin shift.

As bizarre as all of these sights were, they paled in comparison to the final discovery of that chilly morning. For there, snuggled together on the floor of the abandoned rectory of Tollengard, were found the six missing children. All were in good health and appeared unmolested. Being of various ages, all too young to speak, there was no hope of receiving any answers from the babes.

Grateful parents recovered their sons and daughters. In the following days, townsfolk turned both the abbey and the rectory upside down, looking for something to explain the mysterious occurrences. Nothing else of note was ever found, and the missing monks of the Abbey of Ladina were never seen or heard from again.

Final Notes

Thank you so much for taking the time to stop and read this. I hope you find some spark here that you might find useful for a future game. Please drop me a note below if you have any thoughts or suggestions. If you’d like to browse through all of my other maps with plot hooks, you can find them all collected here. Have a great week!

Revisiting the Isle of Dread

I have been running a group using the Rules Cyclopedia (with various tweaks) for about 6 months now. While it started as an experiment, it has become a fun endeavor. Up to this point, I’ve put them through their paces in “The Tower of Zenopus”, “Caves of Chaos”, and various homegrown one-shots.

Going into our holiday hiatus, the group consensus is that they would like to continue. I’ve spent the past week deciding where to take them next. Having enjoyed our previous romps through classic adventures I’ve decided to continue retracing the steps of my youth and chart a course for The Isle of Dread.

My stab at the classic Isle of Dread map. Made using the Campaign Cartographer annual Spectrum overland style.

If you are reading this, it’s quite likely that you are well-versed with the module already. Released in 1981, I received my first copy of the David “Zeb” Cook & Tom Moldvay adventure inside the Dungeons & Dragons Expert Set.

D&D Expert Set rule book from 1981.

As the adventure is largely a wilderness exploration, this will be a perfect opportunity to shift my game a bit. Some of our other friends have been eager to join, while a couple of my current players are going through a hectic period at work. Exploring The Isle of Dread will allow me to take more of an episodic approach to my game, with somewhat of a West Marches style.

After making contact with a group of islanders on the southeastern peninsula, the party will establish a base camp. My sessions will then start as one-shots, with different groups of PCs striking out each week to explore the mysteries of the island. This will hopefully keep us nimble and allow us to get through the winter without any canceled sessions due to the lack of players. As we progress a bit, it’s likely that the group will find another location suitable for a forward base deeper within the island.

Hex version of my map. Click for full image.

These days I derive as much fun from making maps as I do from running the games themselves. This practice seems to fill the void created when I stopped painting minis years ago. While the original hex style map for The Isle of Dread will always be dear to my heart, I wanted to make my own version. I settled on the Annual Spectrum style for Campaign Cartographer and took a stab at it.

While I have a lot of fond memories of The Isle of Dread, the adventure as written does not really lend itself to the story I am looking to tell. I will still introduce the island as a location by allowing the party to discover a secret page from a ship’s log and partial map (I created a new version of this as well). However, aside from these details I’ll be changing quite a bit.

Ideally, I would like to hit my players with a number of stand-alone adventures, while also sprinkling some bread crumbs of an overarching story. To do this, I plan to steal liberally from a couple old guilty pleasures of mine.

Inspiration

The Lost World promo shot.

Sir Arthur Conan Doyle’s The Lost World was a syndicated television series, very loosely based on the 1912 novel. The book itself was likely an inspiration for The Isle of Dread in the first place. It premiered in 1999 and ran for three seasons. The show follows a diverse group of early 20th century adventurers after their hot air balloon crashes on an uncharted plateau where prehistoric creatures still exist.

It was a cheesy production; I suspect owing much to the previous successes of shows like Hercules: The Legendary Journeys & Xena: Warrior Princess. Like these predecessors, each episode loosely followed a “problem of the week” format, while also occasionally touching on the larger story of who the characters were and how they might get off the plateau.

I am not here to claim that this was great television. However, it crossed my path at a time in my life when I was about as far removed from the hobby as I had ever been. I suspect this is why it stuck with me. Something about turning on the TV and seeing these silly stories play out really stoked my imagination. It brought back memories of my youth and playing D&D with my friends. I started to daydream about a time in my life when I might have the time to start gaming again.

The entire 66-episode run is currently available for Amazon Prime subscribers. I have been binging it while I doodle on my maps and making notes. Despite the fluff and gratuitous cleavage shots, I am mining a number of good ideas for one-shot adventures.

The other source that I will be looting for ideas is The Land of the Lost. To be clear, I am not referring to the Will Ferrell movie but rather the 1974 children’s adventure television series by Sid and Marty Krofft.

Land of the Lost title card.

The show’s 3 seasons tell the tale of the Marshall family, who while on a river rafting trip, end up in an alternate universe. Rick Marshall and his children Will and Holly become trapped in a land that time forgot, a place inhabited by dinosaurs and other strange creatures.

The Land of the Lost was every bit as cheesy as the Lost World and was clearly aimed at young children. However, despite all of this there are some elements that I think would make compelling additions to my revised Isle of Dread.

The Sleestak were a race of reptilian bipedal humanoids native to the Land of the Lost. Covered mostly in green scales, they have claws on their feet and hands which can function as pincers. Typically armed with crossbows and nets these unique creatures captured my imagination as a child and will make for great reoccurring villains.

Scheming Sleestak

The remnants of a dying race, the Sleestak reside in a Lost City with subterranean tunnels built by their ancestors. All of this sounds like a great fit for the caldera location in the center of the Isle of Dread.

Finally, scattered about throughout the Land of the Lost are numerous pylons. These futuristic constructs contain matrix tables filled with crystals, each serving as the power source to control different aspects such as the weather or passage of time. The World of Warcraft paid homage to the pylons & crystals in the Un’Goro crater zone, and I think they will be a fun addition to my game as well.

Final Thoughts

That is my plan. Do you ever go in and add your own touches to classic adventures? If so, please share in the comments. I would love to hear what has inspired you and what sources you use for inspiration. I would also like to hear from anyone else who may have been inspired by either of these properties in the past.

Thank you for stopping by. Please take a minute to say hello and if you’d like to read some more, here are some convenient links

For the Village of Cross Tree, go here.

For maps & plot hooks, go here.

For my Idea Chest posts, go here.

For some random tables, go here.

Finally, for a bit about me and some general stuff, this is the spot.

Good Gaming!

My version of the incomplete map found by the characters.

The Isle of Dread is owned by Wizards of the Coast. All of my work on this post is strictly non-commercial, on a voluntary basis as unofficial Fan Content permitted under the Wizards Fan Content Policy. Not approved/endorsed by Wizards. Portions of the materials used are property of Wizards of the Coast. ©Wizards of the Coast LLC.